
headline bars
continuation tabs
notes
warnings
model no. 058-0051-2 | contact us 1-800-689-9928
11
10
OPERA
TING INSTRUCTIONS
OPERA
TING INSTRUCTIONS
correct spray volume, you may fix the position using the adjustment screw
(8)
.
5. The spray pattern size is based on the distance between the work surface and the air brush nozzle
(7)
.
For extra-fine spray, hold the air brush nearer the work surface.
6. When you have finished painting, gently release pressure on the finger lever (first loosening the
adjustment screw, if needed) and disconnect air supply.
IMPORTANT:
If fluid blocks the nozzle while working, move the needle chucking nut (6) back and forth. If
this does not clear the nozzle, try loosening the adjustment screw and gently moving the fluid needle
(9)
back and forth. This will allow a longer movement for the fluid needle and allow the blocked fluid to escape,
clearing the nozzle.
7. After flushing the air brush completely with the proper solvent, spray any remaining solvent through the
nozzle until clear solvent sprays from the end of the air brush tip.
IMPORTANT:
All paints used with this air brush are fast drying by design and can damage your tool if they
are not flushed immediately.
IMPORTANT:
The glass jar with lid (10) has two uses. It is used for excess thinned paint, and also for
solvent when it is time to clean the air brush.
IMPORTANT:
The pressure for atomization is controlled by the regulator on the air brush compressor. The
amount of fluid is adjusted by the finger lever pull length, the paint viscosity, and the air pressure.
IMPORTANT:
To avoid cross-threading, all air brush parts should be screwed in hand tight initially. If the
parts cannot easily be turned by hand, be sure that you have the correct parts, unscrew, realign, and try
again. Never use excessive force in matching parts.
IMPORTANT:
Only use air brush compressor for best performance of your air brush.
PAINTING PROCEDURE
Be sure that the workpiece is clean and free of dust,
grease, etc. Mask off any area not to be painted. Hang or
place small pieces (such as models) on a pedestal or stand
so all paintable areas are easily accessible (a stand may be
built from an ordinary wire coat hanger, or bottle, etc.).
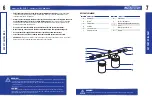
Hold the air brush nozzle about 6" (15 cm) from the
workpiece. Use short strokes, moving the air brush at a
steady rate, parallel to the work surface.
(fig. 3)
To achieve full coverage, first apply a light coat, then let
paint dry and apply another coat. Repeat until desired
coverage is achieved. Do not try for complete coverage
with one pass.
TRIGGERING EXERCISES
IMPORTANT:
Use cardboard or newspaper to perform
triggering exercises.
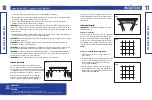
Exercise 1 - Spraying
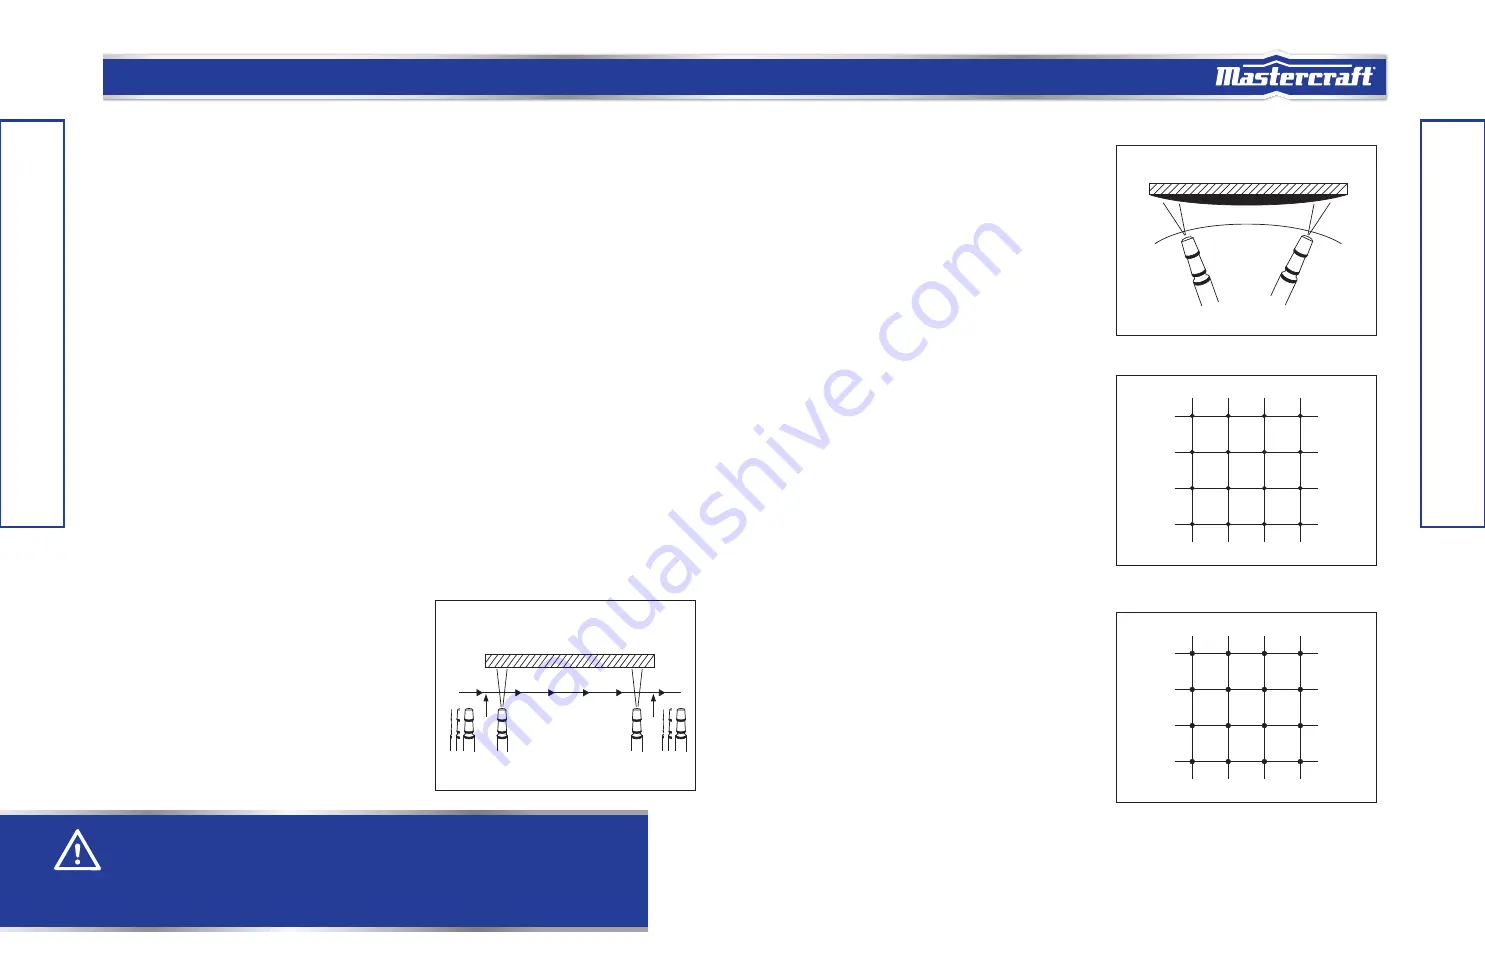
A steady, constant motion produces the best results. Start
motion before pressing the trigger, follow through with
motion after releasing the trigger as shown in
fig. 3
.
Be sure to keep the air brush parallel to the work surface
when painting. If the air brush motion is moved in an arc
or the motion is unsteady, the paint finish will be uneven.
(fig. 4)
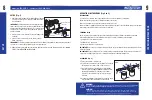
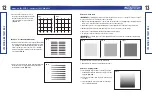
Exercise 2 - Position and Density Control
1. Lightly pencil a grid of 1/2" (1.25 cm) squares on a
piece of paper.
2. Use diluted india ink or water-soluble materials for this
exercise. Hold the air brush approximately 1/2" (1.25
cm) away from paper and spray small dots on the
intersecting lines.
(fig. 5)
3. After placement is accurately achieved, enlarge dot
size by allowing more material to flow through the air
brush and by increasing the distance between the air
brush and the paper.
(fig. 6)
WARNING!
Do not exceed the air brush maximum operation pressure of 50 PSI.
CAUTION!
• Always use the air brush at a safe distance from other people in the work area.
• Clean the air brush IMMEDIATELY after each use. Delayed or inadequate cleaning will permanently clog the air brush.
Fig. 3
Fig. 4
INCORRECT
Fig. 5
Fig. 6


