

headline bars
continuation tabs
notes
warnings
15
headline bars
continuation tabs
notes
warnings
model no. 058-0051-2 | contact us 1-800-689-9928
14
OPERA
TING INSTRUCTIONS
MAINTENANCE
MAINTENANCE
IMPORTANT:
Always clean your air brush immediately after use. Do not leave spray material in glass jar for
long period of time. Dried spray material can cause damage to the internal paint channels of the air brush.
1. Remove material from the glass jar.
2. Wash inside of the glass jar using a bristle brush
dipped in the proper solvent or clear water.
3. Fill the glass jar with the proper solvent or clear water
and spray until clear.
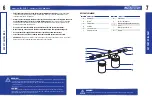
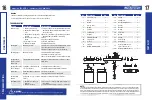
4. Remove valve assembly by turning counter-clockwise
with hand.
(fig. 17)
5. Remove head by turning counter-clockwise with an
adjustable wrench (not provided).
(fig. 17)
IMPORTANT:
Prevent O-ring damage by removing valve assembly and head before soaking air brush in
solvent.
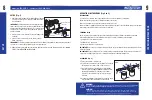
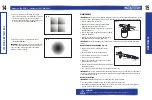
NEEDlE REMOVAl AND ClEANING (fig. 18)
1. Hand loosen the needle chucking nut counter-
clockwise.
2. Carefully pull the needle out of the air brush.
3. Clean needle with proper solvent or clear water.
4. Place needle flat on a worktable.
5. Run a pencil eraser the entire length of the needle
while rolling needle slowly.
6. Remove all eraser particles by running needle between
thumb and forefinger.
7. Do not bend needle. A bent needle will prevent proper air brush use.
IMPORTANT:
If necessary, straighten a bent needle by placing the needle on a firm surface at the angle of
the tip. Run a fingernail across the needle while turning needle slowly. Run fingernail from the body of the
needle outward toward the tip.
NEEDlE INSTAllATION
IMPORTANT:
Install the head before re-inserting the needle into the air brush.
1. Use caution when re-installing needle. Do not jam needle back into the head.
2. Hand tighten the adjustment screw firmly so the needle does not move. If the needle is not tightened
enough, you will not be able to shut off material flow.
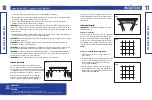
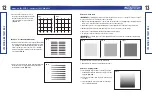
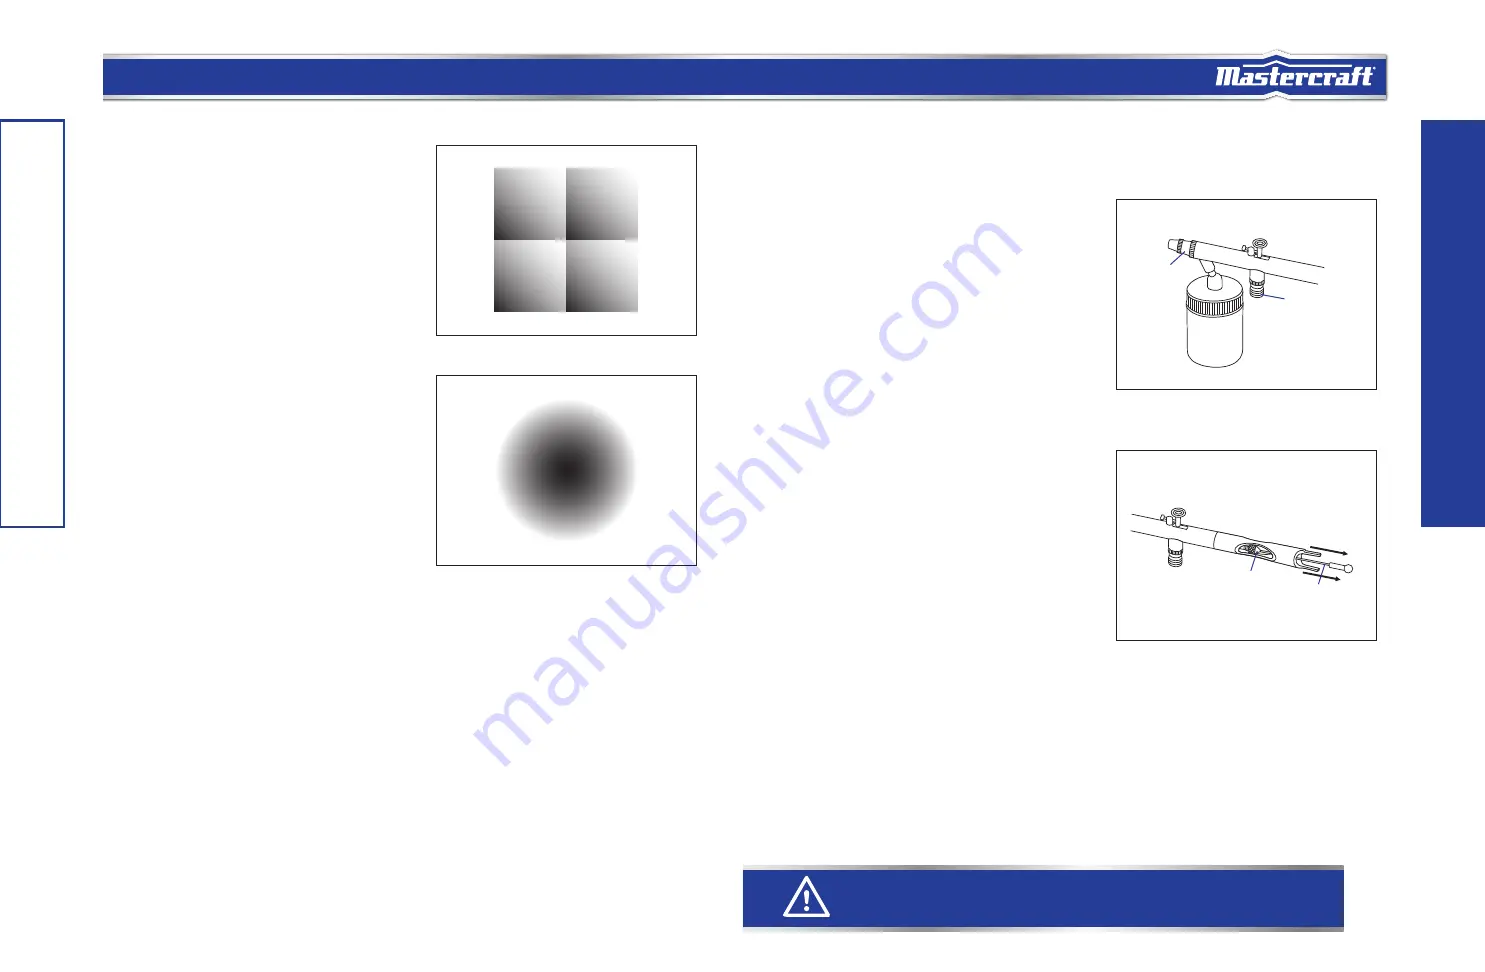
2. Fig. 15 is a combination of masking and varying
shades. This spraying exercise trains the eye to make
sure that each square has the same tone value.
Repeat the spraying method described in steps 1a-1c
to achieve the same tone value.
(fig. 15)
3. Fig. 16 is an exercise in a technique known as
spotlighting.
(fig. 16)
IMPORTANT:
Begin spraying in centre of spot and fade
to one corner. Repeat three times, fading to a different
corner each time. Ensure spray area is adequately
masked to contain overspray.
Fig. 15
Fig. 16
CAUTION!
Maintain the air brush with care. Keep the air brush clean and oiled for best and safest performance.
Fig. 17
Head
Valve assembly
Fig. 18
Needle chucking nut
Needle


