headline bars
continuation tabs
notes
warnings
17
headline bars
continuation tabs
notes
warnings
model no. 058-0051-2 | contact us 1-800-689-9928
16
PAR
TS LIST
TROUblESHOOTING
Problem
Possible Causes
likely Solutions
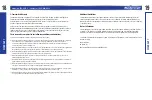
Will not spray.
1. Misuse of finger lever.
2. Needle chucking nut gets
loose.
3. Nozzle and/or air passage
blocked.
4. No air pressure at the air
brush.
5. Air pressure too low.
6. Material too heavy.
1. First press finger lever downward and then draw
back on the finger slowly/gently till fluid comes
out of the nozzle.
2. Make sure that the needle chucking nut is hand
tightened firmly around the fluid needle.
3. Clean.
4. Check air supply and air line.
5. Increase air pressure.
6. Thin material properly.
Grain spray.
Material too thick.
1. Add water or proper solvent sparingly to material.
2. Check needle and tip for dried material.
3. Adjust air supply; then test for proper spray.
Buckling paper.
Material too thin.
1. Add material to thicken mixture.
2. Airbrush less heavily in one area.
3. Move air brush rapidly or lessen amount of spray.
Spray pattern
appears to have
flared ends.
Turning wrist while spraying. Always move arm parallel to work surface to have
flared ends.
Spray pattern looks
like a centipede.
Spraying too much material
too close to paper.
1. Lightly pull back on finger lever.
2. Hold brush further away from work surface.
Splattering.
Allowing needle to snap back
into tip.
1. Release lever gently.
2. Check needle and tip for dried paint.
Curved spray
pattern.
Arcing arm too close to work
surface.
Always move arm parallel to work surface.
Spitting material.
1. Residue on needle or in
glass jar.
2. Material too thick.
1. Clean needle or glass jar with proper solvent or
clear water.
2. Thin material with proper solvent or clear water.
WARNING!
Follow all safety precautions whenever diagnosing or servicing the air brush. Disconnect air supply before service.
MAINTENANCE
STORING
1. When not using the air brush, it must be well cleaned and lightly lubricated.
2. Store the air brush in a dry and safe place out of reach of children.
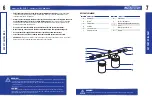
17
18
4
3
6
2
1
19
9
10
8
11
21
20
22
23
25
26
5
24
16
7
14
12
13
15
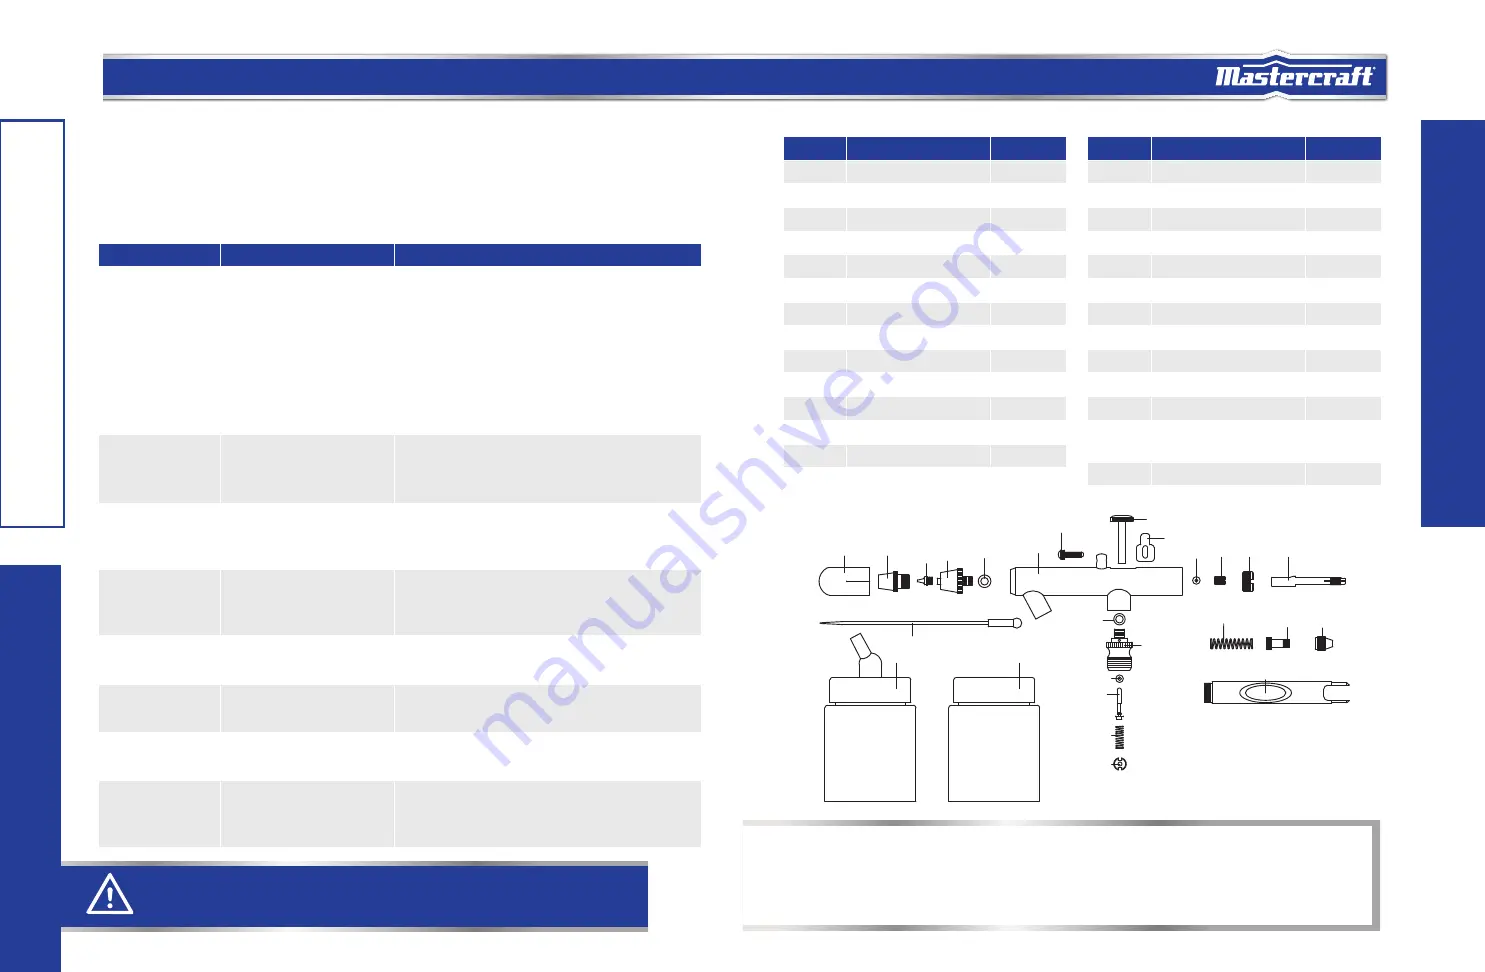
NOTE:
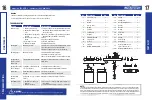
The manufacturer and/or distributor has provided the parts list and assembly diagram in this manual as a reference tool only. Neither the manufac-
turer nor distributor makes any representation or warranty of any kind to the buyer that he or she is qualified to make any repairs to the product, or
that he or she is qualified to replace any parts of the product. In fact, the manufacturer and/or distributor expressly states that all repairs and parts
replacements should be undertaken by certified and licensed technicians, and not by the buyer. The buyer assumes all risk and liability arising out of
his or her repairs to the original product or replacement parts thereto, or arising out of his or her installation of replacement parts thereto.
No.
Description
Qty.
1
Protective cap
1
2
Air cap
1
3
Nozzle
1
4
Air cap body
1
5
O-ring
1
6
Packing
1
7
Packing nut
1
8
Housing
1
9
Adjustment screw
1
10
Finger lever
1
11
Rocker
1
12
Stopper
1
13
Needle chucking guide
1
No.
Description
Qty.
14
Spring
1
15
Spring case
1
16
Needle chucking nut
1
17
Handle
1
18
Needle
1
19
O-ring
1
20
Valve rod
1
21
O-ring
1
22
Spring
1
23
Valve screw
1
24
Valve body
1
25
Glass jar with lid and
fluid connector (22 cc)
1
26
Glass jar with lid (22 cc)
1
TROUBLESHOO
TING


