headline bars
continuation tabs
notes
warnings
headline bars
continuation tabs
notes
warnings
model no. 062-3582-8 | contact us 1-800-689-9928
4
ASSEMBLY INSTRUCTIONS
headline bars
continuation tabs
notes
warnings
headline bars
continuation tabs
notes
warnings
model no. 068-0014-8 | contact us 1-800-689-9928
ASSEMBLY INSTRUCTIONS
• Begin the assembly of this cabinet on a clean, level surface.
• Remove all items from the box and ensure that all parts listed on page 3 are
present.
• When installing parts that have more than one screw, tighten all screws by
hand before finishing tightening them with the provided screwdriver (17).
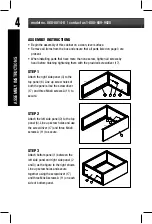
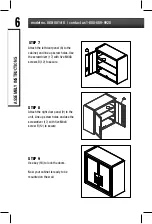
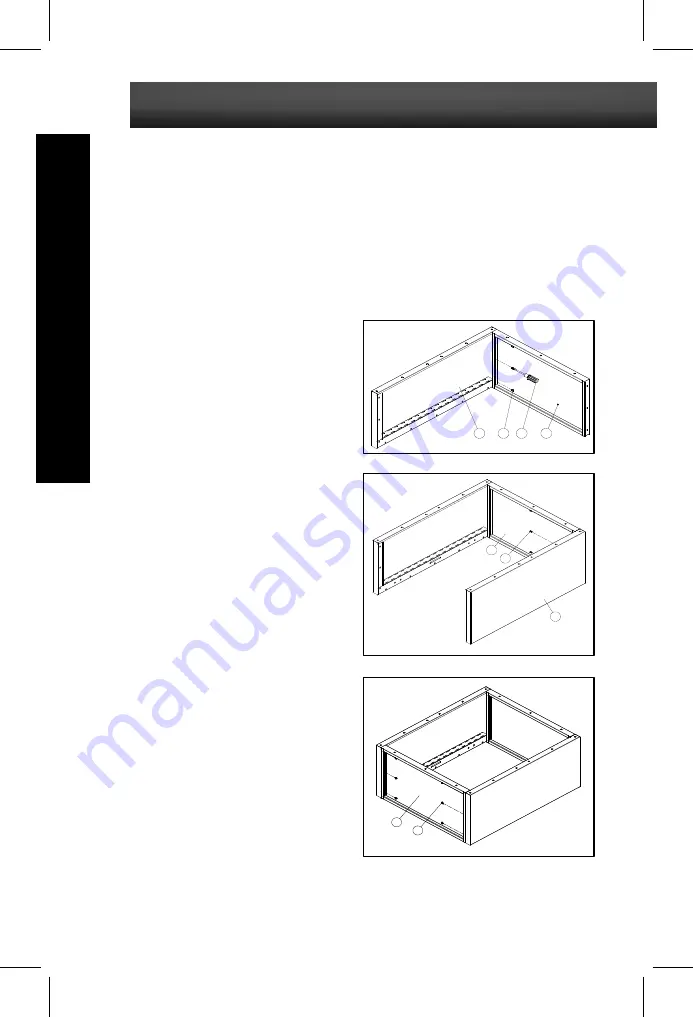
STEP 1
Attach the right side panel (3) to the
top panel (6). Line up screw holes of
both the panels. Use the screwdriver
(17) and three M4x8 screws A (11) to
secure.
STEP 2
Attach the left side panel (2) to the top
panel (6). Line up screw holes and use
the screwdriver (17) and three M4x8
screws A (11) to secure.
STEP 3
Attach bottom panel (1) between the
left side panel and right side panel (2
and 3) as the figure to the right shows.
Line up screw holes and secure
together using the screwdriver (17)
and three M4x8 screws A (11) on each
side of bottom panel.
#3
#11
#17
#6
Front
Back
#6
#11
#2
Back
Front
#1
#11


