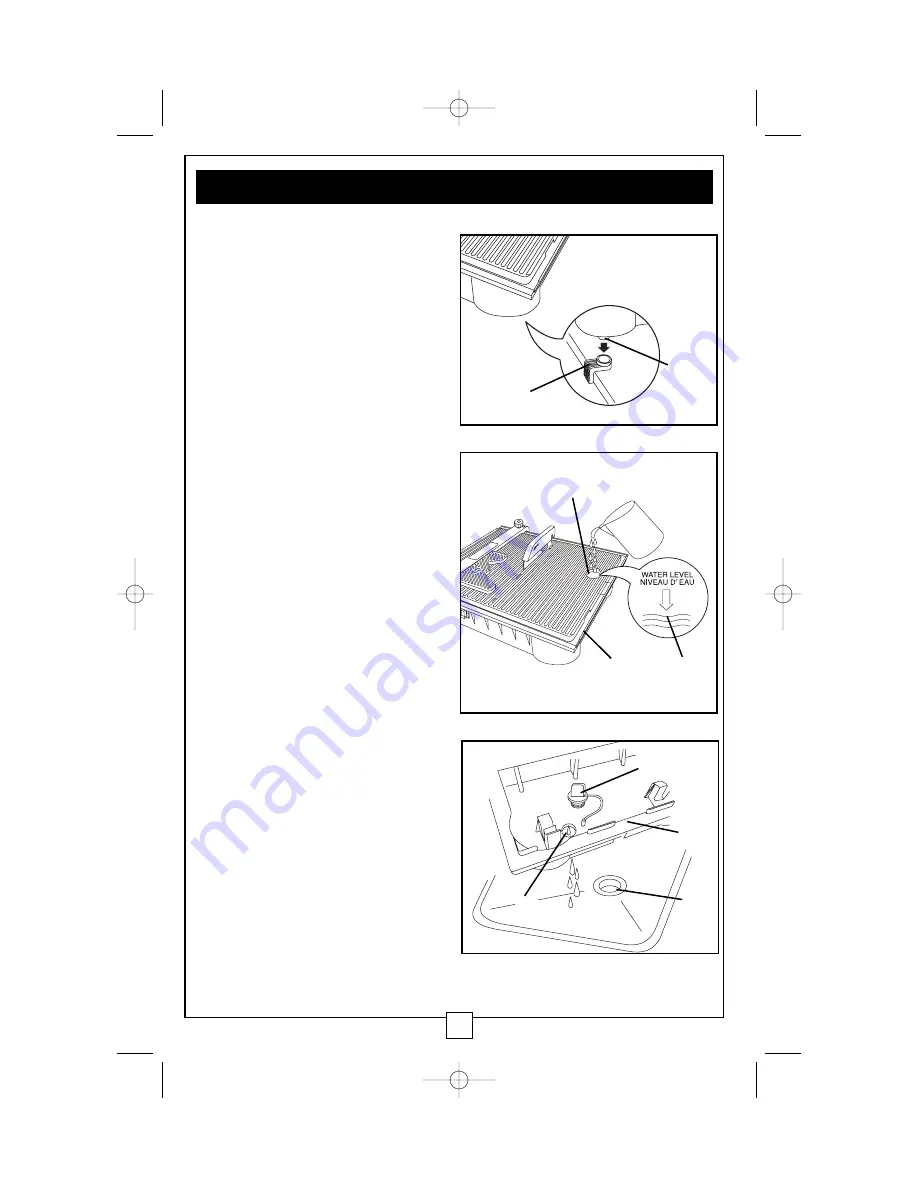
Secure the saw to a base (Fig. 7)
Use the two plastic sliding blocks to
secure the saw to a base so that it will
not move when cutting tile.
1. Place the s-clamp supports (1)
over the two front rubber feet (2).
2. Position the saw on a work surface
so that the edges of the s-clamp
supports (1) fit against the edge of
the work surface.
Add water (Fig. 8)
1. Lift up the tilting table (1) and
make sure the drain plug is in the
base and fits snugly. Lower the
tilting table.
2
Remove the cap from the port (2)
on the tilting table.
3. Pour water through the port (2)
into the base. Look through the
port and make sure the water level
does not exceed the upper-most
indicator line (3) on the water level
gauge.
4. Replace the port cap.
Drain water (Fig. 9)
1. Turn OFF the power and unplug
the wet tile saw.
2. Remove the tilting table from the
base (1).
3. Place the wet tile saw over a sink
or drain (2).
4. Turn and pull up on the drain
plug (3) to remove it from the
base. Allow the water to drain out
of the opening (4) in the base.
VI. Assembly and adjustments - continued
12
Fig. 7
1
2
Fig. 8
3
1
2
Fig. 9
2
1
4
3
MC_WetTileSaw 55-6829 E 3/17/05 4:53 PM Page 12


