14
WARNING:
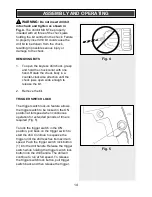
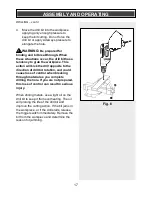
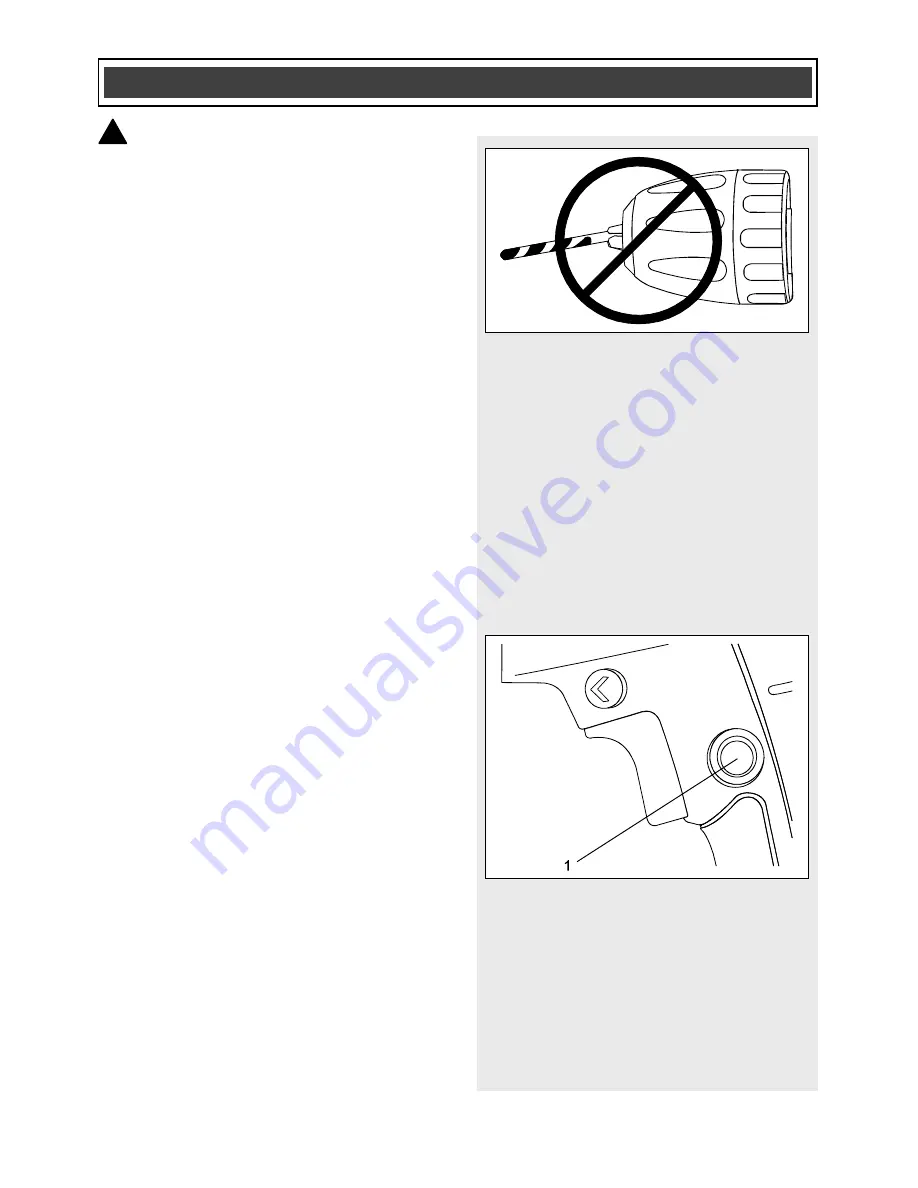
Do not insert drill bit
into chuck and tighten as shown in
Fig. 4.
The drill bit MUST be properly
inserted with all three of the chuck jaws
holding the bit centred in the chuck. Failure
to properly insert drill bit could cause the
drill bit to be thrown from the chuck,
resulting in possible serious injury or
damage to the chuck.
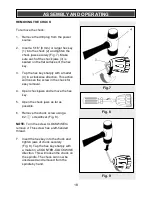
REMOVING BITS
1. To open the keyless drill chuck, grasp
and hold the chuck collar with one
hand. Rotate the chuck body in a
counter-clockwise direction until the
chuck jaws open wide enough to
release the bit.
2. Remove the bit.
TRIGGER SWITCH LOCK
The trigger switch lock-on feature allows
the trigger switch to be locked in the ON
position at full speed when continuous
operation for extended periods of time is
required (Fig. 5).
To lock the trigger switch in the ON
position, pull back on the trigger switch to
start the drill. Continue to squeeze the
trigger until the drill reaches its maximum
speed. Push the trigger switch lock button
(1) into the drill handle. Release the trigger
switch while holding the trigger switch lock
button into the drill handle. The drill will
continue to run at full speed. To release
the trigger switch lock button, pull trigger
switch back and then release the trigger.
ASSEMBLY AND OPERATING
!
Fig. 4
Fig. 5


