
A
CCESSORY
I
NSTALLATION
If it becomes necessary to store or
transport the unit where temperatures
could drop below freezing, 32° F, the
pump, solution hoses and valve on the
tools must be protected from freezing
with a solution of automotive radiator
antifreeze.
1
. Mix
1
/
2
gallon of water and
1
/
2
gal-
lon of antifreeze in the solution tank.
Hook up the hoses and tools to the
extractor.
2.
Turn the pump
ON
and press the
valve to let antifreeze mixture fill the
solution line system.
3.
Disconnect solution supply hoses and
vacuum out remaining antifreeze from
the solution tank
4
. To prevent damage to unit, allow the
extractor to reach room temperature
before using. The antifreeze
MUST
be
flushed out of solution system with clean
water, otherwise, the carpet may be
damaged.
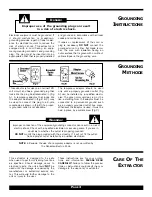
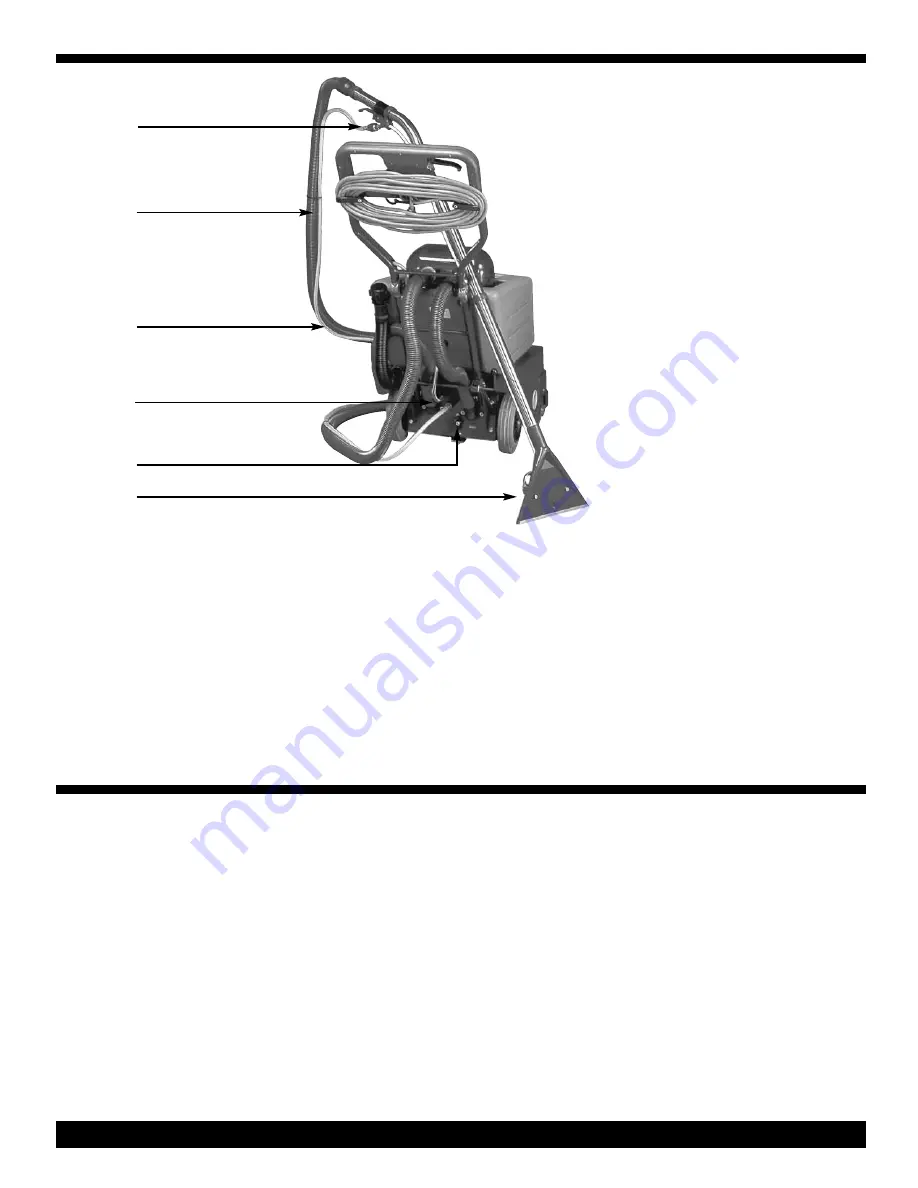
Accessory Tool
Quick-Connect
Accessory Tool
Vacuum Hose
Accessory Tool
Solution Hose
Accessory Tool
Quick-Connect
Solution Control Knob
Cleaning Tool and Wand
P
AGE
7
F
REEZING
T
EMPERATURE
P
RE
-C
AUTIONS
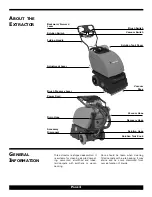
1
. Remove the vacuum hose from the
left side of the tank cover.
2.
Connect the accessory tool vacuum
hose to the left fitting on tank cover and
on to the end of the cleaning tool wand.
Note:
The hose must be connected
tightly.
3.
Connect solution hose to accessory
quick-connect in the back of the extrac-
tor and to quick connect located on the
handle of the tool.
4
. Turn solution control knob in the back
of the extractor to the upright position.
5.
Turn
ON
the solution and vacuum
switches.
DO NOT
turn on brush
switch.
6.
Start cleaning by squeezing trigger
on the wand while slowly pulling the tool
towards you.
7.
When finished, turn
OFF
vacuum and
solution switches, disconnect vacuum
and solution hoses from unit.
8.
Re-connect the extractor’s vacuum
hose to left fitting on the tank cover.
9.
Return the solution control knob to
the normal position.


