2017 OWNERS MANUAL /
370
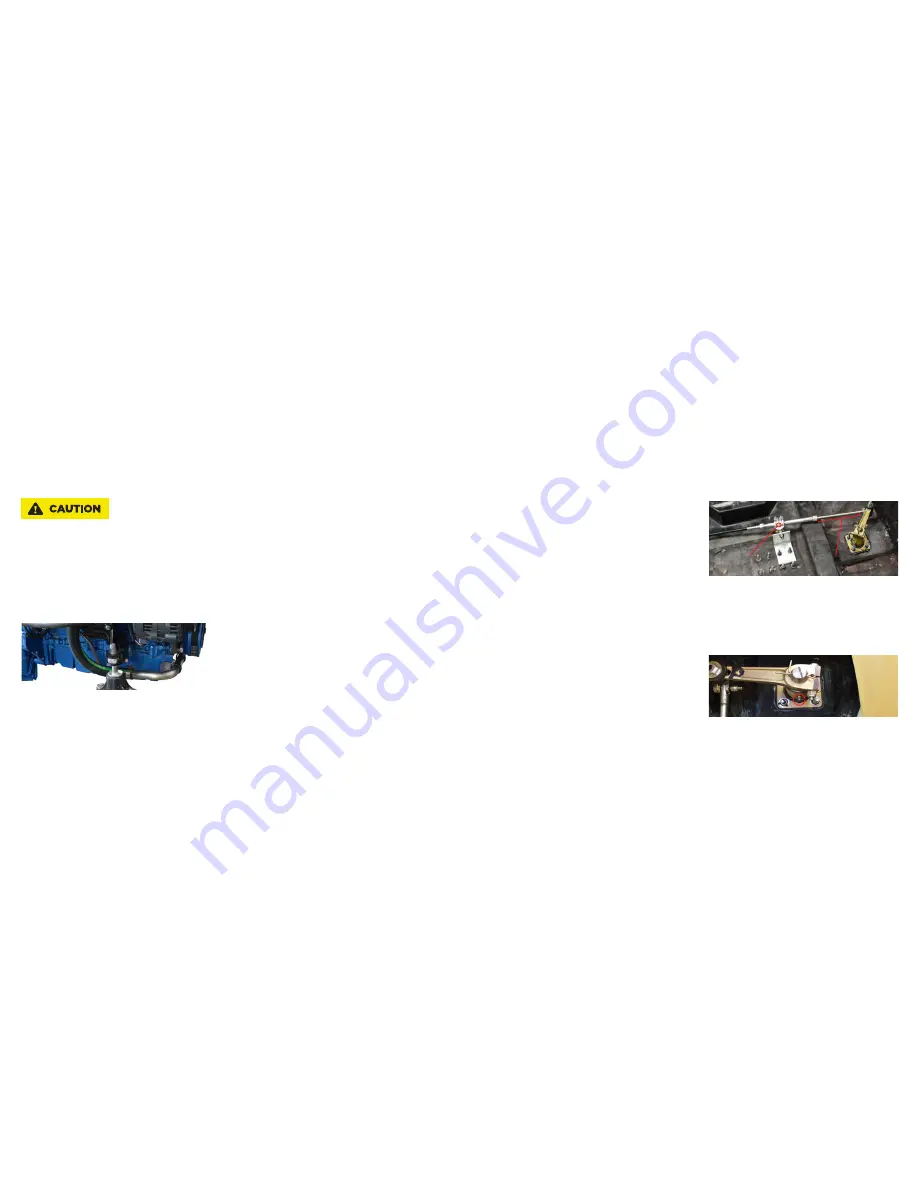
Step 5
Spread a generous amount of white lithium grease over the cable
end. Work the steering wheel back and forth and reapply grease.
Step 6
Using the flexible end of a grease gun, give two (2) full shots of
white lithium grease to the zerk fitting on the steering tube pivot
(circled above). Clean up any old grease purged from the areas.
NOTE: The ProStar has one additional rudder port zerk fitting. Do
NOT use white lithium grease on this rudder port. Use two (2) full
shots of Alpha FG2-100, available only from an authorized Master-
Craft dealer,
CHECK THE PROPELLER SHAFT
COUPLING ALIGNMENT
This function is critical to avoiding unnecessary wear and potential
damage to the engine as well as the propeller and propeller shaft.
Because it is a complex and exacting part of maintenance, this
should be performed only by your authorized MasterCraft dealer as
part of your annual maintenance.
INSPECT THE EXHAUST FLAPS
FOR DAMAGE
Step 1
Ensure the engine is OFF and disconnect the engine safety starting
switch. Be sure that the throttle/shift control lever is in neutral.
Step 2
Inspect the rubber exhaust flap for signs of deterioration. Take
the boat to an authorized MasterCraft dealer to replace the flap if
necessary.
LUBRICATE THE STEERING SYSTEM
For cable systems only (both standard steering and DockStar
Handling System); hydraulic steering maintenance must be
completed by an authorized MasterCraft dealer only.
Because this
process should be completed while all movable components of the
drive train are NOT in motion, MasterCraft recommends lubrication
be done while the boat is out of the water. The process below is
for all MasterCraft boat models. Additional steps listed after are
required for ProStar rudders.
Step 1
Ensure the engine is OFF and disconnect the engine safety stop
switch.
Be sure that the throttle/shift control lever is in neutral.
The
engine must be cool.
Step 2
Remove the access panel in the rear trunk compartment.
Step 3
Turn the steering wheel so that the maximum amount of steering
cable is seen (see photo to the right, notice that the engine has
been removed, this is not necessary for lubrication).
Step 4
Use solvent to clean old lubricant from the cable end, pivot and
rudder shaft.
CHECK THE ENGINE MOUNTS
Some engine parts become very hot during operation. This inspec-
tion must be completed while the engine is cool to prevent burns
to your skin. Perform this task before starting the boat.
Step 1
Ensure the engine is OFF and disconnect the engine safety starting
switch.
Be sure that the throttle/ shift control lever is in neutral.
The engine must be cool.
Step 2
Open the engine box and locate the four (4) motor mounts.
Step 3
Check the tightness of the mounting hardware and adjustment
lock-nuts. Securely tighten any loose hardware.
Spread grease over this
portion of the cable (Step 5)
Grease Fitting (Step 6)
ProStar Rudder Port
Zerk Fitting
Summary of Contents for NXT20 2017
Page 3: ...2017 OWNERS MANUAL SAFETY KNOWLEDGE ...
Page 27: ...2017 OWNERS MANUAL 48 2017MODEL FEATURESANDSPECS ...
Page 40: ...2017 OWNERS MANUAL 74 DASHESAND VIDEOSCREENS ...
Page 42: ...2017 OWNERS MANUAL 78 XANDXTSERIESINSTRUMENTPANEL 4 3 VIDEOSCREEN XSTARINSTRUMENTPANEL ...
Page 43: ...2017 OWNERS MANUAL 80 PROSTARINSTRUMENTPANEL NXTSERIESINSTRUMENTPANEL ...
Page 58: ...2017 OWNERS MANUAL 110 XANDXTSERIES VIDEOSCREEN OPERATIONSHV450 ...
Page 67: ...2017 OWNERS MANUAL 128 XSTAR VIDEOSCREEN OPERATIONS XSTARINSTRUMENTPANEL ...
Page 80: ...2017 OWNERS MANUAL 154 PROSTAR VIDEOSCREEN OPERATIONS ...
Page 97: ...2017 OWNERS MANUAL 188 NXT OPERATIONS ...
Page 101: ...2017 OWNERS MANUAL 196 NXT20 22 VIDEOSCREEN OPERATIONS ...
Page 107: ...2017 OWNERS MANUAL 208 BOAT OPERATIONS ...
Page 158: ...2017 OWNERS MANUAL 310 PREPARATION ...
Page 172: ...2017 OWNERS MANUAL 338 CAREAND MAINTENANCE ...
Page 204: ...2017 OWNERS MANUAL 402 TRAILERS ...


