background image

Page 7


If any part is broken or 

missing, DO NOT attempt to attach the 
battery or operate the Power Source until 
the broken or missing part is replaced. 
failure to do so could result in possible 
serious injury.

                                 Use only with the  
specified battery and charger. for specific 
charging instructions, read the operator’s 
manual supplied with your charger and 
battery.

                                 Do not attempt to 
modify this Power Source or create 
accessories not recommended for use 
with this Power Source. Any such  
alteration or modification is misuse and 
could result in a hazardous condition 
leading to possible serious injury. To  
prevent accidental starting that could 
cause serious personal injury, always 
remove the battery pack from the Power 
Source when assembling parts.

Always remove the battery pack before 
changing or removing accessories. Only 
use accessories specifically recommended 
for this tool. Others may be hazardous.

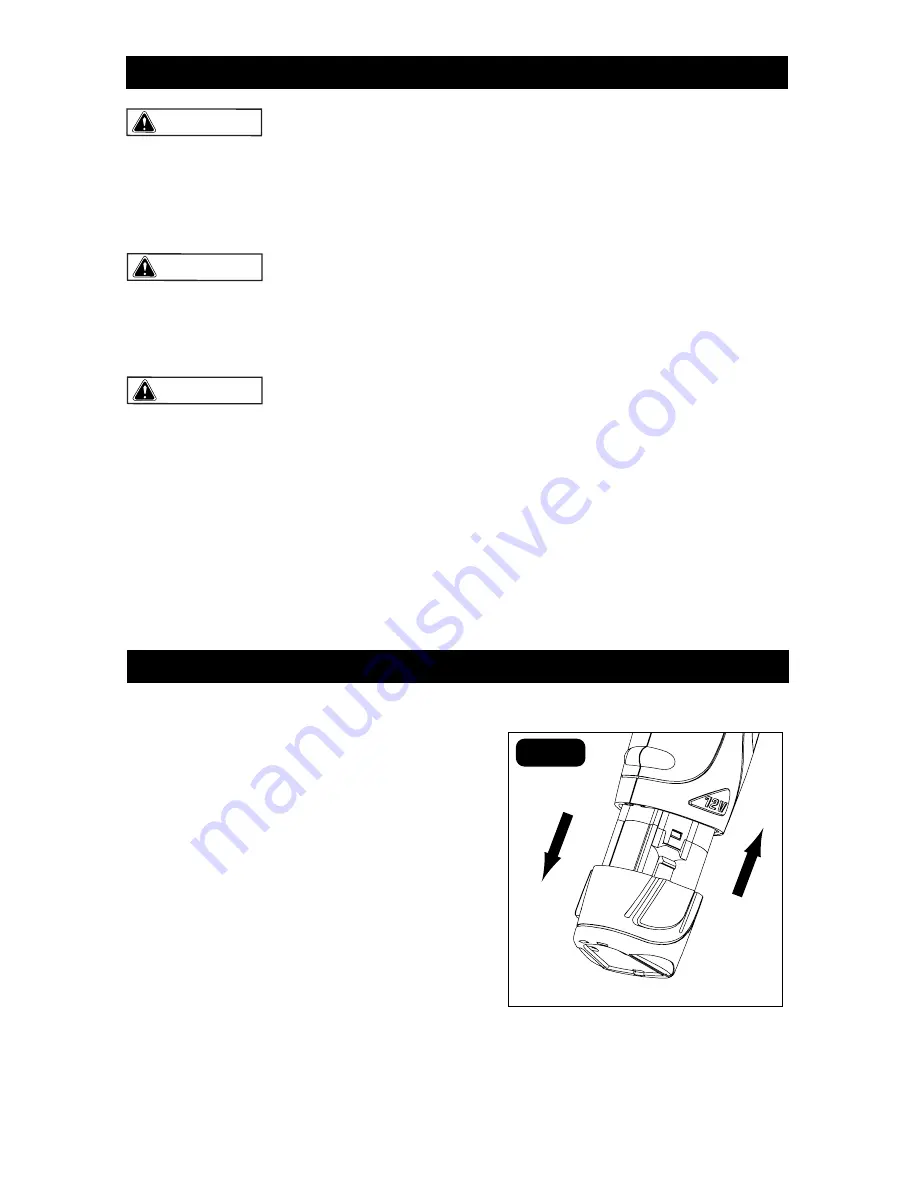
INSERTING/REMOVING THE  

bATTERy (fIG. 2)

1.  


To insert the battery, align the raised  

ribs on the battery pack with the grooves 
in the Power Source, and then attach the 
battery pack to the Power Source.
2.  To remove the battery, depress the 


battery release buttons located on the both 
sides of the battery pack to release the 
battery pack. Pull the battery pack out and 
remove it from the Power Source.

UNPACkING

This product has been shipped completely 
assembled.
1. Carefully remove the Power Source 
from the box.
2.  Inspect the Power Source carefully to 
make sure no breakage or damage 
occurred during shipping.
3. Do not discard the packing material 
until you have carefully inspected and 
satisfactorily operated the tool.

PACkING LIST

12.0-Volt  Lithium-Ion  power  source  and 
Operator’s Manual

ASSEMbLy

  WARNING: 

  WARNING: 

OPERATION

Remove

Insert

FIG. 2

  WARNING: 

Summary of Contents for 241-0318

Page 1: ...Page 1 241 0318 12 0 Volt Lithium Ion Power Source OPERATOR S MANUAL CAUTION To Reduce The Risk Of Injury User Must Read And Understand Operator s Manual Save These Instructions For Future Reference...

Page 2: ...table of contents Safety Symbols Page 2 Safety Instructions Page 3 Overview Specifications Page 6 Assembly Page 7 Operation Page 7 Maintenance Page 9 Troubleshooting Page 9...

Page 3: ...nt Type of characteristic of current no No load speed Rotational speed at no load Class II construction Double insulated construction min Per minute Revolutions strokes surface speed orbits etc per mi...

Page 4: ...e to following all instructions listed below may result in electric shock fire and or serious personal injury SYMBOL MEANING SAFETY ALERT SYMBOL Indicates DANGER WARNING OR CAUTION May be used in conj...

Page 5: ...could result in a hazardous situation 2 Use the correct appliance for the application 3 Stay alert watch what you are doing and use common sense when operating this Power Source Do not use while you a...

Page 6: ...The battery used in this device may present a risk of fire or chemical burn if mistreated Do not disassemble heat above 120 F 50 C or incinerate 6 Dispose of used battery promptly Keep away from chil...

Page 7: ...h working current less than 3A Both ports can power for smarts phones digital cameras MP3 players navigator etc Access door protects the ports from dirt and short circuit overview FIG 1 Specifications...

Page 8: ...ck before changing or removing accessories Only use accessories specifically recommended for this tool Others may be hazardous Inserting Removing the Battery Fig 2 1 To insert the battery align the ra...

Page 9: ...INDICATOR RED LED GREEN LED MEANING ON WORKING OFF ON Power Source is providing power to device s LOW BATTERY ON OFF Battery charge is below 20 capacity Battery pack will turn off after depleted and L...

Page 10: ...WARNING WARNING WARNING troubleshooting PROBLEM CAUSE SOLUTION The Fuel Gauge is not ON when a battery pack has been inserted The battery pack charge is fully depleted Charge the battery pack followi...

Page 11: ...Page 10 notes...

Page 12: ...Page 11 notes...

Page 13: ...Page 12 notes...

Page 14: ...Page 13 notes...

Page 15: ...e or misuse of the Merchandise This warranty 1 excludes expendable parts including but not limited to blades brushes belts bits light bulbs and or batteries 2 shall be void if this tool is used for co...

Page 16: ...Page 16 08 2011 2011 Menard Inc Eau Claire WI 54703...

Reviews: