background image

OPERATING MANUAL
Hi-RPM Circular Saw

241-0740

IMPORTANT :

Carefully read this Owner’s Manual before using this tool. Pay close atten-

tion to all 

Safety Instructions

Warnings

, and 

Caution sections

. Use this tool 

properly, and only for its intended use. 

Safety symbols in this manual are used to flag possible dangers. The safety 

symbols and their explanations require the operator’s full understanding. The 

safety warnings do not, by themselves, eliminate any danger, and they are not 

a substitute for proper accident prevention measures.   

This Safety Alert Symbol indicates caution, warning, or danger. Failure to 

obey a safety warning can result in serious injury to yourself or others. To reduce 

the risk of injury, fire, or electric shock, always follow the safety precautions.

Summary of Contents for 241-0740

Page 1: ...l are used to flag possible dangers The safety symbols and their explanations require the operator s full understanding The safety warnings do not by themselves eliminate any danger and they are not a...

Page 2: ...s listed below may result in electric shock fire and or serious per sonal injury SAVE THESE INSTRUCTIONS WORK AREA Keep the work area clean and well lit Cluttered benches and dark areas invite acciden...

Page 3: ...ust be used for appropriate conditions Before connecting the tool to a power source receptacle outlet etc be sure voltage supplied is the same as that specified on the nameplate of the tool A power so...

Page 4: ...arbor holes Blades that do not match the mounting hardware of the saw will run eccentrically causing loss of control Never use damaged or incorrect blade washers or bolts The blade washers and bolt w...

Page 5: ...of a second of carelessness is sufficient to inflict seri ous injury WARNING Always wear safety goggles or safety glasses with side shields when operating power tools Failure to do so could result in...

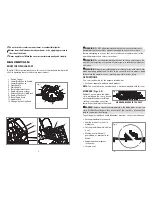
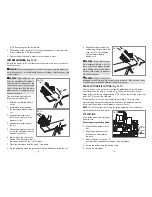
Page 6: ...SE GASOLINE CHANGING THE SAW BLADE FIG 6 WARNING To prevent personal injury always disconnect the plug from the power source before installing or removing the saw blade TO REMOVE THE SAW BLADE Fig 6 1...

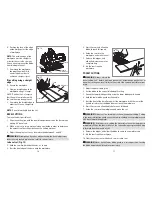
Page 7: ...d by moving it rapidly back and forth from the full open position to the closed position several times This will usually restore the guard to its normal operating condition If this does not correct a...

Page 8: ...Keep the cord away from the cutting area Always place the cord so that it is not hanging on the workpiece while making a cut DANGER If the cord hangs on the workpiece during a cut re lease the switch...

Page 9: ...ece and make the cut 5 Release the trigger and allow the blade to come to a complete stop 6 Lift the saw from the workpiece POCKET CUTTING WARNING Always adjust the bevel setting to 0 before making a...

Page 10: ...fuse or circuit breaker Blade binds jams or burns the wood Improper operation See OPERATION section Dull blade Replace or sharpenblade Improper blade Replace blade Warped blade Replace blade Saw vibra...

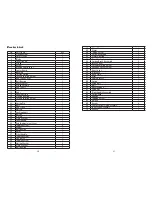
Page 11: ...32 Depth adjustment Lever 1 33 Tapping Screw 9 34 Rubber 1 35 Ball Bearing 1 36 Rotor 1 37 Front Handle 1 38 Tapping Screw 1 39 Fan Baffle 1 40 Tapping Screw 1 41 Spring Washer 2 42 Plain Washer 2 43...

Page 12: ...three years The warranty 1 excludes expendable parts including but not limited to blades bits light bulbs and or batteries 2 shall be void if this tool is used for commercial or and rental purposes an...

Reviews: