background image

SPRAY GUN HANDLING

Your new spray gun is exceptionally rugged in construction and is built to stand up under hard continuous
use. However, like any other fine precision instrument, its most efficient operation depends on knowledge
of its construction, operation, and maintenance. Properly handled and cared for, it will produce beautiful,
uniform finishing results long after other spray guns have worn out.

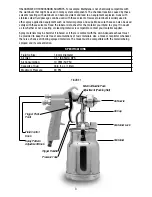
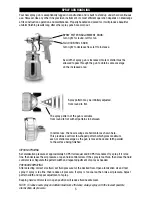
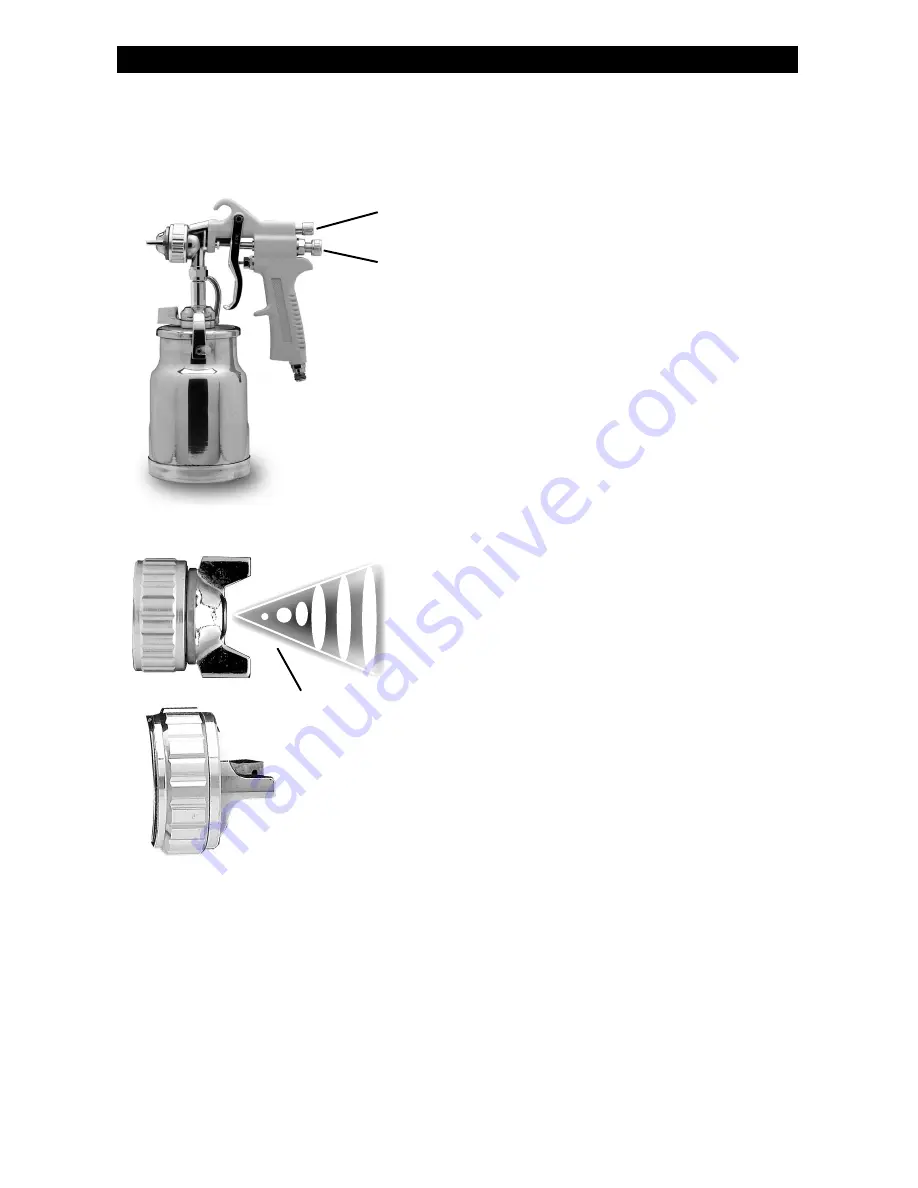
SPRAY PATTERN ADJUSTMENT KNOB:
Turn right for round, left for fan.

FLUID CONTROL KNOB:
Turn right to decrease flow, left to increase.

As width of spray gun is increased, more material must be
allowed to pass through the gun to obtain same coverage
on the increased area.

Spray pattern may be infinitely adjusted 
from round to flat.

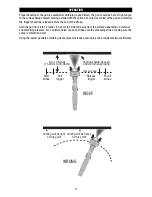
In normal use, the nozzle wings are horizontal as shown here.
This provides a vertical fan-shaped pattern which gives maximum,
even, material coverage as the gun is moved back and forth parallel 
to the surface being finished.

SIPHON SPRAYING

Set atomization pressure at approximately 50 PSI for lacquer and 60 PSI for enamel. Try spray. If it is too
fine, then decrease the air pressure or open fluid control screw. If the spray is too thick, then close the fluid
control screw. Regulate the pattern width and repeat adjustment of spray as needed.

PRESSURE SPRAYING

After selecting correct size fluid, set fluid pressure for the desired flow. Open atomization air and test
spray. If spray is too fine, then reduce air pressure. If spray is too coarse, then raise air pressure. Adjust
pattern width and repeat adjustment of spray.

Keeping fluid control screw in open position will reduce fluid needle wear.

NOTE: To reduce overspray and obtain maximum efficiency, always spray with the lowest possible 
atomization air pressure.

5

The spray pattern of the gun is variable 
from round to flat with all patterns in between.

Summary of Contents for 690042

Page 1: ...ET KEEP MANUAL WITH IMPORTANT RECORDS FOR SAFETY INSTRUCTIONS OPERATING PROCEDURES AND WARRANTY Please retain these instructions for future reference If you encounter any problems or difficulties plea...

Page 2: ...hoses from heat oil and sharp edges Check hoses for weak or worn condition before each use making certain that all connections are secure High sound levels can cause permanent hearing loss Protect yo...

Page 3: ...to whether or not a coating or cleaning material is compatible contact your material supplier Spray materials may be harmful if inhaled or if there is contact with the skin Adequate exhaust must be p...

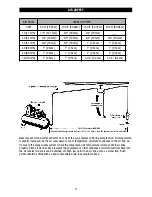
Page 4: ...re it can be drained off Each low point in an air line acts as a water trap Such points should be fitted with an easily accessible drain See diagram above 4 AIR FLOW LENGTH OF PIPE CFM 50 ft 15 24m 10...

Page 5: ...an shaped pattern which gives maximum even material coverage as the gun is moved back and forth parallel to the surface being finished SIPHON SPRAYING Set atomization pressure at approximately 50 PSI...

Page 6: ...m to 30 48cm away from the surface depending on material and atomizing pressure For a uniform finish lap each stroke over the preceding stroke making sure the spray is smooth and wet Using the lowest...

Page 7: ...essure for atomization and fluid supply is regulated by two individual air regulators on tank PRESSURE FEED TANK HOOKUP For medium production spraying Single regulator Air pressure for atomization is...

Page 8: ...N USED WITH PRESSURE TANK Shut off air supply to tank and release pressure on tank Open vent and loosen air nozzle Hold a piece of cloth over the air nozzle and squeeze trigger Air will back up throug...

Page 9: ...ool that is softer than brass 5 Adjust the fluid needle valve so when gun is triggered air flow occurs before fluid flow SERVICE Tool service must be performed only by qualified repair personnel Servi...

Page 10: ...dried out b Fluid nozzle loosely installed or dirt between nozzle and body c Needle sealing damaged a Back up knurled nut and put a few drops of machine oil on packing Retighten nut b Take off fluid n...

Page 11: ...g b Sluggish needle c Tight packing nut d Worn fluid nozzle or needle a Lubricate b Lubricate c Adjust d For pressure feed replace with new fluid nozzle and needle Thin sandy and coarse finish a Gun h...

Page 12: ...ner Inlet Assembly 1 22 Screw 1 6 Needle Seat 1 23 Spring 1 7 Felt Washer 1 24 Valve 1 8 Air Valve Set 1 25 Air Regulator Housing 1 9 Pivot 1 26 Gasket 1 10 Trigger 1 27 Packing Material 1 11 C Clip 2...

Page 13: ...blank 13...

Page 14: ...blank 14...

Page 15: ...IBC blank 15...

Page 16: ...FOR CUSTOMER SERVICE 1 800 423 3598 WEAR SAFETY GLASSES WARNING 1431 VIA PLATA LONG BEACH CA 90810 1462 Copyright 2004 Alltrade Tools LLC Rev 1 www handtoolonline com...

Reviews: