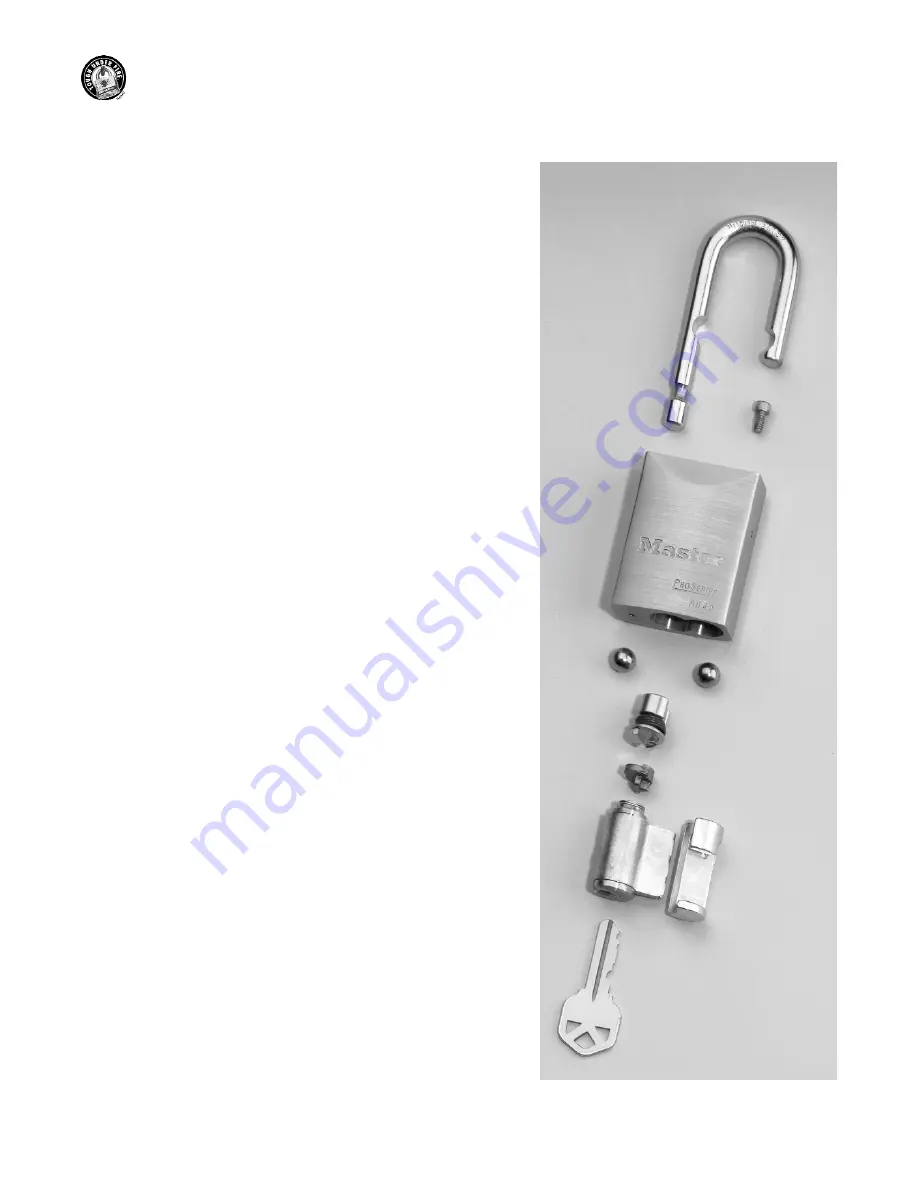
The ProSeries
®
Door Hardware locks employ a construction technology
similar to that used in the Rekeyables. It also allows for a uniform
assembly and disassembly technique. Below is the step by step procedure
for disassembling this version of padlock. The only exception to this
procedure will be the IC version of the lock.
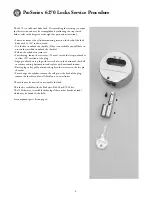
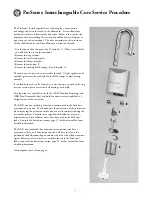
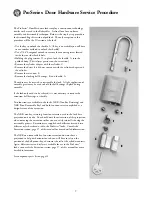
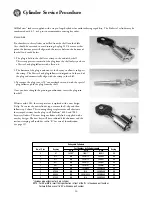
• Use the key to unlock the shackle, A. (If key is unavailable you will have
to use another method to unlock the shackle).
• Use a 7/64" hexagonal wrench to remove the mounting screw located
inside the toe side shackle hole.
• Holding the plug retainer, D, in place, lock the shackle, A, into the
padlock body. (This relieves pressure on the extension.)
• Remove the cylinder adapter with the cylinder, C.
• Remove the driver if it did not come out with the cylinder adapter and
the cylinder.
• Remove the extension, E.
• Remove the locking ball bearings, B, and shackle, A.
The order may be reversed to reassemble the lock. A light application of
assembly grease may be used to hold the ball bearings in place during
assembly.
If the lock only needs to be rekeyed, it is not necessary to remove the
extension, ball bearings, or shackle.
Two functions are available in the locks, NKR (Non Key Retaining) and
NRK (Non Removable Key) and both functions are accomplished as a
design feature of the extension.
The NKR, non key retaining, function extension used in the lock has a
projection on one side. You should note the orientation of this projection
when removing the extension so that you can easily reinstall it during the
reassembly process. Extensions are supplied with different sizes and two
different styles have been used in the ProSeries
®
locks. Consult the
Extension section, page 17, of this manual for more detailed information.
The NRK non removable key, function extension does not have a
projection to help with orientation and you will have to rely on the
position of the half-moon shaped actuator the tail of the cylinder contacts.
Again, different sizes and styles are available for use in the ProSeries
®
locks, so consult the Extension section, page 17, of this manual for more
detailed information.
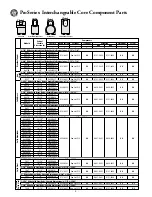
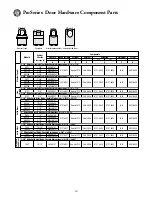
See component parts list on page 10.
ProSeries
®
Door Hardware Service Procedure
9
A
G
B
E
C
D

