background image

FRENCH

Page 6

WARNING

2003041-14

MNTS8

HAND PISTOL RIVET NUT KIT

1. Remove and install the mandrel and nosepieces. Always 

keep the matched mandrel/nosepiece sets together.

2. Remove nosepiece from #16 sleeve by unthreading the 

nose piece counterclockwise. This can be done either by 

hand or with the provided wrench if too tight to do so.

OPERATING INSTRUCTIONS:

1. Choose the rivet nut size to be installed. 
2. Install the correct size mandrel/nosepiece for the rivet nut 

to be installed. See photos and instructions for changing 

the mandrel/nosepiece and adjustment.

3. Drill a hole in the work product the same size or slightly 

larger than the outside diameter of the rivet nut to be 

installed.

4. To install the rivet nut, open the handles outward as far 

as possible and thread the rivet nut clockwise onto the 

mandrel until reaching the nosepiece.

5. Insert the rivet nut fastened to the riveter into the 

pre-drilled hole until flush with the work product, and 

pull handles inward to secure the rivet nut into the hole. 

If the rivet nut is loose in the hole, open the handles 

outward, turn #10 knob clockwise, and pull handles 

inward until the rivet nut is secure in the hole. Repeat as 

necessary until the rivet nut is secure in the hole. See 

adjustment instructions if necessary.

6. Turn  the  #10 knob counterclockwise until the mandrel is 

removed from the rivet nut. The rivet nut installation is 

complete if the rivet nut is secure from movement in the 

hole.

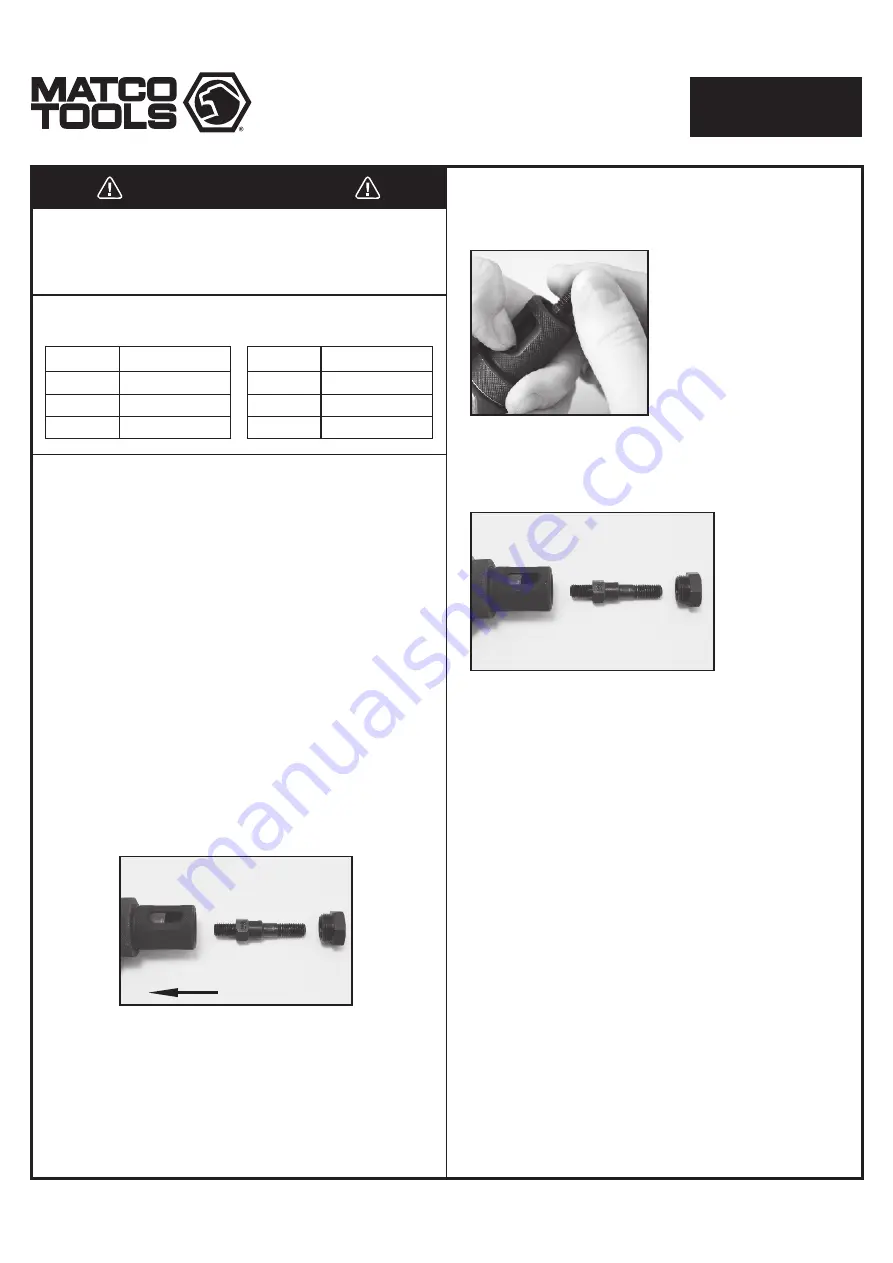
CHANGING MANDREL/

NOSEPIECE INSTRUCTIONS:

Assembly direction

DRILL SIZE GUIDE:

Nut Size

M4

M5
M6

Drill Size

6mm (7/32")
7mm (9/32")

9mm (3/8")

Nut Size

8-32

10-24

1/4-20

Drill Size

6mm (7/32")
7mm (9/32")

9mm (3/8")

SAE

Metric

WARNING

Always wear ANSI approved safety goggles when using this 
product (users and bystanders). Failure to read and follow 
all warnings and operating instructions may result in 
damages and serious injuries or death.

3. Using your thumbnail or tool, press down to depress the 

#15 inner hexagonal sleeve that sits within the #16 outer 

sleeve. This should expose the lower hex portion of the 

mandrel.

4. Unthread the mandrel by hand to remove it from the 

sleeve. Once the mandrel has been threaded out far 

enough to clear the #15 hex sleeve you may release 

tension on this sleeve collar. 

5. Choose the correct mandrel/nosepiece to be installed.

6. Thread the new mandrel into the tool by hand until  it 

approaches the #15 hex sleeve and fully depress this 

sleeve to allow the mandrel to be threaded further until it 

stops. The mandrel does not need to be torqued. Release 

the hex sleeve and allow it to fully reengage the mandrel. 

If the mandrel and hex sleeve do not initially align, rotate 

the #10 knob while holding onto the mandrel until it clicks 

up and reengages.

7.  Thread the matching nose piece into the #16 by hand. 

Torqueing the nose piece is optional.

Summary of Contents for MNTS8

Page 1: ...ace The MNTS8 is designed to set the rivet nuts of the following thread pitches 1 4 20 10 24 8 32 10 32 M4x0 7 M5x0 8 and M6x1 0 Do not use this tool outside of the designed intent Never modify the tool for any other purpose or use Made in China to Matco specifications Caution To help prevent personal injury Use of this product can expose you to chemicals including ethylene glycol gasoline vapors ...

Page 2: ...kwise until the mandrel is removed from the rivet nut The rivet nut installation is complete if the rivet nut is secure from movement in the hole CHANGING MANDREL NOSEPIECE INSTRUCTIONS Assembly direction DRILL SIZE GUIDE Nut Size M4 M5 M6 Drill Size 6mm 7 32 7mm 9 32 9mm 3 8 Nut Size 8 32 10 24 1 4 20 Drill Size 6mm 7 32 7mm 9 32 9mm 3 8 SAE Metric WARNING Always wear ANSI approved safety goggles...

Page 3: ... INFORMACIÓN DEL PRODUCTO 2003041 14 MNTS8 The MNTS8 is designed to set the rivet nuts of the following thread pitches 1 4 20 10 24 8 32 10 32 M4x0 7 M5x0 8 and M6x1 0 No utilice esta herramienta fuera de la intención de su diseño Nunca modifique la herramienta para ningún otro propósito o uso HECHO en China Para Matco especificaciones ADVERTENCIA NO LO DESCARTE O DESECHE ENTREGESELO AL USUARIO AD...

Page 4: ...clockwise until the mandrel is removed from the rivet nut The rivet nut installation is complete if the rivet nut is secure from movement in the hole CHANGING MANDREL NOSEPIECE INSTRUCTIONS Assembly direction DRILL SIZE GUIDE Nut Size M4 M5 M6 Drill Size 6mm 7 32 7mm 9 32 9mm 3 8 Nut Size 8 32 10 24 1 4 20 Drill Size 6mm 7 32 7mm 9 32 9mm 3 8 SAE Metric WARNING Always wear ANSI approved safety gog...

Page 5: ...tentivement avant d installer d utiliser d entretenir et de réparer cet outil Conserver ces instructions dans un endroit sécuritaire et accessible Mise en garde Pour aider à prévenir les blessures L utilisation de ce produit peut vous exposer à des produits chimiques notamment l éthylène glycol les vapeurs d essence et les gaz d échappement des moteurs qui sont reconnus par l État de Californie po...

Page 6: ...lockwise until the mandrel is removed from the rivet nut The rivet nut installation is complete if the rivet nut is secure from movement in the hole CHANGING MANDREL NOSEPIECE INSTRUCTIONS Assembly direction DRILL SIZE GUIDE Nut Size M4 M5 M6 Drill Size 6mm 7 32 7mm 9 32 9mm 3 8 Nut Size 8 32 10 24 1 4 20 Drill Size 6mm 7 32 7mm 9 32 9mm 3 8 SAE Metric WARNING Always wear ANSI approved safety gogg...

Page 7: ...43B 13 1443B 14 1443B 15 1443B 16 1443B 17 1443B 18 1443B A30 1443B A31 1443B 21 1443B 22 1443B 23 12 13 14 15 16 17 18 19 20 21 22 23 3 1 1 1 1 1 1 1 1 1 1 1 Index Part No Description Qty Spacer Loop Bar Pull Rod Sliding Sleeve Sleeve Spring Spacer M5 Mandrel M5 Nosepiece Top Handle Sleeve Lower Handle Sleeve Pothook Index Part No Description Qty 1443B 24 1443B 25 1443B A28 1443B A29 1443B 28 144...

Reviews: