MUC122ID
3
rev. 02/04/14
MUC122ID 12V Impact Driver
1. Hold tool by insulated gripping surfaces when performing an
operation where the accessories may contact hidden wiring.
Contact with a “live” wire will also make exposed metal parts
of the tool “live” and shock the operator.
2. Be aware that this tool is always in operating condition,
because it does not have to be plugged into an electrical outlet.
3. Always be sure you have firm footing.
4. Be sure no one is below when using the tool in high locations.
5. Hold the tool firmly and use both hands.
6. Keep hands and hair away from rotating parts.
7. Do not leave the tool running. Do not force tool to stay in the
“on” position. Operate the tool only when hand-held.
8. Do not touch the impact socket or the workpiece immediately
after operation; they may be extremely hot and could burn your
skin.
9. Some material contains chemicals which may be toxic. Take
caution to prevent working dust inhalation and skin contact.
Follow material supplier safety data.
WARNING:
MISUSE or failure to follow the safety rules stated in
this instruction manual may cause serious personal
injury.
OPERATING INSTRUCTION
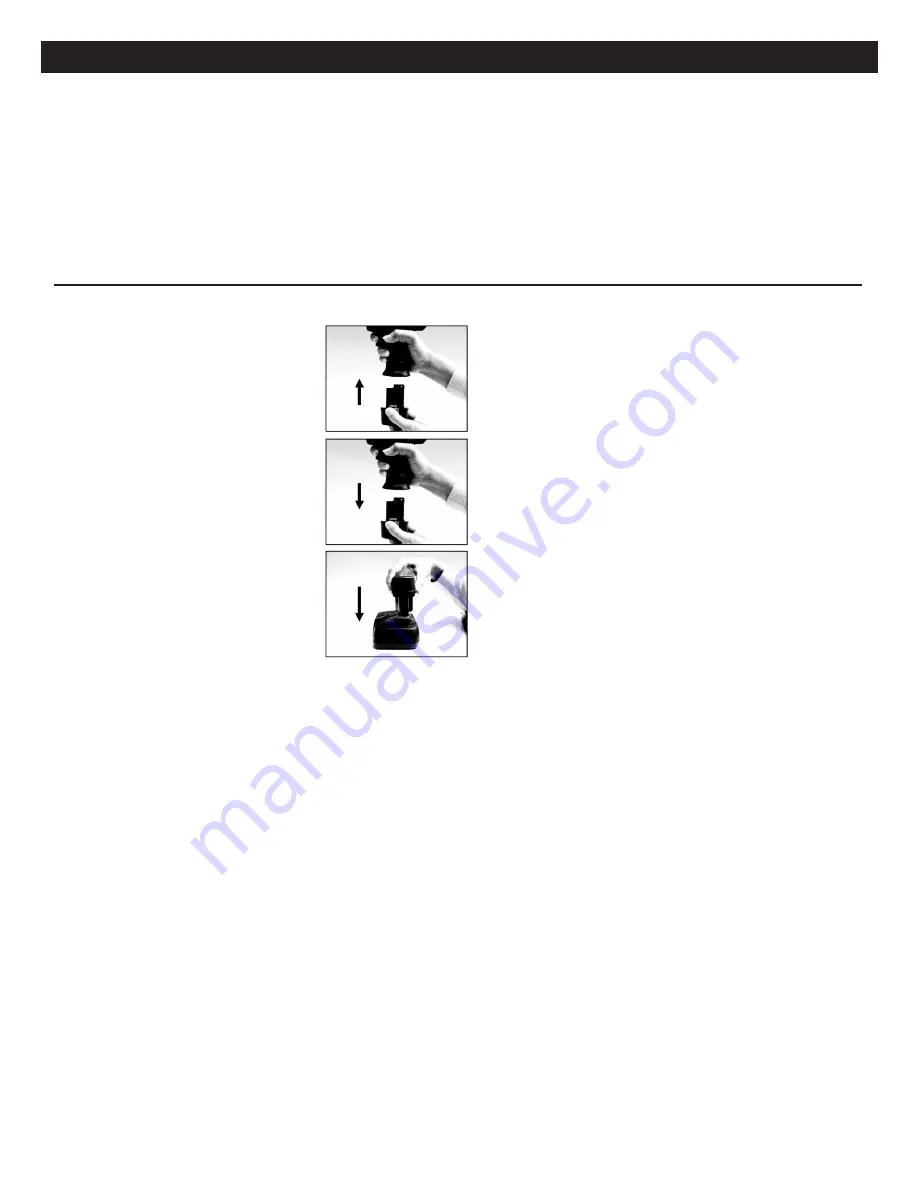
Installing Or Removing Battery Pack
(See Fig.1, Fig.2)
1. Your new battery pack is not fully charged.
You may need to charge it before use.
2. Make sure the switch is in the "off"
position before insertion/removal of a
battery pack.
3. To remove a battery pack, depress both
tabs on either side of the battery and pull
downward.
4. To insert a battery pack, align the battery
with the tool housing and push battery
inward until click indicating battery is fully
installed.
Charging The Battery Pack
(See Fig.3)
1. Battery may not charge when it is above
a certain preset temperature limit. Allow
temperature of battery to cool before
charging.
2. The charge process will take less than one hour.
3. After charging, unplug the charger from the power source and
stow away in a safe place.
Replace Carbon Brush
1. During the lifetime of a motor, 2-3 sets of carbon brushes
may need to be replaced.
2. Please ensure that the battery is removed before the
following takes place.
a. Use T10 size torque bit to loosen the side panel screws
and remove the panel.
b. Take out the carbon brushes on both sides and replace
with new units from an Authorized Matco Distributor.
c. Insert new carbon brushes and install cover with the same
screws. Tighten and check operation with charged battery
inserted into the tool.
Tool Operation:
• Always be sure that the machine is switched off and the
battery cartridge is removed before installing or removing
the socket.
1. To install the socket, push the socket onto the anvil as far as it
will go.
2. To remove the socket, simply pull the socket from the anvil.
3. To start the tool, simply pull the trigger. Release the trigger to
stop.
4. For reversing the tool, use the forward/reverse switch on the
drive unit. The directions of the rotation are also shown on the
face of the switch.
5. Always check the direction of rotation before operation..
6. Use the forward/reverse switch only after the tool comes to a
complete stop. Changing the direction of rotation before the
tool stops may damage the gears.
7. Hold the tool firmly in place, make sure the socket is
completely over the nut or bolt. Apply forward pressure to the
tool to the extent that the socket will not slip off the nut or bolt.
Pull the trigger to begin.
NOTE:
• Use the proper impact socket size for the nut that you intend to
install or remove.
• Hold the tool pointed straight at the nut or bolt. If you tighten
the nut or bolt for a time longer than it needs, the nut or bolt
or point of the driver socket may be overstressed, stripped,
damaged, etc. When tightening a standard nut or bolt in a
steel plate, the proper tightening torque can be obtained in an
extremely short time (approx. 0.1-0.2 seconds).
• Turn the tool off as soon as the impact sound is heard.
• When tightening nut M6 or smaller, carefully adjust pressure on
the switch trigger so that the nut is not damaged.
8. The tightening torque is affected by a wide variety of factors
including the following.
• When the battery cartridge is discharged almost completely,
voltage will drop and the tightening torque will be reduced.
• Driver bit or socket bit: Failure to use the correct size driver bit
or socket bit will cause a reduction in the tightening torque.
• Driving a bolt: Even though the torque coefficient and the class
of bolt are the same, the proper tightening torque will differ
according to the diameter of the bolt.
9. Even if the diameter of the bolts are the same, the proper
tightening torque will differ according to the torque coefficient,
the class of the bolt and the bolt length.
10. The manner in which the tool is held or the driving position
of the material to be tightened will affect the torque.
Make sure that the impact wrench is turned off and the
battery cartridge is removed before carrying out any
work on the tool. To maintain product safety and
reliability, repairs, maintenance or adjustments should be
carried out by a Matco authorized service center.
Fig. 1
Fig. 2
Fig. 3


