RL-450
4
Rev. 08/06/03
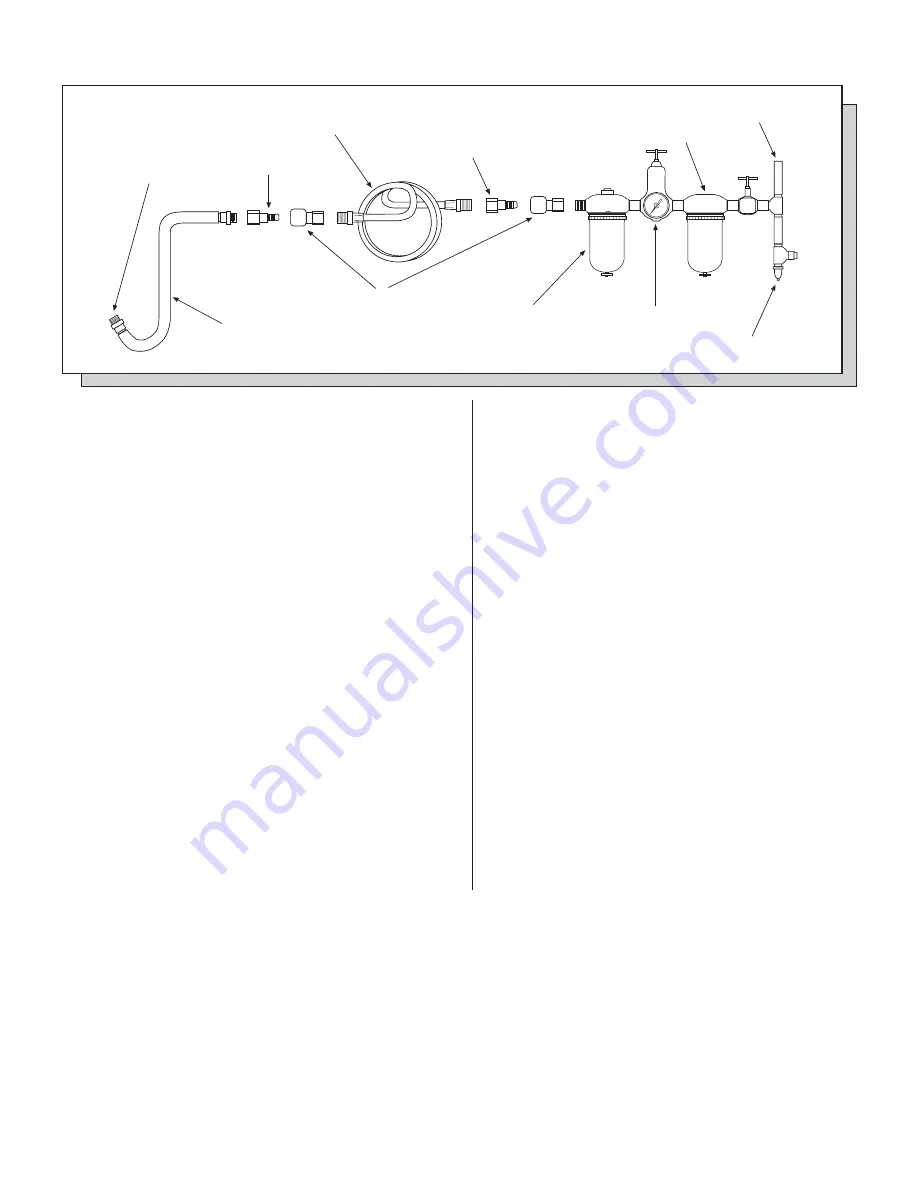
Nipple
Leader Hose
Whip Hose
Nipple
Filter
Air Supply
Regulator
Quick Coupler
Oiler
Drain Daily
Do Not Install
Quick Coupling
Here
Operating Instructions • Warning Information • Parts Breakdown
Operation...
• Always use the recommended wheel guard to prevent injury
from broken grinding wheel parts. If a guard has withstood a
wheel breakage, discontinue its use and replace it with a new
guard. It may be damaged. Position the guard between the
grinding wheel and the operator. Use barriers to protect others
from wheel fragments and grinding sparks.
• Always wear impact-resistant eye and face protection when in-
volved in the operation of this tool. Even small projectiles can
injure eyes and cause blindness. A grinding wheel that bursts
can cause very serious injury. Daily measure the air grinder
speed with a tachometer to make sure it's not greater than the
RPM marked on the grinding wheel. Never use a grinding wheel
marked with a speed lower than the air grinder speed.
• Before grinding, test grinding wheel by briefly running the tool
at full throttle. Be sure to use a barrier (such as under a heavy
work table) to stop any possible broken wheel parts.
To Assemble Grinding Discs:
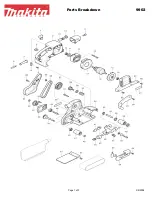
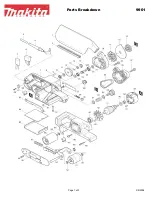
1. Use stop spanner (#41) to hold gear shaft (#11).
2. Screw on disc nut (#4) with shoulder side facing tool. Tighten.
3. Attach grinding disc wheel.
4. Screw on other disc nut, shoulder side facing tool.
Secure tightly!
Air Supply...
Tools of this class operate on a wide range of air pressures. It is
recommended that air pressure of these tools measure 90 PSI at the
tool while running free. Higher pressure (over 90 psig; 6.2 bar) raises
performance beyond the rated capacity of the tool which will shorten
the tool’s life because of faster wear and could cause injury.
Always use clean, dry air. Dust, corrosive fumes and/or water in the
air line will cause damage to the tool. Drain the air tank daily. Clean
the air inlet filter screen on at least a weekly schedule. The recom-
mended hookup procedure can be viewed in the above figure.
The air inlet used for connecting air supply, has standard 1/4" NPT.
Line pressure should be increased to compensate for unusually long
air hoses (over 25 feet). Minimum hose diameter should be 3/8" I.D.
and fittings should have the same inside dimensions and be
tightly secured.
Lubrication...
Lubricate the air motor daily with quality motor oil. If no air line oiler
is used, run a teaspoon of oil through the tool. The oil can be squirted
into the tool air inlet or into the hose at the nearest connection to the
air supply, then run the tool. The amount of oil to be used is 1 ounce.
Overfilling will cause a reduction in the power of the tool.
MATCO TOOLS™ 1 YEAR LIMITED WARRANTY FOR AIR TOOLS
Matco warrants its air tools for a period of 1 year to the consumer. We will repair any air tool covered under this warranty which proves to
be defective in material or workmanship during the warranty period. In order to have your tool repaired, return the tool to any Matco
Authorized Warranty Center, freight prepaid. Please include a copy of your proof of purchase and a brief description of the problem. The
tool will be inspected and if any part or parts are found to be defective in material or workmanship, they will be repaired free of charge and
the repaired tool will be returned to you freight prepaid.
This warranty gives you specific rights. You may also have other rights which vary from state to state.
The foregoing obligation is Matco's sole liability under this or any implied warranty and under no circumstances shall Matco be liable for
any incidental or consequential damages.
Note: Some states do not allow the exclusion or limitation of incidental or consequential damages so the above limitation or exclusion may
not apply to you.


