a
x 3
c
Ø6
SILICON
x 3
x 3
x 3
x 3
7mm
b
1
2
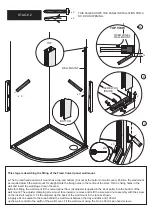
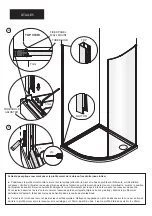
STAGE 2
TOP VIEW
FIXED PANEL
WALL MOUNT
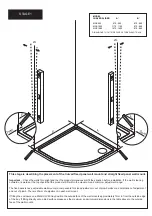
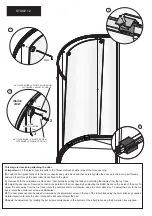
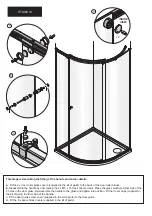
This stage is describing the fitting of the Fixed Curved panel wall mount.
a.
The Curved fixed panel wall mount has a top and bottom (Cut out at the bottom of wall mount). Position the wall mount
as required plumb the wall mount for upright mark the fixing holes in the centre of the slots. Drill 3 x fixing holes in the
wall and insert the wall plugs. Clean the area.
b.
Before fitting the wall mount fit the curved panel floor rail adjuster (supplied in the kit of parts) into the bottom of the
wall mount. The adjuster clamping screw must face inwards, remove and refit the screw and nut assembly with the screw
on the inside if required. Fit the adjuster up the back of the wall mount in the recess shown.
c.
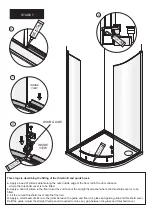
Apply silicon sealant to the area behind the wall mount between the tray and tiles and 100mm
up the wall, central to the width of the wall mount. Fit the wall mount using the No.8 x 38mm pan head screws.
WALL MOUNT
THIS PAGE SHOWS THE PANEL INSTALLATION FOR A
RH DOOR OPENING.
BOTTOM
TOP
SCREW ON
INSIDE

