58
10.2 beAring AsseMbly sHiMMing
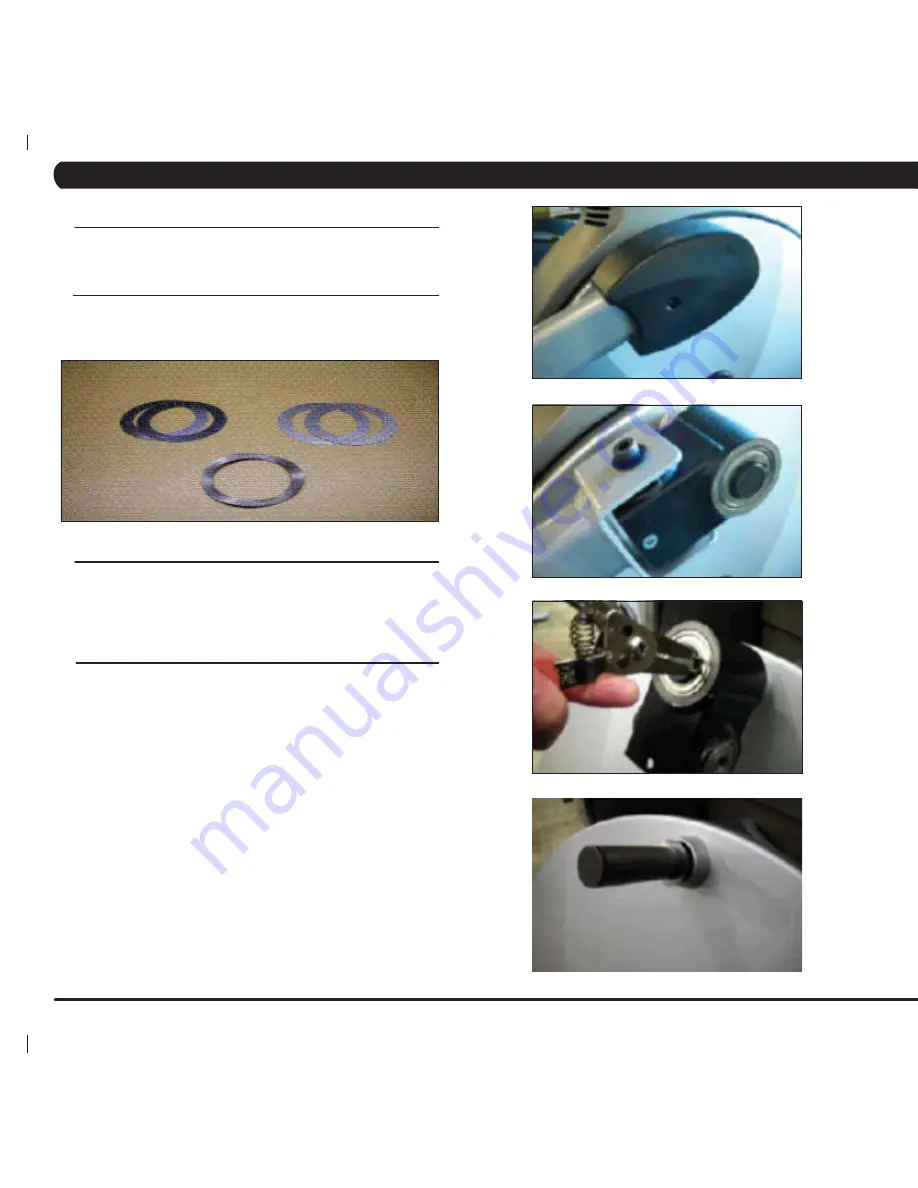
Eliminate clunking noise by shimming bearing assembly with washers.
1. Washer kit (SAP - ZMS3000335): Includes 4x .1mm
(SAP - ZMS3000332) and 4x .2 flat washers (SAP - ZMS3000333),
2x. 5mm wavy washer (SAP 005219-00).
re-work PArts reqUired
1. Snap Ring Pliers
2. Phillips Head Screwdriver
3. 8mm Socket
4. 17mm Open Wrench
tools And eqUiPMent reqUired
1. Remove the plastic guard cover over the crank assembly with a
Phillips head screwdriver (Figure A).
2. Separate the bearing assembly from the arm using an 8mm
socket and 17mm open wrench (Figure B).
3. Remove the snap ring from the bearing rod using a snap ring
pliers (Figure C).
4. Remove the bearing assembly from rod (Figure D).
5. Insert the appropriate combination of washers onto the rod. This
number will vary, but using combinations of washers you may go up
to .1mm in total shim distance. Typically you should start with a .2
mm washer and adjust from there.
6. Do a stress test by trying to move the bearing assembly back and
forth along the rod. If the assembly still moves, add washers in .1mm
increments.until tight.
7. Test the Ascent Trainer for function as outlined in Section 8.20.
ProcedUre
figUre A
figUre b
figUre c
figUre d
cHAPter 10: UPgrAdes
Summary of Contents for A5x-02
Page 1: ...A 5 x 0 2 A s c e n t T r a i n e r SER V ICE M A N U A l...
Page 2: ......
Page 5: ...1 SERIAL Number Placement Chapter 1 serial number location 1 1 SERIAL NUMBER LOCATION...
Page 20: ...16 7 1 Electrical Diagram Chapter 7 Troubleshooting...
Page 21: ...17 7 1 electrical diagram Chapter 7 Troubleshooting...
Page 22: ...18 System block diagram 7 1 electrical diagram Chapter 7 Troubleshooting...
Page 69: ...65 notes...


