4
INSTALLATION – PARTS AND TOOLS REQUIRED
A Tools Required – Phillips Screwdriver.
B Part Required - RAP Kit – contains the RAP, 1 Antenna, and 1 power cord with AC-DC converter (6’ in length).
SECTION A: SETUP AND INSTALLATION INSTRUCTIONS
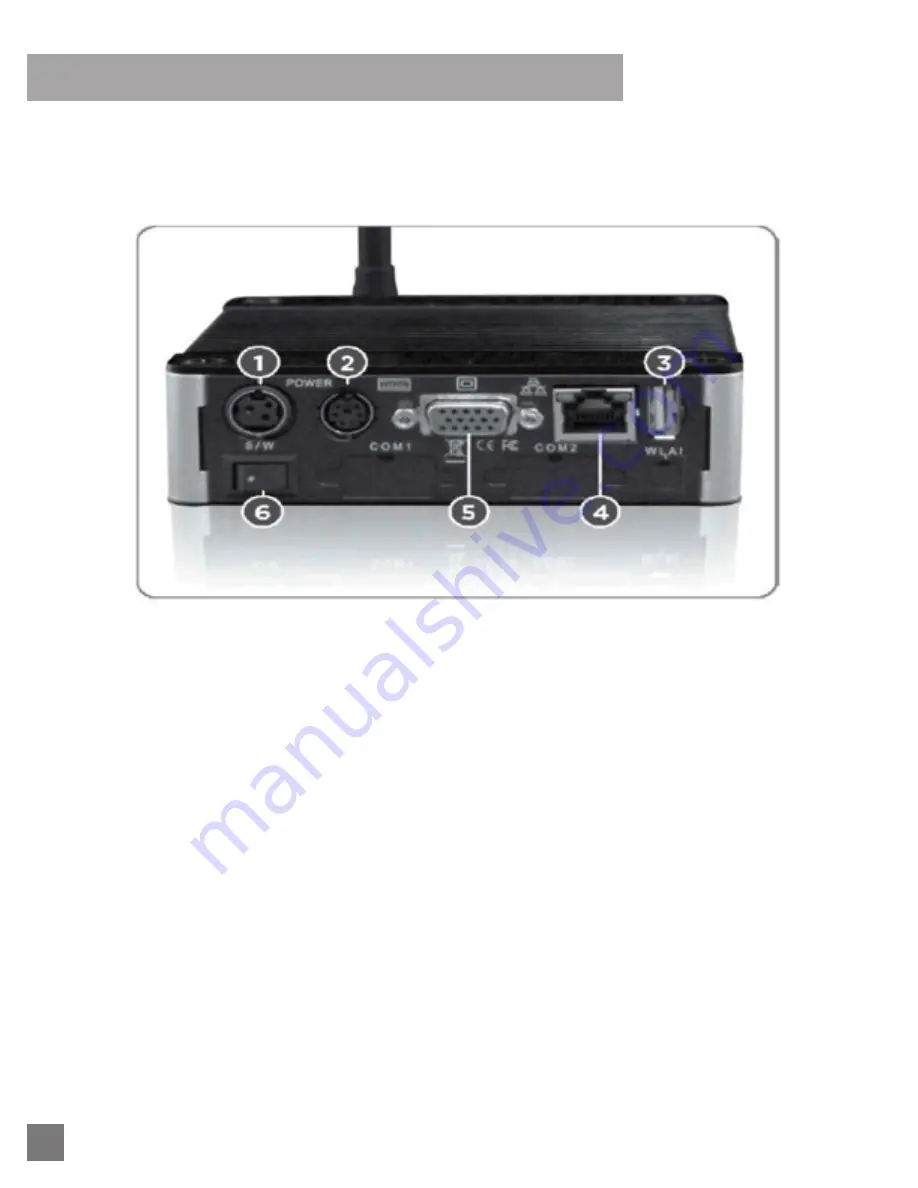
1 Power Port (use for cycling power).
2 PS/2 Keyboard (must be plugged in prior to power up if used).
3 USB Connection (will work with most keyboards).
4 Ethernet RJ45 Connection
5 VGA Video Connection for Monitor
6 Switch (non functional).
INSTALLATION - PROCEDURE
Pre-installation Requirements:
1 One active RJ-45 network data jack at the location where the RAP is to be installed.
2 One power outlet – 110VAC duplex outlet at the location where the RAP is to be installed (the RAP consumes less than 2 amps of
current). NOTE: The included power cord is 6’ in length.
3 Network IP assignment: The device is pre-configured with DHCP, allowing for plug and play if used on a DHCP network. NOTE: The
RAP can be installed within your firewall. The RAP communicates bidirectionally on Port 80 just like a web browser. The RAP will only
communicate with the www.actihealth.net web portal.
Installation:
1 Place the RAP in a location within its 150-400 foot range of Matrix Products (best line of sight position).
2 Mount the RAP to a surface using the included adhesive strips or the four mounting screws.
3 Attach the antenna.
4 Connect the Ethernet data cable to the device and wall data jack.
5 Plug the power adaptor into the wall outlet to boot the RAP.
6 The devise is pre-configured with DHCP, allowing for plug and play if used on a DHCP network. 3 beeps signal connection to the web server.
NOTE
: If using a Static Network Address, please see the document Accessing and Navigating the RAP.


