10
4.1 PROPER SET UP
The Krankcycle was designed explicitly for upper body and
cardiovascular training. To maximize exercise effectiveness and comfort,
the Krankcycle should be adjusted for each user and exercise position. The
instructions below describe one approach to adjusting the cycle to ensure
optimal user comfort and ideal body positioning: you may choose to adjust
the cycle differently.
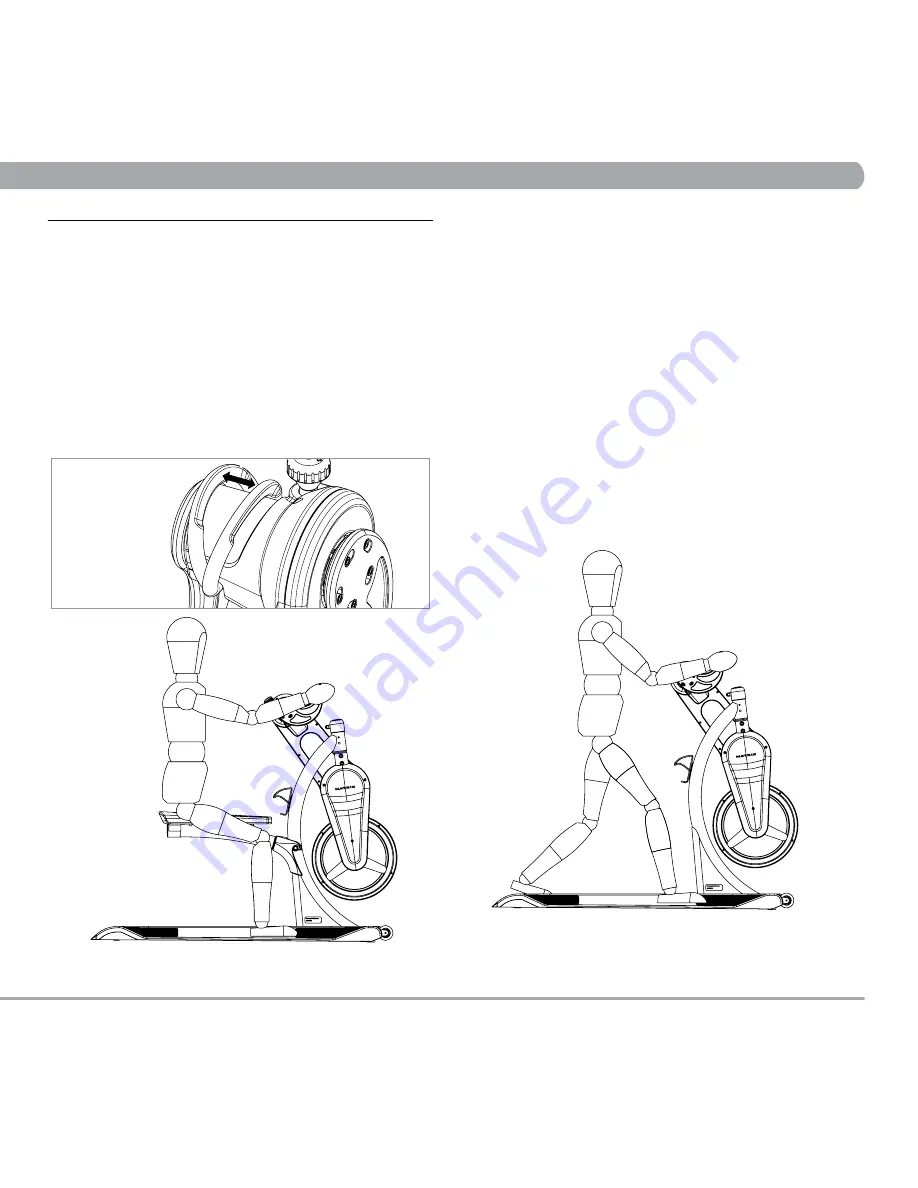
CRANK HEIGHT ADJUSTMENT
While seated on the Krankcycle, grab the upper crank axis with both hands,
press the height adjustment lever towards the outer edge of the crank axis,
lifting or lowering the crank axis until it is in line with the center of the
chest. Release the lever to lock into position. Crank handles should not hit
the thigh when rotated.
!WARNING!
Make sure height adjustment mechanism is locked into posi-
tion before you begin Kranking.
With your back straight, position yourself on the saddle so that there is a
slight bend in the elbow when the crank arm is in the furthest position away
from the body.
CHAPTER 4:
u
sinG
t
he
K
ranKcycle
To Krank while standing, stand with your back straight and your feet
shoulder width apart. Position yourself so there is a slight bend in the elbow
when the crank arm is in the furthest position away from the body. Adjust
the crank height if necessary.


