50
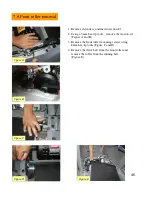
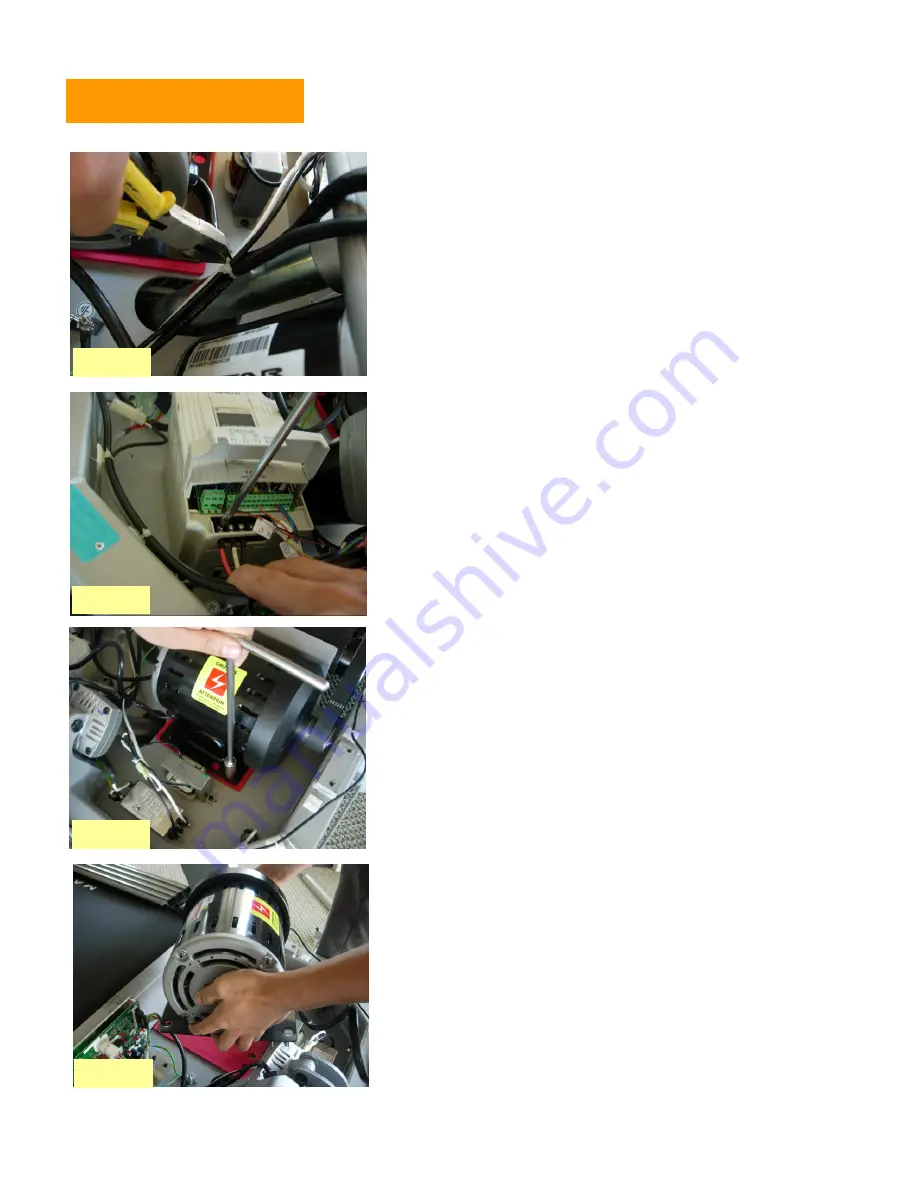
7.10 Motor removal
1. Remove the front shroud as outlined in
section 8.1
2. Release drive belt tensioner as described in
section 8.5
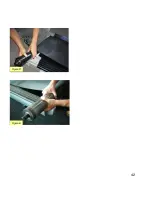
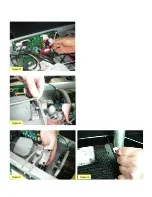
3. Cut any wire ties (Figure A)
3. Disconnect the motor power cable from the
inverter (Figure B)
4. Using the 8mm Allen wrench, remove 4 motor
mounting screws (Figure C)
5. Lift the motor away from the treadmill
(Figure D)
6. When reinstalling the motor, make sure the
red vibration pad is in place.
Figure A
Figure B
Figure C
Figure D
Summary of Contents for MX-T3x
Page 1: ...1 MX T3x TM94E AC SYSTEM SERVICE MANUAL...
Page 4: ...4 SERIAL NUMBER LOCATION SECTION 1...
Page 5: ...5 Matrix T3x TM94E Serial Number Location...
Page 6: ...6 MOVING THE UNIT SECTION 2...
Page 8: ...8 IMPORTANT SAFETY I N S T R U C T I O N S SECTION 3...
Page 12: ...12 PREVENTATIVE MAINTENANCE SECTION 4...
Page 19: ...19 SECTION 5 MANAGER MODE...
Page 23: ...23 SECTION 6 TROUBLE SHOOTINGS...
Page 24: ...24 6 1 Electrical block diagram...
Page 25: ...25 6 2 Wire pin definition P01 Console Wire...
Page 26: ...26 P04 Inverter Wire N24 Pulse Board Wire...
Page 27: ...27 P11 CTRL Overlay Wire Left P12 CTRL Overlay Wire Right...
Page 35: ...35...
Page 39: ...39 SECTION 7 PARTS REPLACEMENT...
Page 42: ...42 Figure D Figure E...
Page 53: ...53 Figure D Figure E Figure F Figure G...
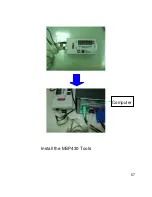
Page 57: ...57 Install the MSP430 Tools Computer...
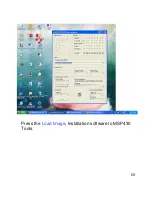
Page 58: ...58 Press the Load Image Installation software to MSP430 Tools...
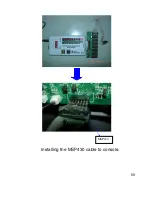
Page 59: ...59 Installing the MSP430 cable to console MSP430...
Page 61: ...61 SECTION 8 UPGRADES...

