43
9.11 loWeR SeAT fRAMe RePlACeMeNT
1) Remove the seat pad as outlined in Section 9.6.
2) Remove the back pad as outlined in Section 9.7.
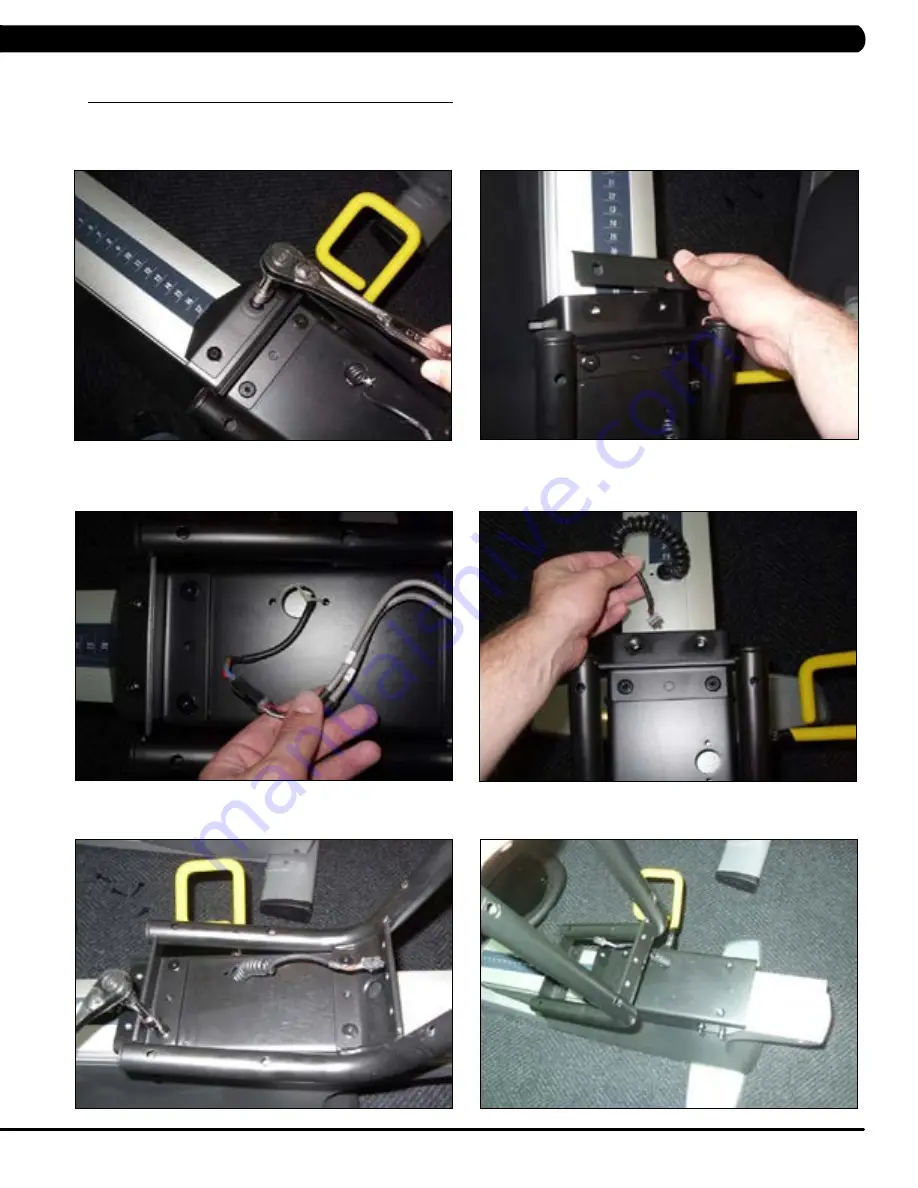
3) Remove the 2 screws holding the seat position plate onto the seat frame and remove the seat position plate (Figures A & B).
4) Disconnect the HR wiring that is exposed when the seat pad is removed and slide it out the hole in the frame so it does not restrict the seat
movement (Figures C & D).
5) Remove the 4 screws holding the upper seat frame onto the lower seat frame and remove the upper seat frame (Figures E & F).
figURe A
figURe B
figURe C
figURe D
figURe e
figURe f
CHAPTeR 9: PART RePlACeMeNT gUiDe
Summary of Contents for R5x-04
Page 1: ...R 5 x 0 4 B i k e S E R V I C E M A N U A l ...
Page 17: ...14 8 1 Electrical Diagrams chapter 8 Troubleshooting HURES5x C Electrical block diagram ...
Page 18: ...15 8 1 Electrical Diagram CONTINUED Chapter 8 Troubleshooting r5x F Electrical block diagram ...
Page 23: ...20 Chapter 8 Troubleshooting 8 4 LCB wiring connectionS ...
Page 75: ...72 NOTES ...


