7
GB
INSTALLATION
* All images are for reference
only; please refer to your
individual unit for actual item.
1
2
4
3
6
5
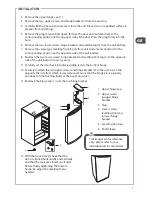
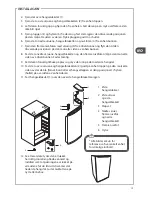
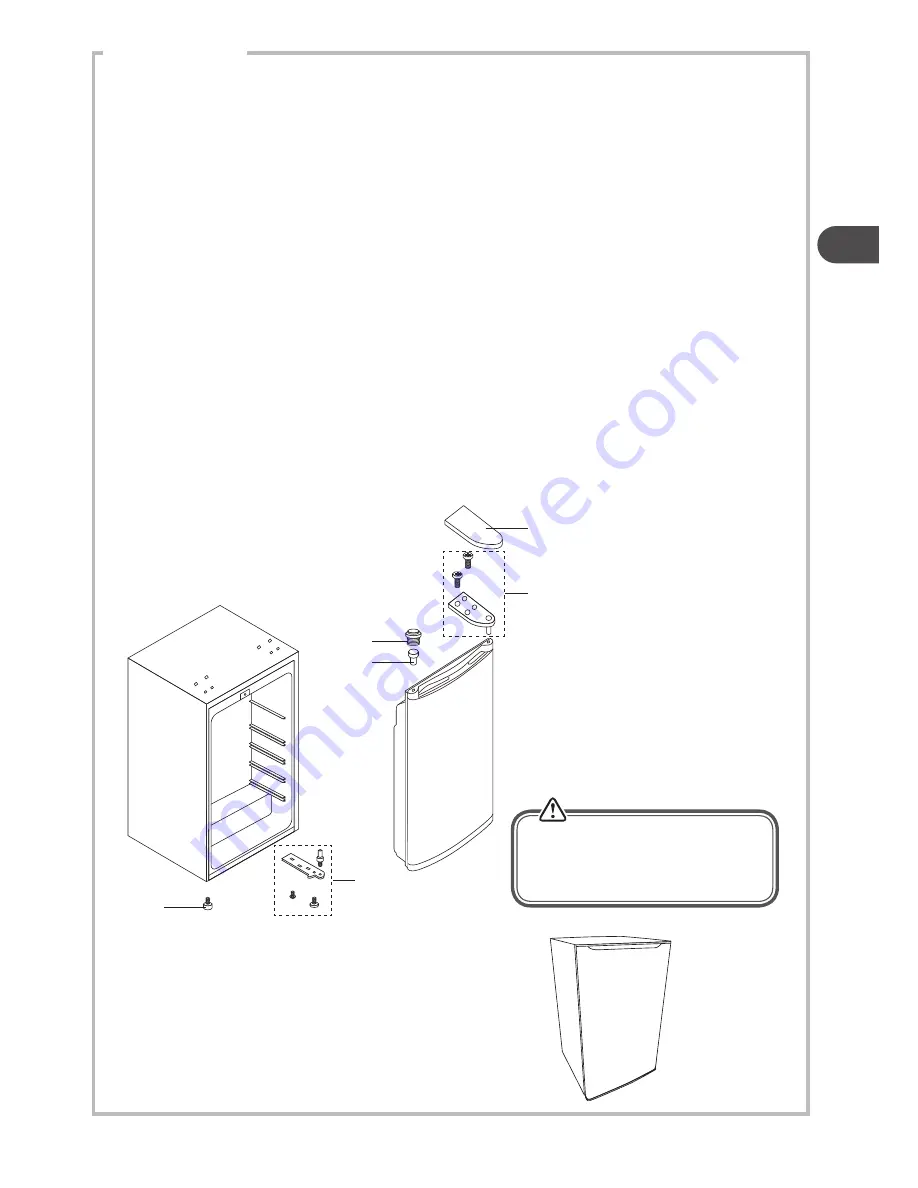
2. Remove the upper hinge cap (1).
3. Remove the two upper screws and hinge bracket (2) from the unit top.
4. Carefully lift the door up and remove it from the unit. Place door on a padded surface to
prevent from scratching.
5. Remove the plug (3) and shaft sleeve (6) from the door and reattach them to the
corresponding position on the opposite side of the door. Press the plug firmly into the
hole.
6. Remove the two lower screws, hinge bracket and levelling leg (4) from the unit bottom.
7. Remove the screw-type levelling front leg (5) from unit bottom and transfer it to the
corresponding position on the opposite side of the unit bottom.
8. Reattach the two lower screws, hinge bracket and levelling front leg (4) to the opposite
side of the unit bottom. Loosely secure.
9. Carefully set the door back into place, sliding it onto the bottom hinge.
10. Securely reattach the two upper screws and hinge bracket (2) to the unit top on the
opposite the side from which it was removed. Ensure that the hinge pin is properly
positioned in the bushing (hole) at the top of unit door.
11. Reattach the hinge cap (1) over the top hinge bracket.
1 Upper hinge cap
2 Upper screws
& upper hinge
bracket
3 Plug
4 Lower screws,
levelling front leg
& lower hinge
bracket
5 Levelling front leg
6 Shaft Sleeve
12. With the door closed, check that the
door is aligned horizontally and vertically
and that the seals are closed on all sides
before finally tightening the bottom
hinge. Re-adjust the levelling feet as
needed.


