W
indy31
Q
uick
I
nstallation
G
uide
Windows VISTA
9
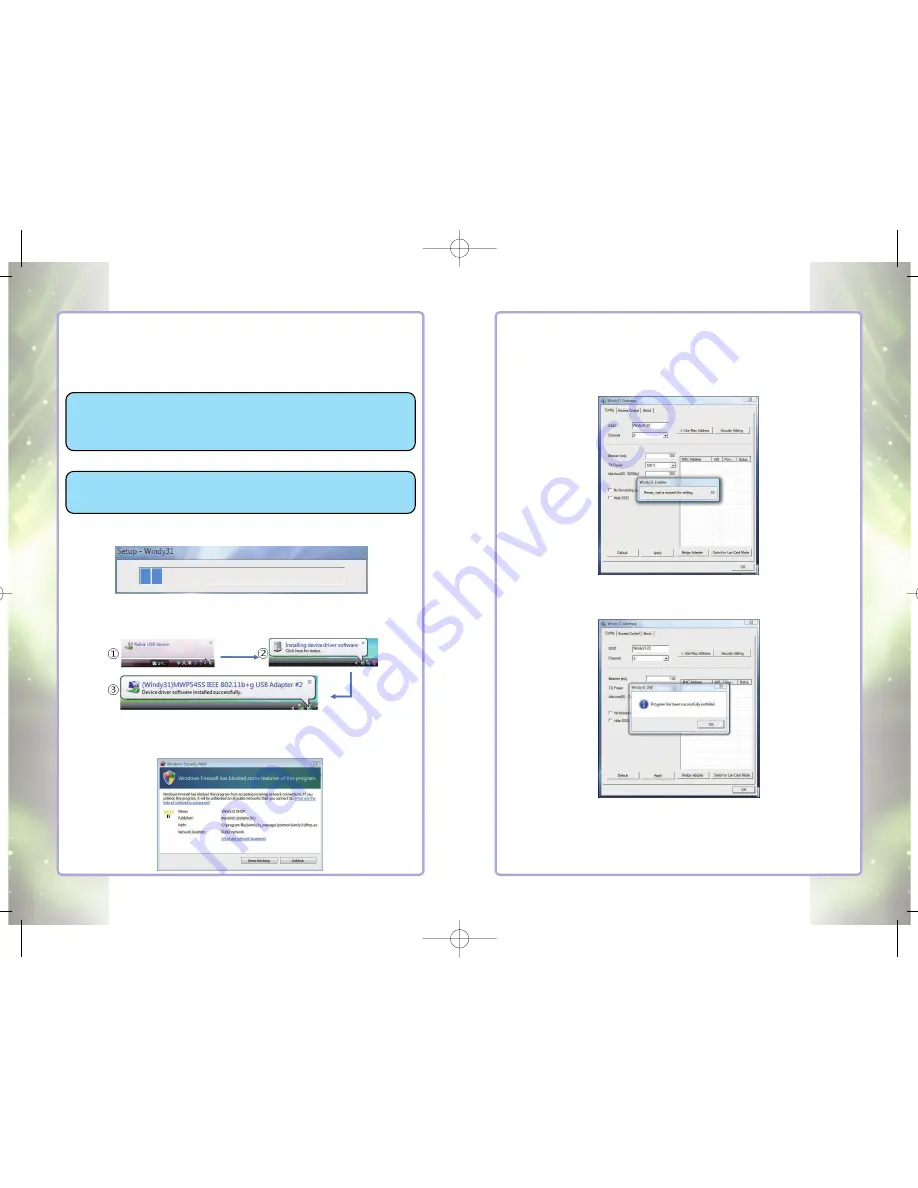
3) Please wait until “Windy31 Gateway Manager”window appears,
“Windy31 setting in-progress" and "setting complete" windows will be
displayed as shown below. This process will take a few minutes as it
installs Windy31 Gateway. (Installation time may differ according to
computer configuration)
4) In Step 3, After the “Program has been successfully installed“
message, click “OK”. Windy31 has completed the installation.
Connection method may differ according to Wireless LAN device, please
refer to Wireless LAN usage method. (For wireless device usage method,
please refer to wireless device product manual or please contact the
provider.)
W
ir
eless
B
roadband
R
outer
8
Windows VISTA
Windows VISTA
Installing Windy31
■
■
Checklist before installing
Computer to be installed with Windy31 must have more than one
LAN Adapter.
Computer to be installed with Windy31 must have Internet
connection.
■
■
Installation
Please check your computer for Virus and Spyware before
installation. Some Viruses and Spywares may interfere with
automatic installation of Widny31 driver and utility programs
1) Insert Windy31 into USB port of your laptop or desktop PC,
and program will automatically run as shown below
2) Once the program is installed, the following screen will appear on
the bottom right of the screen, indicating that the USB deviceis
acknowledged and the installation of Windy31 is in progress.
During installation, Windows Security Alert may display
“
Keep blocking
”
&
“
Unblock
”
pop-up for security reasons, please select the button
“
unblock
”
.
(If you select
“
keep blocking
”
, there will be no network connection.)
윈디31 메뉴얼 (150qn) 4도 2008.9.11 2:0 PM 페이지8


