background image

10

DRIVING FASTENERS

NOTE :

This tool is shipped with SEQUENTIAL TRIP selected.

SEQUENTIAL TRIP

The Sequential Trip requires the operator hold the tool against 
the work before pulling the trigger.
This makes accurate fastener placement easier, for instance on 
framing, toe nailing and crating applications.
The Sequential Trip allows exact fastener location without the pos-
sibility of driving a second fastener on recoil, as described under 
"Contact Trip".
The Sequential Trip Tool has a positive safely advantage be-
cause it will not accidentally drive a fastener if the tool is contact-
ed against the work or anything else-while the operator is holding 
the trigger pulled.

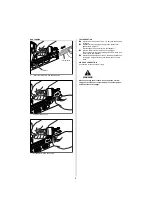
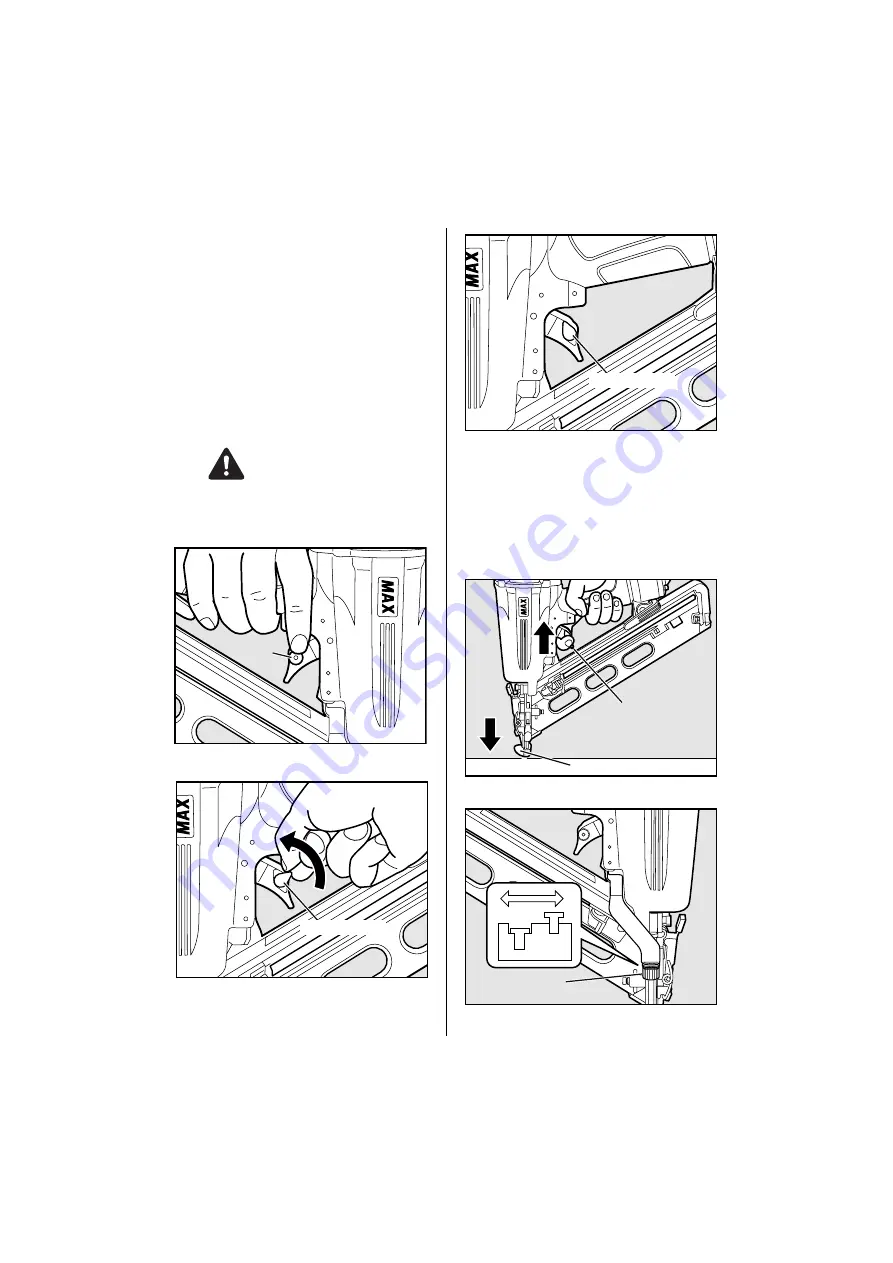
Switching SEQUENTIAL TRIP to CONTACT TRIP

ALWAYS-disconnect air supply before switching the trigger-
ing method.

1

Press the button on the trigger.

2

Turn the switching lever in the direction of the arrow.

3

 Set the switching lever as above picture.

CONTACT TRIP

The common operating procedure on "Contact Trip" tools is for 
the operator to contact the work to actuate the trip mechanism 
while keeping the trigger pulled, thus driving a fastener each time 
the work is contacted. 
All pneumatic tools are subject to recoil when driving fasteners. 
The tool may bounce, releasing the trip, and if unintentionally al-
lowed to recontact the work surface with the trigger still actuated 
(finger still holding trigger pulled) an unwanted second fastener 
will be driven.

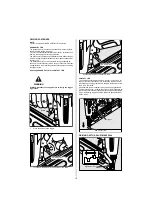
DRIVING DEPTH ADJUSTMENT DIAL

WARNING

Button

Switching lever

Switching lever

Trigger

Contact arm

Adjustment dial

Summary of Contents for NF665/15

Page 1: ...KEEP THESE INSTRUCTIONS WITH THE TOOL FOR FUTURE REFERENCE AVANT D UTILISER CET OUTIL LIRE CE MANUEL ET LES CONSIGNES DE S CURIT AFIN DE GARANTIR UN FONCTIONNEMENT S R CONSERVER CE MANUEL EN LIEU S R...

Page 2: ...une situation ventuellement dangereuse qui si elle n est pas contourn e pourrait provoquer la mort ou des blessure s rieuses ATTENTION Indique une situation ventuellement dangereuse qui si elle n est...

Page 3: ...9 and provide both frontal and side protection The employer is responsible to enforce the use of eye pro tection equipment by the tool operator and all other person nel in the work area NOTE Non side...

Page 4: ...bar as the tool can burst 3 DO NOT OPERATE THE TOOL NEAR A FLAMMABLE SUBSTANCE Never operate the tool near a flammable substance e g thinner gasoline etc Volatile fumes from these substanc es could b...

Page 5: ...G THE FASTENERS AFTER COMPLETING OPERATION If fasteners are left in the magazine after the completion of operation there is the danger of a serious accident occur ring prior to the resumption of opera...

Page 6: ...Always carry the tool by the grip never carry the tool by the air hose The tool must be used only for the purpose it was designed Never remove tamper with the operating controls e g TRIGGER CONTACT A...

Page 7: ...2 These values are determined and documented in accord ance with ISO 8662 11 This value is a tool related characteristic value and does not represent the influence to the hand arm system when using th...

Page 8: ...ly 6 Check the air leakage The Tool must not have the air leakage 7 Hold the Tool with finger off the trigger then push the con tact arm against the work piece The tool must not oper ate 8 Hold the To...

Page 9: ...fire the fastener 3 With the tool off the work piece pull the trigger Then depress the connect arm against the work piece The tool must fire the fastener 4 Adjust the air pressure as much as the lowe...

Page 10: ...d Switching SEQUENTIAL TRIP to CONTACT TRIP ALWAYS disconnect air supply before switching the trigger ing method 1 Press the button on the trigger 2 Turn the switching lever in the direction of the ar...

Page 11: ...ils to a soft material Use the contact tip at the back of the rear side of the magazine as necessary CLEARING JAMMED NAILS ALWAYS disconnect air supply before clearing jammed nails 1 Disconnect the ai...

Page 12: ...th the jet oiler Recommended Oil ISO VG32 5 INSPECT AND MAINTAIN DAILY OR BEFORE OPERA TION Disconnect air supply and empty the magazine when inspect ing or maintaining the tool 1 Drain air line filte...

Page 13: ...the quality of our products Les caracteristiques et la conception des produits mentionnes dans ce manuel sont sujettes a des modifications sans preavis en raison de nos efforts continus pour ameliore...

Reviews: