60
61
MAXDATA SN 40 M1 – User Guide
Managing Your Storage System
60
61
MAXDATA SN 40 M1 – User Guide
Managing Your Storage System
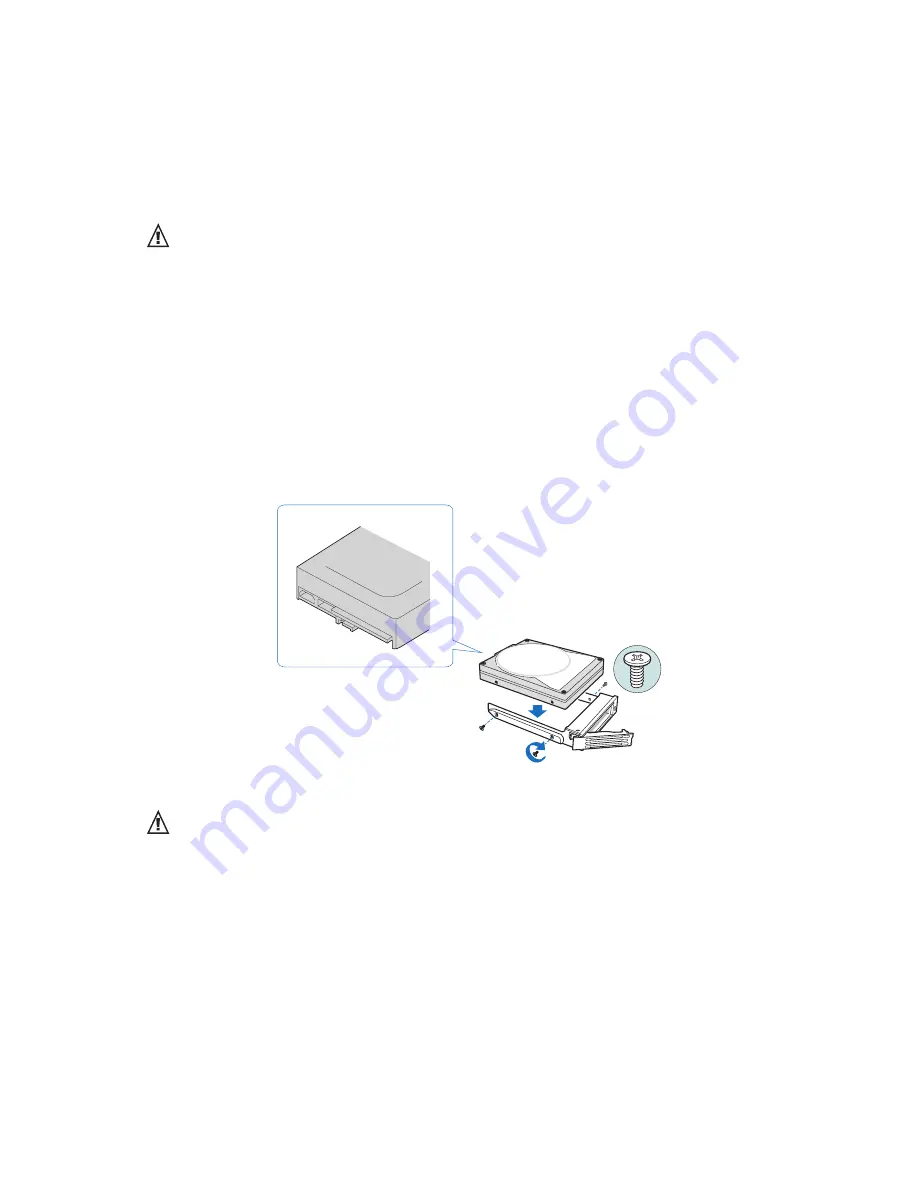
5. Remove the four screws that attach the defective hard disk to the drive carrier. Two screws
are located on each side of the drive carrier.
Note
Store the plastic retention device for future use.
6. Remove the hard disk from its wrapper and place it on an anti-static surface.
Important
Make sure the hard disk is a SATA disk.
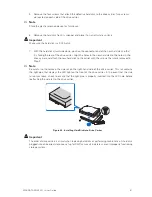
7. With the hard disk circuit-side down, position the connector end of the new hard disk so that
it is facing the rear of the drive carrier. Align the holes in the new hard disk to the holes in the
drive carrier and attach the new hard disk to the carrier with the screws that were removed in
Step 5.
Note
Be careful not to remove the side rail on the right-hand side of the drive carrier. This rail contains
the light pipe that displays the LED light on the front of the drive carrier. In the event that the side
rail comes loose, check to ensure that the light pipe is properly inserted into the LED hole before
reattaching the side rail to the drive carrier.
Figure 30. Installing Hard Disk into Drive Carrier
Important
The order of drive carriers is critical when replacing hard disks or performing maintenance. A hard disk
plugged into an incorrect slot once set up for RAID can result in data loss or an improperly functioning
storage system.
Summary of Contents for SN 40 M1
Page 1: ...User Guide MAXDATA SN 40 M1 Rev 1 1...
Page 2: ...2 Contents...
Page 6: ...6...
Page 32: ...32...
Page 84: ...84...

