25
Settings of the video and audio input sources
Refer to section “Media I/O” to setup video & audio input sources.
(
If you use HDMI input, make the following settings.
Go to [Media I/O]
[Video inputs]
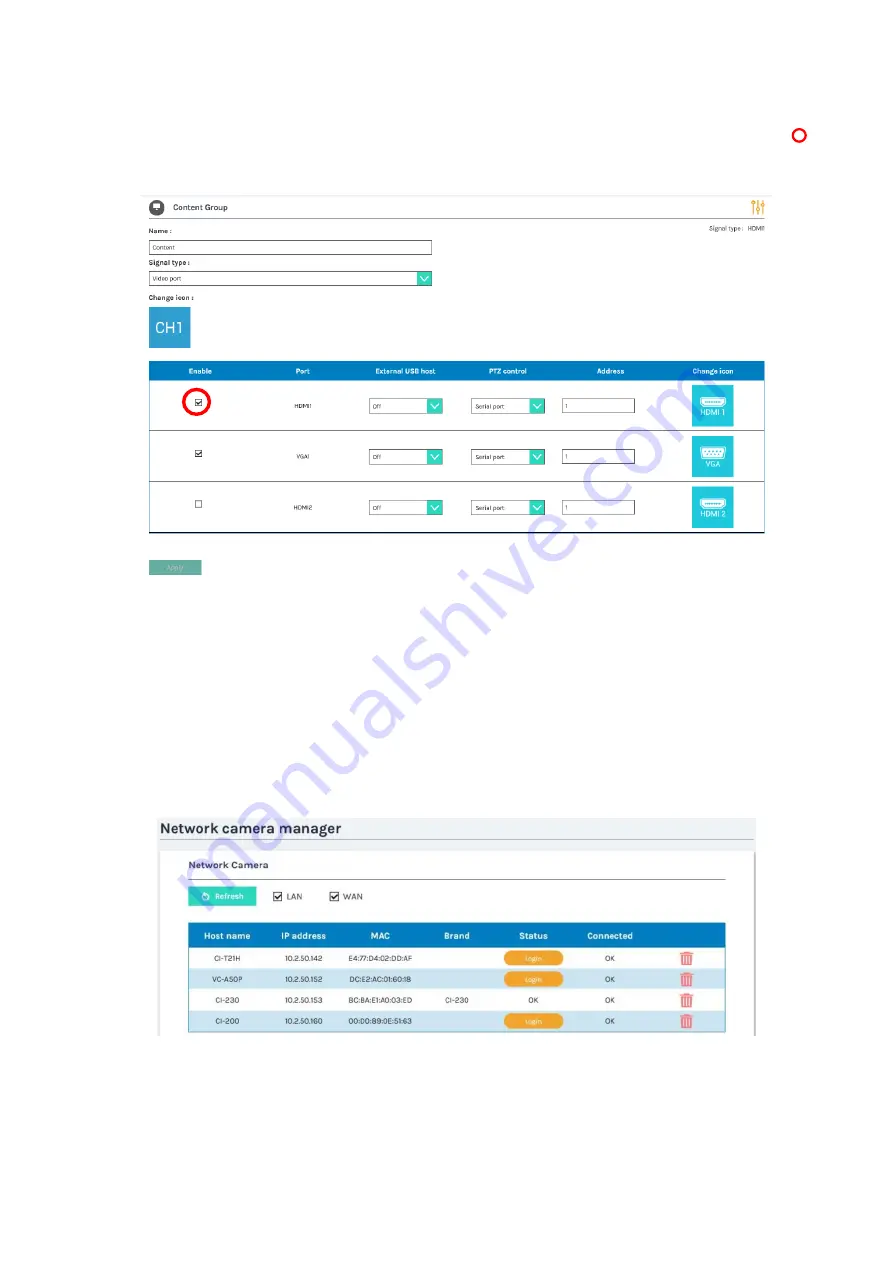
Select the Enable checkbox of the HDMI port number to which the
HDMI output device is connected. For example, if CH1 is selected, select the Enable checkbox of
in
the following figure.
If you use network camera, make sure it comply with standard ONVIF before the setting.
Then check if the RJ45 is well connected with the product LAN port and the camera is ON.
Check Camera’s product label and remember the MAC address of the camera.
Come back to Administration webpage.
Go to [Media I/O]
[Network Camera Manager]
Press [Refresh] button
The network camera should be listed in the table and using
MAC
address to identify the one in use.
Press “Login” button and input camera’s account name and password* to pass authentication until
“Status” shows “OK”.
Remember the IP address of the camera.
*: To know camera’s account name and password, please refer to the manual of the
network camera.
(continued on next page)
Summary of Contents for MA-XL1
Page 28: ...28 Settings of the conference function continued ...
Page 36: ...36 Playback continued Video playback mode continued on next page ...
Page 85: ...85 Auto Layout continued continued on next page ...
Page 86: ...86 Auto Layout continued continued on next page ...
Page 87: ...87 Auto Layout continued continued on next page ...
Page 88: ...88 Auto Layout continued continued on next page ...
Page 89: ...89 Auto Layout continued ...


