Page 6 of 13 pages
18.
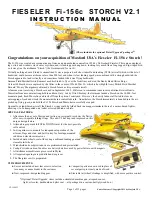
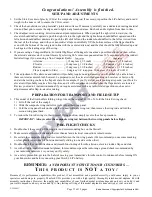
Position the preassembled landing gear‟s A-arms (with their attached axles and wheels) on the
bottom of the fuselage.
19.
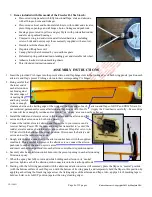
Use the supplied screws and metal straps to attach the A-arms to the fuselage as shown below.
The landing gear on this model is similar to that on the original Storch in that the upper end of each
strut is solidly attached to the fuselage; the lower end of each strut connects to an A-arm, and each A-
arm has its own axle and wheel. At a normal flying weight (including the motor, battery, etc.) and at
rest on its landing gear, the Storch‟s A-arms may spread apart to some extent and the springs inside
the struts may slightly compress, splaying or spreading apart the wheels. The landing gear returns to
its more upright and „together‟ position in the air. Serious hobbyists may obtain a slight improve-
ment in smooth landing gear articulation over out-of-the-box settings by carefully reshaping the
wires at the strut, axle and/or A-arm, and by adding a drop of light machine oil in the area of the
spring near the midsection of each strut.
20.
Ensure the wheel and landing gear mounting bolts are secure. (We also recommend you also
apply a tiny „drop‟ of hot-melt glue to „vibration-proof‟ the wheels on their axle-bolts.)
21.
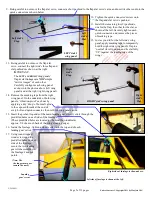
Insert the elevator‟s provided CA hinges into the precut hinge slots in the trailing edge of the
horizontal stabilizer. Making sure the covering material is the same color on matching sides of
the elevator and horizontal stabilizer, slide the elevator‟s precut CA hinge slots onto their
corresponding CA hinges.
22.
Being careful to leave enough clearance between the trailing edge of the horizontal stabilizer and
the front edge of the elevator so full UP and DOWN travel is not restricted, permanently secure
the elevator to the horizontal stabilizer with thin CA. (Apply the CA adhesive carefully – Excess
drips or runs will leave unsightly residue and/or „smoky‟ or „cloudy‟ areas on nearby surfaces.)
23.
Test-fit the horizontal stabilizer in its precut horizontal slot at the end of the
fuselage. Remove the excess covering material at the center section of the horizontal
stabilizer to ensure good wood-to-wood gluing-surfaces between the horizontal
stabilizer and the end of the fuselage.
24.
Insert the elevator‟s pushrod from the rear of the fuselage. Guide the elevator‟s
pushrod through a quick-connector on your elevator servo‟s control arm. Bend the
aft end of the pushrod to align the Z-bend in the end of the pushrod with the slot in
the bottom left of the elevator that will be used to mount the elevator‟s control horn.
25.
With the horizontal stabililzer and the elevator‟s pushrod properly adjusted, apply
30-minute epoxy to secure the horizontal stabilizer in its slot at the end of the fuselage. Attach the elevator‟s control horn to
the elevator‟s pushrod and use 30-minute epoxy to secure the control horn into its slot in the elevator.
26.
While the 30-minute epoxy remains workable, test-fit the vertical stabilizer in its opening above the horizontal stabilizer,
make any necessary final adjustments, then apply CA adhesive at all accessable points of contact be-
tween the vertical stabilizer and the fuselage to secure the vertical stabilizer to the rear of the
fuselage and make a final check to ensure the vertical and horizontal stabilizers, elevator and
elevator‟s control horn are accurately positioned, then set the fuselage aside to let the epoxy cure.
27.
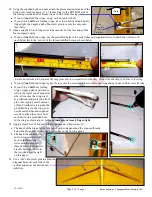
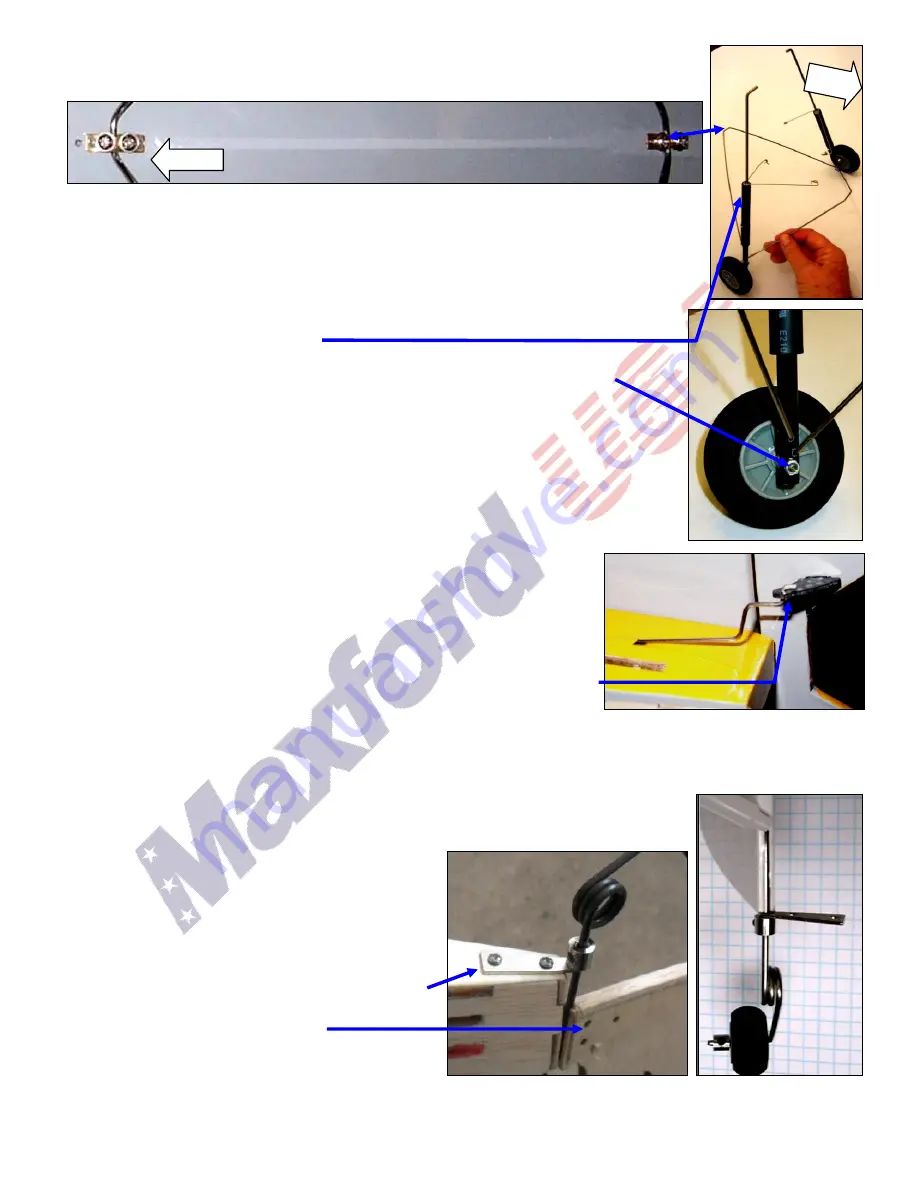
Test-fit the tail wheel‟s strut into its opening at the front of
the rudder. If necessary, cut any Mylar covering the
opening for the tail wheel‟s strut.
28.
Apply CA adhesive to secure the strut into its opening in
the rudder and attach the rudder to the vertical stabilizer
with CA hinges and thin CA adhesive.
29.
Use two 5/16-inch wood screws to attach the tail wheel
strut‟s metal mounting base to the bottom of the fuselage.
30.
Fit the rudder‟s control-arm onto the rudder pushrod‟s
Z-bend and attach the horn to the rudder.
Forward.
Forward
.
V.2-150423
Entire Contents © Copyright 2013 by Maxford USA

