Page
10
of
13
There is a 3" piece of 1/4" square balsa provided in the kit which you can use to
reinforce the lower joint between the extension assembly and the rear former of the
fuselage.
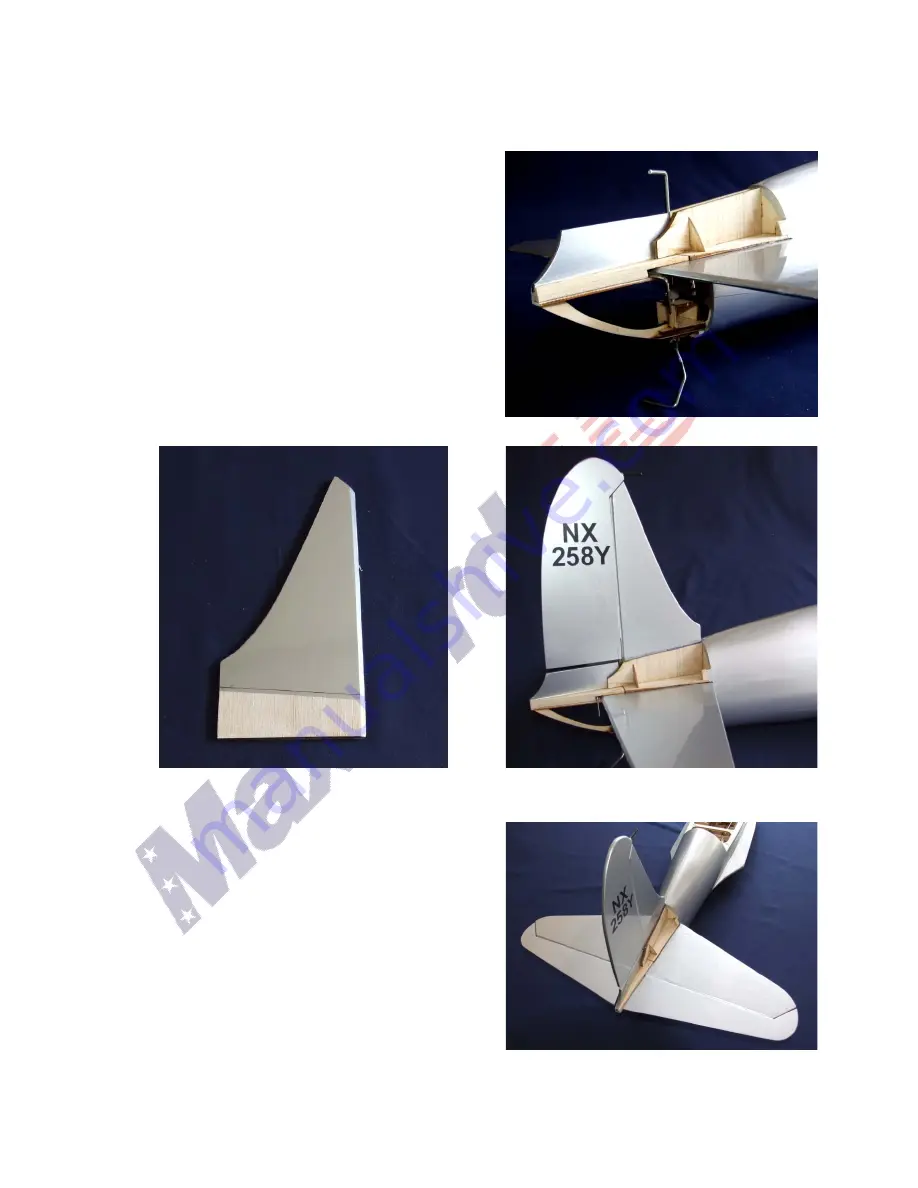
Locate the top rear fuselage extension and
The [ shaped wire elevator joiner. Slide the
top extension on
with the elevator joiner
between the extension and the stabilizer
.
Glue the extension in place. (See photo.)
INSTALL THE FIN AND RUDDER AND
THE ELEVATOR:
Slide the vertical fin into its slot, draw a line
on each side and remove the covering as
you did on the stabilizer. Glue the fin in
place.
Slide the rudder onto the tail wheel strut and
install the rudder to the fin as you did the
elevators. You may have to loosen the set
screws on the steering arm and the wheel
collar so that the strut can move up or down
to set the rudder at the right height.
Don't forget to retighten the set screws.
Insert the elevator joiner wire into the factory
drilled holes and install the elevators to the
stabilizer using the same hinging techniques
that you used for the ailerons.
NOTE:
The elevator with the predrilled holes for the
control horn goes on the
left
side.


