background image


- 24 - 

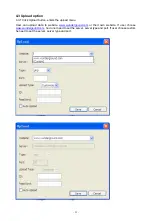
Note: How to create a Wunderground.com® account and station ID.


1.  Join the wunderground.com® Community.    Visit: 

 https://www.wundergro und.com/members/signup.asp 

 and sign up with wunderground.com®. 


2.  Join the Personal Weather Station (PWS) network. Visit: 


http://www.wunderground.com/weatherstation/about.asp


 and Get Started! to add your weather station and you will receive a Station ID. 

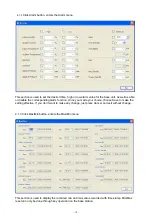
Enter the Station ID obtained and password you use to log into wunderground.com® site .


Please Note: Make sure you enter the ID in all capitals, and the password exactly as you 
chose it, both fields are case sensitive. 
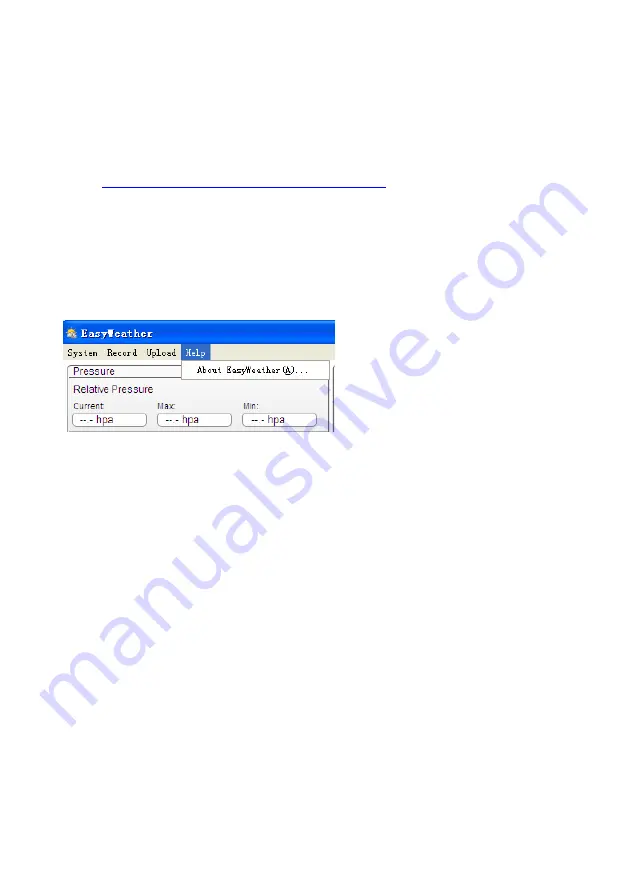


4.4 Help option 


Click About EasyWeather button, enters the About menu 


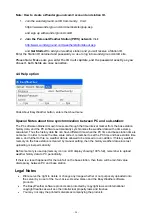
Special Notes about time synchronization between PC and sub-station: 


The PC software obtained its own time scale through the time interval marker from the base station 
history data, and the PC software automatically synchronizes the weather data with a time stamp 
calculated. Thus the history data file can have different time when the PC time and base station time is 
not same. In order to make the time scale correct, remember to set the PC time and base station time 
same, and further to this, no weather data is allowed to be missed or over-written. If history weather 
memory on the base station is cleared by manual setting, then the history weather data since last 
uploading is lost permanently. 


Before memory is used up(memory icon on LCD display showing 100% full), remember to upload 
weather history data to PC periodically. 


If there is a reset happened for the rain fall on the base station, then there will be rain fall value 
discrepancy between PC and base station.   


Legal Notes 


We reserve the right to delete or change any image whether or not purposely uploaded onto 
the server by a user of the 

Touch Screen Weather Station

 and the EasyWeather software 

products.  


The EasyWeather software products are protected by copyright laws and international 
copyright treaties as well as other intellectual property laws and treaties.     


You may not copy the printed materials accompanying the products. 


Summary of Contents for WS-1081PC

Page 1: ...e ABSOLUTE AIR PRESSURE Absolute air pressure is the actual air pressure on the barometer without regard to altitude INCHES OF MERCURY inHg Inches of Mercury are the common unit of measurement for air...

Page 2: ...uch screen by slightly touching not pressing the related areas touch the flashing ON OFF or to make the corresponding selection or increase the value Every time a programming step is activated by touc...

Page 3: ...3...

Page 4: ...ut on the wind direction sensor The wind direction sensor s cable is connected to the input marked Wind on the thermo hygro sensor see fig 6 The rain sensor s cable is connected to the input marked Ra...

Page 5: ...transmitter the LED located in the middle front case of transmitter will be turned on for 4 seconds then it will be off and start to work normally The transmitter will make a data transmission When th...

Page 6: ...ime by touching any other function area except or ON OFF indoor temperature Activate the indoor temperature related setting by 1 Touch the INDOOR TEMPERATURE section button and button will be flashing...

Page 7: ...ep Touch the ON OFF button to choose the alarm on or off if alarm is enabled the speaker icon will be turned on indicating the alarm function has been enabled 4 Touch the OUTDOOR TEMPERATURE section t...

Page 8: ...lue will be flashing MIN icon will light up as well Hold the minimum value for 3s the minimum value will be reset to current reading Outdoor humidity Procedures and settings are similar to Indoor humi...

Page 9: ...cating the alarm function has been enabled 4 Touch the rain section the fourth time to display current maximum rain fall record Touch the rain section for 3s will reset the maximum rain fall value to...

Page 10: ...step Touch the ON OFF button to choose the alarm on or off if alarm is enabled the speaker icon will be turned on indicating the alarm function has been enabled 6 Touch the PRESSURE sections the sixt...

Page 11: ...ime button and button will be flashing Touch the button or button to set the day Hold the button or button for 3s to change the number in great step 6 Touch the DATE section the sixth time button and...

Page 12: ...PC takes place by means of an included USB cable The EasyWeather software package also included in the shipping contents must be installed on the PC This software allows the display of all present wea...

Page 13: ...ll take about two minutes to upload all history data into PC and it takes another two minutes to process all history data for graphic display Further detailed PC software user manual can be found from...

Page 14: ...rvation of the environment and return used batteries to an authorized depot All rights reserved This handbook must not be reproduced in any form even in excerpts or duplicated or processed using elect...

Page 15: ...y at least 128MB 256MB recommended CD ROM Drive Base Station and PC must be connected by USB cable 3 0 Installation of the EasyWeather Software Firstly the Base Station and the Outdoor Sensors should...

Page 16: ...need to make any setting changes on the PC software However you can still easily make any setting changes you wanted from the PC and download the changes into the base station the setting change will...

Page 17: ...4 1 System option 4 1 1 Click System button enters the Setting menu This section is used to set up PC software display base station units Once you made your choice press Save to make the setting effec...

Page 18: ...ding alarm function Once you made your choice choose Save to make the setting effective If you don t want to make any change just press Cancel and exit without change 4 1 3 Click Max Min button enters...

Page 19: ...nu This section is used to display recorded history data in a spread sheet If you wanted to see all history data in a desired time period choose the time duration and press Search to reload the histor...

Page 20: ...history record press Clear Data button to clear up the data base all history weather data will be deleted if you would like to keep a back up history file before deleting all weather data you can make...

Page 21: ...21 With the Export as image button you can export the selected graph into jpeg format file You can change the Y axel by scrolling the mouse up and down roller...

Page 22: ...the following step 1 find the folder where the EasyWeahter exe file is located 2 Create a file name reg_graph bat file with wordpad or notepad editor program 3 Type regsvr32 easyweather ocx and save t...

Page 23: ...ers the upload menu User can upload data to website www wundergound com or their own website If user choose www wundergound com he do not need to set the server server type and port If user choose cus...

Page 24: ...culated Thus the history data file can have different time when the PC time and base station time is not same In order to make the time scale correct remember to set the PC time and base station time...

Reviews: