background image

4

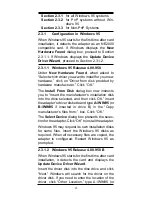
Section 2.3.1 for all Windows 95 systems
Section 2.3.2 for PnP systems without Win-

dows 95

Section 2.3.3 for Non-PnP Systems

2.3.1

Configuration in Windows 95

When Windows 95 starts for the first time after card
installation, it detects the adapter as an NE2000
compatible card. If Windows displays the New
Hardware Found
 dialog box, proceed to Section
2.3.1.1. If Windows displays the Update Device
Driver Wizard
, proceed to Section 2.3.1.2.

2.3.1.1 Windows 95 Release 4.00.950

Under  New Hardware Found, when asked to
“Select which driver you want to install for your new
hardware,” click on “Driver from disk provided by
hardware manufacturer.” Click “OK.”

The Install From Disk dialog box now instructs
you to “Insert the manufacturer's installation disk
into the drive selected, and then click OK.” Insert
the adapter's driver diskette and type A:\WIN95 (or
B:\WIN95 if inserted in drive B) in the “Copy
manufacturer's files from:” box. Click “OK.”

The Select Device dialog box presents the selec-
tion for the adapter. Click “OK” to install the adapter.

Windows 95 may request its own installation disks
for some files. Insert the Windows 95 disks as
required. When all necessary files are copied, the
adapter is configured. Restart Windows 95 as
prompted.

2.3.1.2 Windows 95 Release 4.00.950 B

When Windows 95 starts for the first time after card
installation, it detects the card and displays the
Update Device Driver Wizard.

Insert the driver disk into the disk drive and click
“Next.” Windows will search for the driver on the
driver disk. If you need to enter the location of the
driver, click “Other Location,” type A:\WIN95 (or

Summary of Contents for NXP-16

Page 1: ...Part MAN107 Rev 1 0 NX16BT D NXP 16 USER S GUIDE High Performance Plug and Play 16 bit Ethernet Adapter...

Page 2: ...include a 16KB RAM buffer for improved net work transmission and reception Plug and Play is a set of specifications that define the ability for the computer hardware or operating system to automatica...

Page 3: ...2 1 Unpacking Your Network Adapter Two types of network adapter cards are available Before you proceed determine the model you have purchased The following table summarizes the contents and features...

Page 4: ...ity from your body 6 Carefully install the adapter by firmly press ing the card into the slot you have chosen applying even pressure until the adapter is completely seated in the slot 7 Fasten the ret...

Page 5: ...u to Insert the manufacturer s installation disk into the drive selected and then click OK Insert the adapter s driver diskette and type A WIN95 or B WIN95 if inserted in drive B in the Copy manufactu...

Page 6: ...card configuration from the one assigned select Setup change the Operating Mode to Jumperless and configure the adapter as outlined in Section 2 3 3 for legacy systems Continue to Section 2 4 to run...

Page 7: ...The Adapter AdapterdiagnosticsareincludedintheSETUP EXE program found in the root directory of the driver diskette Refer to the file README TXT in the same directory for detailed information Note To r...

Page 8: ...tween two cards One card is setup as a Re sponder and a second card is setup as an Initia tor The Initiator and Responder will exchange packets and display the number of transmit and receive packets t...

Page 9: ...om patible and can use the NE 2000 driver supplied with your network operating system Drivers for most popular network operating systems are in cluded on the driver diskette in separate subdirectories...

Page 10: ...e to use IRQ 4 COM1 or IRQ 3 COM2 Other adapters in your system may already use addresses 0300H or 0320H example sound audio card Vary the settingsonyournetworkadapterbyrunningSETUP again to eliminate...

Page 11: ...nductors and UL codes CM CMR and CMP are required The computer on the net work is connected via a star topology i e each node is connected to a HUB not to each other Maximum cable length is 300 100 m...

Page 12: ...2 SCO Unix Section Seven Technical Support Intheunlikelyeventyouexperiencedifficultyintheuseofthe product or if it does not operate as described we suggest you 1 consult the Troubleshooting section o...

Page 13: ...eduretoreturntheproductto MaxTech 1 Returntheproductinitsoriginalpackageandpack ing ifpossible andputitinasturdycorrugatedbox 2 Be sure to include your name address day time telephone number RMA numbe...

Page 14: ...reofthefollowingmeasures Reorientorrelocatethereceivingantenna Increasetheseparationbetweentheequipmentandthe receiver Connecttheequipmentintoanoutletonacircuitdifferent from that to which the receive...

Page 15: ...14 documentinanyformisallowedwithoutwrittenpermission fromthemanufacturer FirstEdition GZ DR Version 1 0...

Page 16: ...15...

Reviews: