background image

User Manual

EN

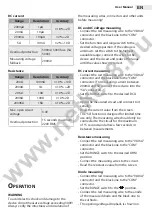
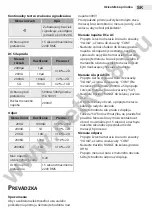
dC current

range

resolution

accuracy

2000μA

1μA

±1.8% +2D

20mA

10μA

200mA

100μA

±2% +2D

5A

10mA

±2% +10D

Overload protection

500mA 500V fuse (5A

500V)

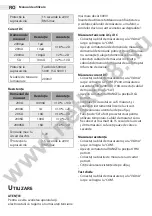
Measuring voltage 

fallback

200mV

resistance

range

resolution

accuracy

200Ω

100mΩ

±1.0%  +10D

2000Ω

±1.0%  +2D

20KΩ

10Ω

±1.0% +2D

200KΩ

100Ω

±1.0% 2D

2000KΩ

1KΩ

±1.0% +2D

Max. open circuit 

voltage

3.0V

Overload protection

15 seconds maximum 

220V RMS

o

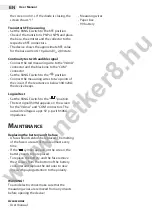
peration

Warning

To avoid electric shock and damage to the 

device do not measure voltage exceeding 300V! 

Always verify the intactness and insulation of 

the measuring wires, connectors and other units 

before measuring!

dC and aC voltage measuring

• 

Connect the red measuring wire to the “VΩmA” 

connector and the black one to the “COM” 

connector.

• 

Set the function and range switch to the 

desired voltage position. If the voltage is 

unknown, set the switch to the highest 

available range, connect the wires to the 

device and the circuit and reduce the range 

until the value shown is correct.

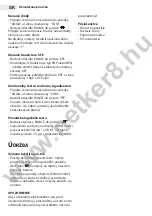
dC current measuring

• 

Connect the red measuring wire to the “VΩmA” 

connector and the black one to the “COM” 

connector. (For measuring current between 

200mA and 5A connect the red wire into the 

“5A” connector).

• 

Set the RANGE switch to the desired DCA 

position

• 

Open the measured circuit and connect to it 

serially.

• 

Read the current value from the screen. 

• 

The “5A” function is designed for limited time 

use only. The measuring wire should only be 

connected to the circuit for the maximum 

of 15 seconds and allow a few seconds in 

between measurements.

resistance measuring

• 

Connect the red measuring wire to the “VΩmA” 

connector and the black one to the “COM” 

connector.

• 

Set the RANGE switch to the desired OHM 

position.

• 

Connect the measuring wires to the circuit.

• 

Read the resistance value from the screen.

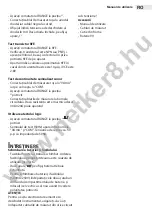
diode measuring

• 

Connect the red measuring wire to the “VΩmA” 

connector and the black one to the “COM” 

connector.

• 

Set the RANGE switch to the “ ” position.

• 

Connect the red measuring wire to the anode 

of the measured diode and the black one to 

the cathode.

• 

The opening voltage dropback is shown on 

www.netker8.hu

Summary of Contents for 25108

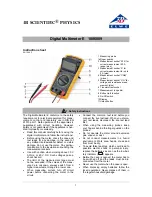
Page 1: ...utasítás Manual de utilizare Užívateľská príručka digital multimeter DIGITAL MULTIMETER digitális multiméter MULTIMETRU DIGITAL Digitálny multimeter Product code Produktcode Termékkód Cod produs Kód produkta 25108 DT700D i w w w n e t k e r 8 h u ...

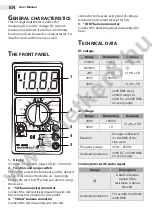
Page 2: ...nnector Connect the red measuring wire into this connector to measure every kind of voltage resistance and current except for 5A 5 COM banana connector Connect the black negative measuring wire here Technical data DC voltage Range Resolution Accuracy 200mV 100uV 0 5 3D 2000mV 1mV 1 0 5D 20V 10mV 200V 100mV 300V 1V 1 2 5D Overload protection 220V RMS AC at 200mV range és 300V DC or 300V RMS on ever...

Page 3: ...e range until the value shown is correct DC current measuring Connect the red measuring wire to the VΩmA connector and the black one to the COM connector For measuring current between 200mA and 5A connect the red wire into the 5A connector Set the RANGE switch to the desired DCA position Open the measured circuit and connect to it serially Read the current value from the screen The 5A function is ...

Page 4: ...ow 30Ω 20Ω the device beeps Logical test Set the RANGE switch to the position The test signal 50Hz appears on the screen for the VΩmA and COM connectors The outward voltage is appr 5V p p with 50KΩ impedance Maintenance Replacing the battery and the fuse A fuse should seldom be replaced The melting of the fuse is a result of misuse almost every time If the symbol appears on the screen the battery ...

Page 5: ...sleitung in diese Buchse zu 5A Strom zu messen 4 VΩmA Bananen Buchse Verbinden Sie das rote positive Messsleitung in diese Buchse zu alle Spannung Widerstand und Stromstärke außer 5A zu messen 5 COM Bananen Buchse Verbinden Sie das schwarze negativ Messsleitung in diese Buchse Technische Daten DC Spannung Messbereich Auflösung Genauigkeit 200mV 100uV 0 5 3D 2000mV 1mV 1 0 5D 20V 10mV 200V 100mV 30...

Page 6: ...stärkemessung Verbinden Sie die rote Messleitung mit dem VΩmA Anschluss und die schwarze Messleitung mit dem COM Anschluss zwischen 200mA und 5A Stromstärke verbinden Sie die rote Messleitung mit dem 5A Anschluss Stellen Sie den RANGE Schalter in die gewünschte Position DCA Eröffnen Sie den gemessenen Stromkreis und verbinden Sie an den gemessenen Stromkreis durch Kaskadenschaltung Lesen Sie der W...

Page 7: ...schen Test Stellen Sie den RANGE Schalter in die Position Das Testsignal 50Hz erscheint auf dem Bildschirm zwischen VΩmA und COM Anschlüsse Die Ausgangsspannung ist ca 5V p p 50KΩ Scheinwiderstand Wartung Batterie und Sicherung Austausch Eine Sicherung sollte nur selten ersetzt werden Das Schmelzen der Sicherung ist ein Ergebnis der Funktionsstörung fast jeder Zeit Wenn das Batteriesymbol im Displ...

Page 8: ...zsinórt 5A áramerősség méréséhez 4 VΩmA banán aljzat Csatlakoztassa ebbe az aljzatba a piros pozitív mérőzsinórt minden feszültség ellenállás és áramerősség kivéve 5A méréséhez 5 COM banán aljzat Csatlakoztassa ebbe az aljzatba a fekete negatív mérőzsinórt Technikai adatok DC Feszültség Méréshatár Felbontás Pontosság 200mV 100uV 0 5 3D 2000mV 1mV 1 0 5D 20V 10mV 200V 100mV 1000V 1V 1 2 5D Túlterhe...

Page 9: ... a készülékhez vagy a mérendő áramkörhöz és csökkentse addig a méréshatárt amíg kielégítő értéket nem mutat DC áramerősség mérése Csatlakoztassa a piros mérőzsinórt a VΩmA aljzatba a feketét pedig a COM aljzatba 200mA és 5A áramerősség közötti méréshez csatlakoztassa a piros mérőzsinórt a 5A aljzatba Állítsa a RANGE kapcsolót a kívánt DCA pozícióba Nyissa meg a mérendő áramkört és csatlakoztassa s...

Page 10: ...megszólal a csipogó A logikai teszt használata Állítsa a RANGE kapcsolót a pozícióba A teszt jelzés 50Hz megjelenik a VΩmA és COM jack aljzatok között A kimenő feszültség kb 5V p p 50KΩ impedanciával Karbantartás Elem és biztosítékcsere Biztosítékot ritkán kell cserélni Ennek kiégése majdnem mindig működtetési hiba eredménye Ha jelenik meg a kijelzőn elemet kell cserélni Az elem és a biztosíték 50...

Page 11: ...ăsura curent 5A 4 VΩmA mufă banană Conectaţi cablul de măsurare roşu pozitiv aici pentru a măsura tensiune rezistenţă şi curent mai puţin de 5A 5 COM mufă banană Conectaţi aici cablul de măsurare negru negativ DATE TEHNICE Tensiune DC Domeniu de măsurat Rezoluţie Acurateţe 200mV 100uV 0 5 3D 2000mV 1mV 1 0 5D 20V 10mV 200V 100mV 1000V 1V 1 2 5D Protecţie la suprasarcină 220V RMS AC la domeniul 200...

Page 12: ...e domenii de măsurat la domeniul de tensiune potrivit Dacă tensiunea nu cunoaşteţi alegeţi domeniul cel mai mare conectaţi cablurile de măsurat în circuit şi coborâţi domeniul de măsurat de acolo treptat în funcţie de nevoie Măsurare curent DC Conectaţi cablul de măsurare roşu la VΩmA iar pe cel negru la COM Pentru măsurarea curentului între 200mA şi 10A conectaţi cablul de măsurare roşu la 5A Aşe...

Page 13: ...lui Dacă rezistenţa este mai mică decăt 30Ω 20Ω piuie aparatul Utilizarea testului logic Aşezaţi comutatorul RANGE la poziţia potrivit Semnalul de test 50Hz apare între bornele VΩmA şi COM Tensiunea de ieşire cca 5V p p cu impedanţă de 50KΩ ÎNTREŢINERE Schimbarea bateriei şi fuzibilului Fuzibilul foarte rar trebuie schimbat Arderea fuzibilului aproape totdeauna este cauzată de utilizare incorectă ...

Page 14: ...u šnúru prístroja pozitívne k meranie silu prúdu 5A 4 VΩmA banániková zásuvka Pripojte do tej zásuvky červenú šnúru prístroja pozitívne k meranie všetkého napätia odporu a silu prúdu okrem 5A 5 COM banániková zásuvka Pripojte do tej zásuvky čiernu šnúru prístroja negatívne TECHNIKCKÉ ÚDAJE DC napätie Merací rozsah Rozlíšenie Presnosť 200mV 100uV 0 5 3D 2000mV 1mV 1 0 5D 20V 10mV 200V 100mV 300V 1V...

Page 15: ...apätie DC a AC Pripojte červenú meraciu šnúru do zásuvky VΩmA a čiernu do zásuvky COM Nastavte spínača funkcií do želanej pozície napätie Ak napätie je neznáme nastavte spínača do najvyššieho meracieho rozsahu a pripojte meraciu šnúru k prístroja alebo k meraného obvodu a znižšite merací rozsah kým neukazuje vyhovujúcu hodnotu Meranie silu prúdu DC Pripojte čiernú meraciu šnúru do zásuvky VΩmA a č...

Page 16: ...te tlačidlo RANGE do pozície Pripojte meraciu šnúru k dvoch koncovkám obvodu Ak odpor je menej ako 30Ω 20Ω zbučiak začína pípnúť Prevádzka logického testu Nastavte spínača RANGE do pozície Signal testu sa objavý na displej 50Hz medzi jack zásuvkám VΩmA a COM Výstupné napätie je okolo 5V p p s impedanciou 50KΩ ÚDRŽBA Výmena batérií a poistok Poistky nemusíte vymeniť často Vybité poistky sú znakom n...

Reviews: