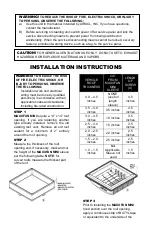
flange in the area under the screw
location dimples.
CAUTION!
When installing your
MAXXFAN MINI
, only use a
caulking/sealant compatible with the
flange (plastic product) and the roof
surface. DO NOT use materials
containing solvents such as or similar to
Xylene, Toluene, Methyl Ethyl Ketone
(MEK), Acetate or Acetone as they can
damage the flange. Also, Polysulfide
(Thiokol) type sealants must be avoided.
If in doubt, please contact the
manufacturer of your RV.
STEP 4
Insert the
MAXXFAN MINI
hood into the
roof opening with the louvered section
facing the rear of the vehicle and
centering the hood in the opening. Using
the twenty-eight (28) screws provided,
attach the flange to the roof at each
dimple location along the flange. Screw
into the dimple to pierce the flange,
making sure not to overtighten the
screws to avoid cracking the flange.
STEP 5
After the
MAXXFAN MINI
hood has
been installed, remove the excess
BUTYL caulk that may have squeezed
out. Using a sealer such as Dicor self-
leveling lap sealant or similar caulking,
apply a daub over every exposed screw
head. In addition, apply a bead
(approximately 3/16” dia.) along the
outside edge of the flange all the way
around the vent.
THIS COMPLETES THE ROOF
TOP PORTION OF THE
INSTALLATION
CAUTION!
Disconnect main vehicle power
before connecting 12 volt DC power to the
MAXXFAN MINI Plus or MINI Deluxe
!
STEP 6
Insert the 12 volt DC power supply wires
into the open hole in the side of the
metal bracket on the MAXXFAN Mini,
allowing 4 to 6 inches of wire inside the
bracket. Secure the wires to the bracket
with the supplied strain relief bushing.
Using the supplied wire nuts, connect
the Positive (+) 12VdC supply wire to
the MAXXFAN Mini
marked “POS
12VDC” and the Negative (-) 12VDC
supply wire to the MAXXFAN Mini wire
marked “Neg. 12VDC”.
Insert the RJ45 cable plug into the
connector on the PC Board.
STEP 7
Route supply wires and RJ45 cable to
notch in the back of the
MAXXFAN MINI
Plus/Deluxe
interior plate, place sleeve
over interior plate with supply wires
routed through hole formed between
interior plate and sleeve.


