background image

Warranty 

Pre-installation 

PLANNING INSTALLATION 

Before beginning assembly of the product, make sure all parts are present. Compare parts with the package contents list and hardware contents. If 

any part is missing or damaged, do not attempt to assemble the product. 

A\ 

WARNING: Tum off electricity at breaker box before beginning 

� installation.

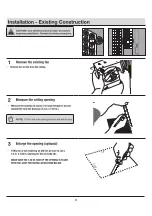
Carefully remove the unit from the carton. 
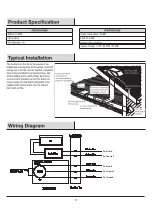
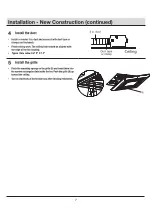
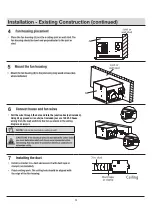
Check area above installation location to be sure that wiring can run to the planned location and that duct work can be run and the area is sufficient 

for proper ventilation. 
Inspect duct work and wiring before proceeding with installation. 

Before installation, provide inspection and future maintenance access at a location that will not interfere with installation work. 

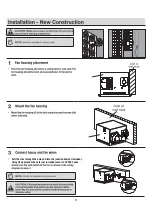
You may need the help of a second person to install this fan; one person on the attic side and one on the room side. 

NOTE: 

Installation may vary depending on how the previous bath fan

r-6\ 

was installed. Supplies necessary for the installation of your bath fan are

not all included. However, most are available at your local home

improvement or hardware store. 

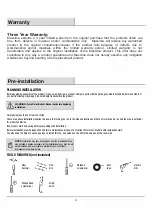
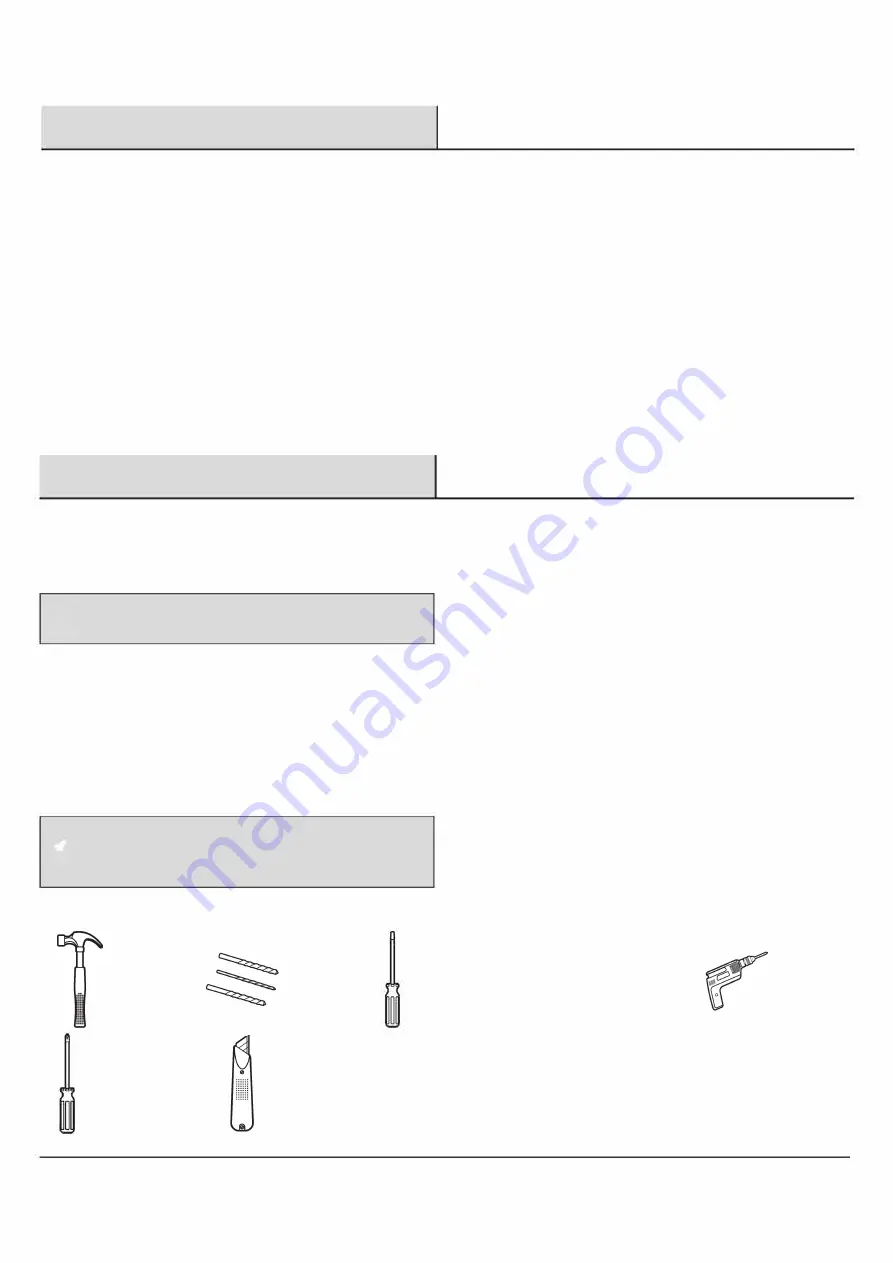
TOOLS REQUIRED (not included} 

Claw 

hammer 

EB 

Phillips head 

screwdriver 

Drill 

bits 

Utility 

knife 

Flathead 

screwdriver 

0-

Duct 

tape 

Electric 

drill 

Three

 Year Warranty: 

Maxxima  extends  a 

3

  year  limited  warranty  to  the  original  purchase  that  the  products  listed  are 

free  from  defects  in  material  and/or  workmanship  only.    Maxxima  will replace any warrantied 

product  to  the  original  consumer/purchaser  if  the  product  fails  because  of  defects  due  to 

workmanship  and/or  materials  within  the  limited  warranty  period.  Limited  warranty  is  not 

transferable  and  applies  to  the  original  installation  of the  Maxxima  product.  This  offer  does  not 

constitute  in  any  way  a  product  guarantee and  Maxxima  does  not  hereby  assume  any  obligation 

whatsoever beyond sending a free replacement product. 

Summary of Contents for Luvoni MEW-VF270L

Page 1: ...g the fan Failure to comply with the instructions contained herein could result in personal injury or property damage We recommend that you keep this guide for future reference Ventilation Fan with LED Light MEW VF270L READ AND SAVE THESE INSTRUCTIONS INSTALLATION AND CARE GUIDE 1 ...

Page 2: ...he application When the fan is going to install in the bathroom the fan and the tub need to be more than 1 0 meter between each other the fan required to install at the other side of the tub in ceiling Acceptable for use over a bathtub or shower when installed in a GFCI protected branch circuit ...

Page 3: ...Current 0 33A 39 6W To Switch To Neutral To Switch To Neutral To Ground Lumen Output CCT 600LM 3000K ...

Page 4: ... and one on the room side NOTE Installation may vary depending on how the previous bath fan r 6 was installed Supplies necessary for the installation of your bath fan are D not all included However most are available at your local home improvement or hardware store TOOLS REQUIRED not included Claw hammer EB Phillips head screwdriver Drill bits Utility knife e 4 Flathead screwdriver 0 Duct tape Ele...

Page 5: ...lation continued HARDWARE INCLUDED I NOTE Hardware shown to actual size Part Description I Quantity Long wood screw 04x30 I 4 PACKAGE CONTENTS Part Description Quantity Fan Body 1 B Grille 1 C Duct Connector 1 5 ...

Page 6: ...Pull the wire through the hole and into the junction box not included Using UL approved wire nuts not included secure 120 VAC house ...

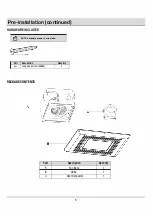
Page 7: ...Typical hole cutout is 7 5 X 7 3 ...

Page 8: ......

Page 9: ...Pull the wire through the hole and into the junction box not included Using UL approved wire nuts not included secure 120 VAC house ...

Page 10: ...ely There is insufficient airflow intake in the room There is insufficient CFM The fan is not clearing the room Solution Be sure the CFM rating on the fan matches the square footage of your room Check the damper to ensure it is opening and closing properly If the damper has become damaged please call Customer Service Be sure you do not have any sharpbends in the duct closer than 18 in to the fan d...

Reviews: