13
Before you proceed further with this step, please make sure you have completed the
above Steps 1, 2, and 3.
If bike still needs more resistance adjustment, then complete Step 4.
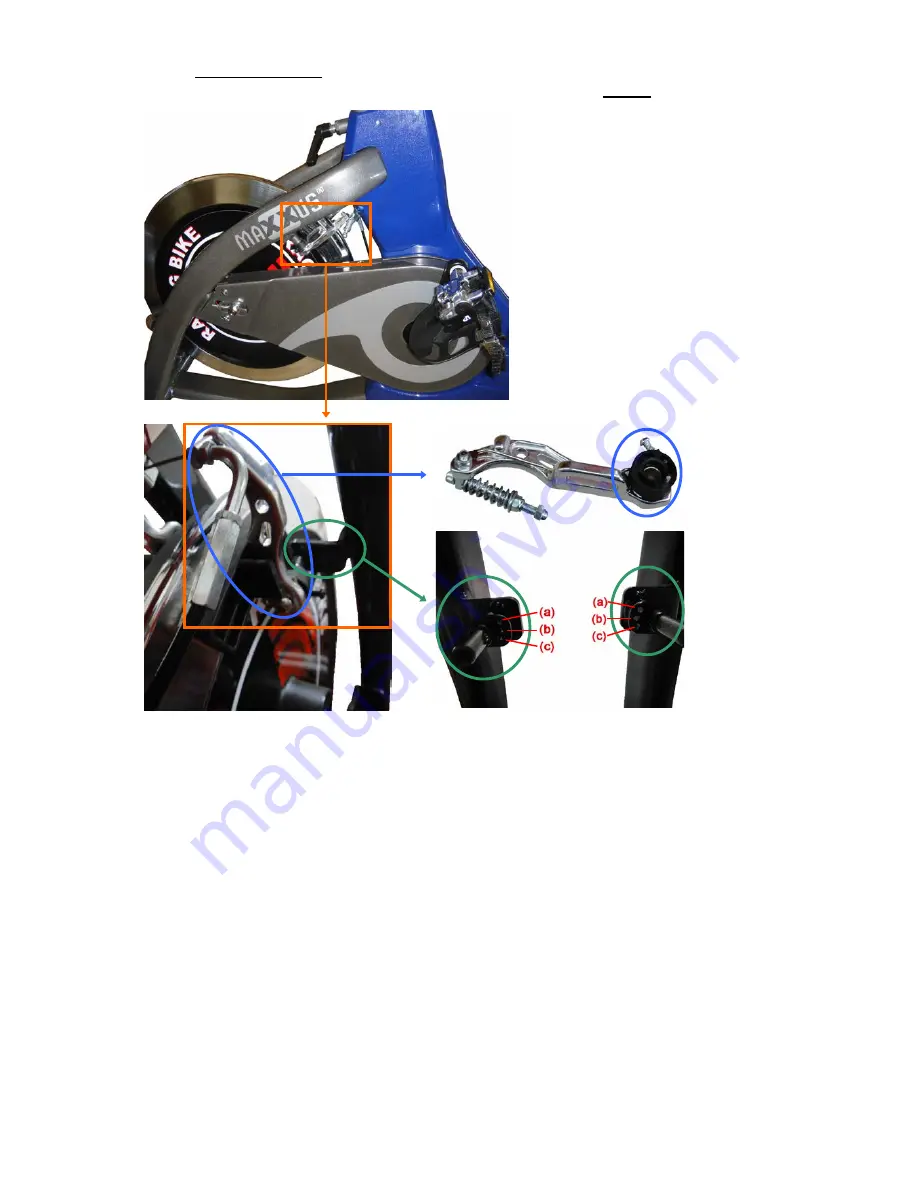
Picture (F)
Picture (G)
Loosen the screw which is tightened on the black cap (as seen circled in blue in Picture
(F)).
Take off the screw and insert into the hole which is nearest the seat in Picture (G).
Then tighten the screw to decrease the resistance.
** Original setting: The screw is tighten on the middle hole (b).
** Change the screw to the hole nearest the seat (a), the resistance decreases.
** Change the screw to the hole farthest the seat (c), the resistance increases.
You will find the parts (shown in the above pictures) on the left-hand side and right-hand
side of the bike.
As the parts are on both sides, they are not interchangeable.
To avoid mix up, please complete one side at a time.
__________________________________________________________
SERIAL NUMBER LABEL
The diagram below shows the location of the Serial Number Label. The serial number is
indicated on the label affixed to the lower part of the Main Frame.


