MP7950 12V Automatic Digital Air Compressor
www.maypole.ltd.uk
3
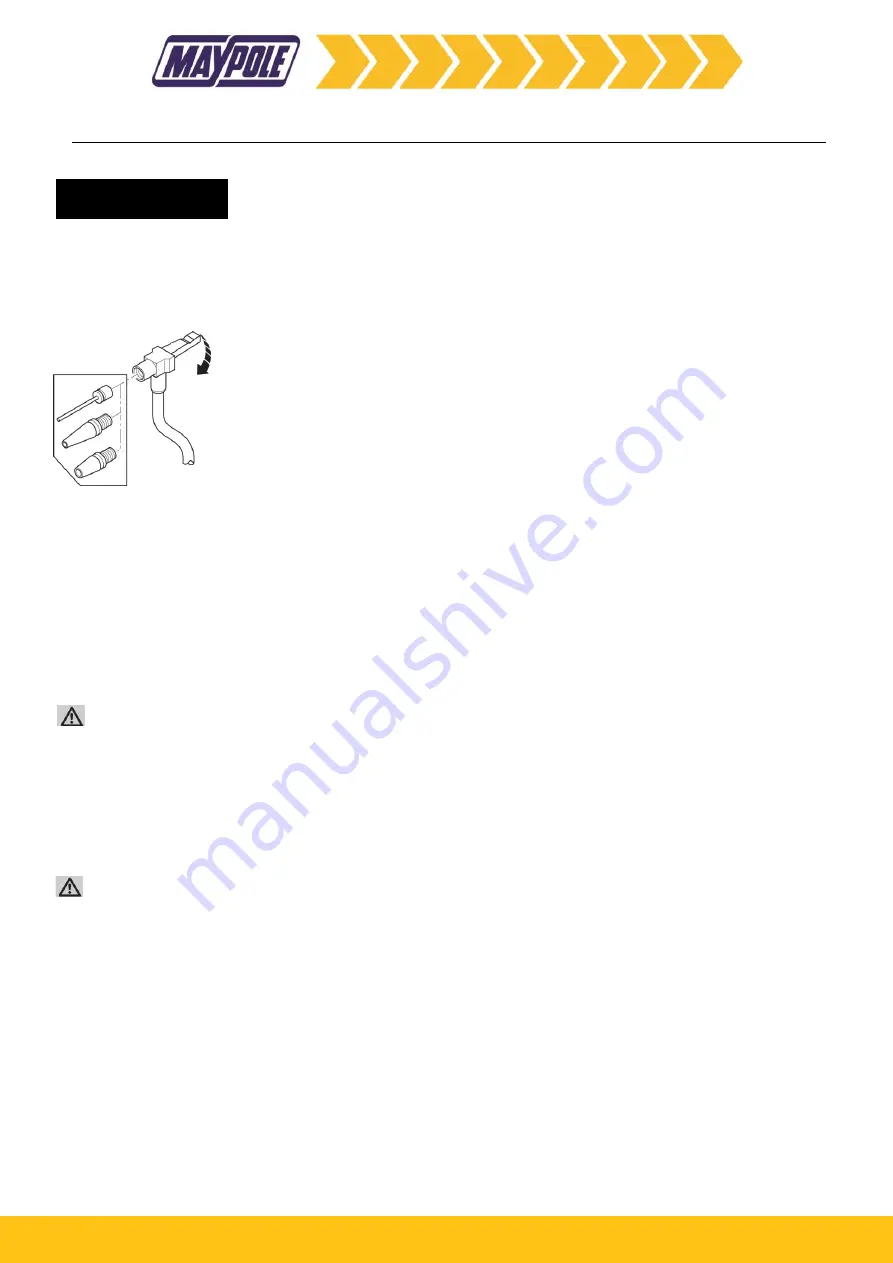
USE OF ACCESSORIES
Remove the required accessories from the accessory
compartment.
FITTING THE ACCESSORIES
Your inflator is supplied with the standard tapered nozzles and
the needle inflator nozzle, these are located on the bottom of
the unit.
• To use the universal valve adaptor, make sure that the lever
is in the up position.
• Place the valve adapter over the stem of the inflation needle
or tapered nozzle.
• Press the lever on the valve adapter
down to lock it in place.
• Place the inflation needle or tapered nozzle into the item to
be inflated.
POWER THE LCD DISPLAY
WARNING: Do not operate the inflator when the car
engine is running.
Note: Make sure that your 12 Volt accessory socket is live. On
some vehicles the accessory socket may only become live
when the ignition key is in the accessory position.
To power the display from the 12Vdc adapter, just plug the 12
Vdc vehicle connector
⑨
into the vehicle 12V accessory socket
QUICK START
WARNING: Never leave inflator running unattended in
this mode. In can burst car tyres and other items.
To use your inflator immediately you can do so without setting
the automatic shut-off feature.
•
Before use, check the manufacturers recommended tyre
pressures for the vehicle.
•
Plug the 12Vdc vehicle connector into the vehicle accessory
socket. The LCD will be powered.
• To switch between the different units (PSI, BAR or
KPA) press
the unit shift button (6) until the required units are displayed.
• Connect the
quick coupler (8) and an accessory, if required,
to the item to be inflated, making sure that the lever of the
coupler is in the down position to lock it in place.
Note: Make sure that the Quick Coupler is correctly fitted
to the item to be inflated.
• To start the inflator press the main switch (1) to the on
position.
• When the item is inflated as required or to stop the
inflator at any time press the main switch (1) to the off
position.
SETTING THE AUTOMATIC SHUT-OFF PRESSURE
Note:
The LCD will only show inflation pressures when
the inflator is being used.
• To switch between the different units (psi, bar or kPa),
press the unit shift button (6) until the required units are
displayed.
• Press and hold either buttons
- & + (4, 5) for 3 seconds,
the value will increase or decrease until get the reqired
value.
• After 3 seconds the display will flash and return to a
reading of "0.0". This is normal.
• Connect the
Quick Coupler (8) and accessories, if
required, to the item to be inflated, making sure that the
lever of the quick coupler is in the down position to lock
it in place.
• To start the inflator press the main switch (1) to the on
position.
• When the item to b
e inflated has reached the preset
value the unit will automatically turn off.
Note:
You may notice the actual pressure reading may
drop after a couple of seconds, this is normal.
• To stop the inflator at any time press the main switch
(1) to the off position.
• Remove the
quick coupler and/or accessory from the
inflated item and the 12 Volt connector (9) from your
vehicle's 12 Volt accessory socket.
Note: If the main power switch is turned off, all settings
will be lost and will need to be re-entered following the
instructions under the heading 'Setting the automatic
shut-off pressure'.
This is a safety feature to prevent the
risk of items OVER INFLATING.
USING THE INFLATOR AS A PRESSURE GAUGE
• Plug the 12Vdc vehicle connector into the vehicle
accessory socket. The LCD will be powered.
• Connect the
quick coupler (8) to the item to be
checked.
• The LCD will display the items pressure.
• After checking, return the air hose to the storage
location.
5. OPERATION
OPERATION


