background image

Summary of Contents for CHE9000B

Page 1: ...7 Using Your Coil Element Cooking Surfaee 8 Using Your Oven 9 11 Baking and Roasting 9 Broiling 10 Programmed Oven Operations 10 11 Cleaning 12 15 Porcelain Enamel Cooktop 12 Drip Bowls 12 Manual Clea...

Page 2: ...how your new electric range operates before you use it On the following pages you will find information regarding the operation of your SerialNumber new range By following these instructions carefully...

Page 3: ...ls fi om the appliance before never be allowed to sit or stand operating it on any part of the appliance Flammable materials should not be stored in an oven or CAUTION Do not store items on or near su...

Page 4: ...me hot enongh to cause bnms Dnring cooking is completed and after use do not touch or let clothing or other flammable materials contact beating elements areas It is normal for some parts of the cookto...

Page 5: ...l smvicer Refer this manual Do not use eyelid covers for the surface to the Table of Contents for location of self clean units stove top grills or add on oven convection instructions and for informati...

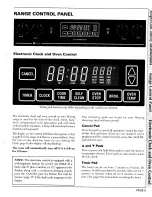
Page 6: ...grammed the control correctly press the CANCEL the time of day clock has been set see Setting the pad and start over Clock page 6 the display will stop flashing and Pads The oven will automatically tu...

Page 7: ...el the See pages 12 i3 for detailed information on the self operation to set the clock clean feature Press the CLOCK pad to recall the time of day when Broil Pad another function is displayed Use this...

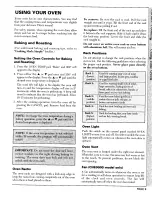
Page 8: ...s may require a different numbered settings beat setting for the same cooking operation For more To operate the control Push in and turn the knob in information on cookware see Cooking Made either dir...

Page 9: ...ge features an upswept cooktop that can be sits level on the drip bowl lifted up for convenient access to the area under the cooktop The top is hinged and can be raised but not Drip Bowls removed The...

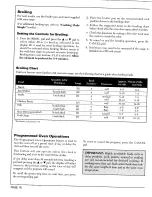
Page 10: ...00 will on the oven bottom appear in the display 2 Press either the or pad once and 350 will appear in the display Press the or pad until the desired oven temperature is displayed The word ON will lig...

Page 11: ...til you become more familiar with your new range use the following chart as a guide when broiling foods Q antity Or Rack Approx Minutes Side Food Thickness Temp Position Doneness 1st Side 2nd Side Bac...

Page 12: ...within 7 seconds after entering the cook time the control will beep until another pad is pressed 000 will light in the display 7 Enter the oven temperature by pressing the or 5 Enter the oven temperat...

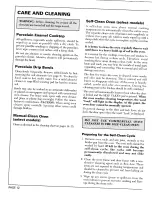
Page 13: ...use If the oven is heavily deauer or soap filled scouring pad for hard to remove soiled smoke and odor are common During the soil cleaning process the kitchen should be well ventilated Bowls may also...

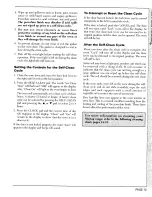
Page 14: ...n out Some soil may leave a light gray powdery ash which can Setting the Controls for the Self Clean be removed with a damp cloth If soil remains it indicates that the clean cycle was not long enough...

Page 15: ...stic or soap filled vegetable coating such as Pare or Mazola to make seouring pad denning easier Dishwasher Soaking makes cleaning easien Soap and water Remove knobs by pulling forward Wash rinse d_ w...

Page 16: ...s especially acid spills milk fruits tomato_ etc Mild liquid sprays Never wipe a warm or hot surface with a damp cloth as cracking and chipping may result NOTE Do not use abrasive cleaning agents such...

Page 17: ...replacing the oven or panel light bulb 5 When you have made the adjustment press the disconnect power to range Be sure the bulb and CANCEL pad to return to the time of day display range parts are cool...

Page 18: ...e range has coil elements are they properly Oven door won t lock select models plugged into the receptacles Are the proper controls set for the self clean cycle Were appropriate pans used See Cooking...

Page 19: ...are brought into Canada due to transfer of residence from the United States to Canada Limited Parts Warranty Outside The United States Or Canada For two 2 years from the date of original retail purch...

Page 20: ...be process the kitchen should be well ventilated If removed during the next clean cycle the oven is heavily soiled heavier smoke and odor If the oven racks were left in the oven during the may occur...

Page 21: ...for instructions Plastic or soap filled aluminumRlght rear boWlfoil has hole in it for oven venting Do not cover with Broiler Pan and Soap and water Pretreat the broiler pan and insert with a non stic...

Page 22: ...cleaner powder or liquid cleansers abrasive or Door Handle Paste of baking soda and water caustic cleaning agents on plastic finishes These cleaning agents Control Panel Trim will scratch or marr the...

Page 23: ...at set the oven temperature 25 F higher or lower than the temperature in your recipe then bake The results of the test should give you an idea of how much the thermostat _ should be changed J To adjus...

Page 24: ...opened into place and restore the power Reset the clock to about 6 inches and grasp the door with both hands at each side Do not use door handle to lift the current time of day door Lift up evenly unt...

Page 25: ...e Is the range plug loose or disconnected from the Is the bulb loose or burned out electrical outlet if not wired direct to the Is the light switch in the On position electrical supply Has a range fus...

Page 26: ...e display until the control has been serviced The cooktop and continuous beeps will sound can be used During a Self Clean Cycle _ Ii J If the oven is heavily soiled excessive smoke and flaring may res...

Page 27: ...r two 2 years from the date of original retail purchase any part which fails in normal home use will be repaired or replaced free of charge for the part itself with the owner paying all other costs in...

Page 28: ...7 General _ps 6 Baking Pans 7 RackPositions 7 Pan Positions 7 Common Baking Problems and Causes 8 9 Roas _ing 10 _1 Roasting T_ps 10 Roasting Chart 11 Convection Bakingand Roasting 12 General Convecti...

Page 29: ...f construction size and the pan is not flat heat is not transferred as well material plus proper and food will cook unevenly and take longer To heat setting or flame determine the flatness of the bott...

Page 30: ...PanMaterial The pan material determines how evenly and quickly heat is transferred from the heat source to the pan bottom Some widely used pan materials are a...

Page 31: ...wer setting and Do not use oversized pans or pans that increaseto a higher one later if needed rest across two elements or burners There are many factors that affect the These may transfer heat to the...

Page 32: ...e the recom mended pan size Preheatthe oven if calledfor in the recipe or on the packagedirections Preheating is NOT necessary for roasting Selecting a temperature higher than the desired temperature...

Page 33: ...there rack in the middle ofthe oven Iffood are no measurements measure inside is placed on a rack toward the top of width and length of the pan the oven top browning may be too dark If food is placed...

Page 34: ......

Page 35: ......

Page 36: ...allow self basting of the meat during roasting Cooking time for roasting is determined by the weight of the meat and the desired doneness Use ameat thermometer for best results Insert the ther mometer...

Page 37: ...ly cooked boneless Ham Half cook before eating Poultry Turkey unstuffed Turkey Breast Chicken Fryer Chicken Roaster Lamb Leg boneless Whole Leg Cookingtimesa_e_oximat trodmayvaWdependi_gon the s_ of t...

Page 38: ...d often in more even top when baked with the regular con ventional baking method shorter cooking times at lower tempera Roasting tures and with the flexibility of using Convection roasting in most cas...

Page 39: ...ers the food in front of 25 when using convection heat the convection fan which improves air circulation and browning If pans are Refer to the Roasting Chart on page too long to place front to back ce...

Page 40: ...eat after cooking Salt tends to draw distance between the juices out of the meat and delay browning food and the heat Use the broiler pen supplied with your oven It is source and the cooking designed...

Page 41: ...source will de crease spattering and smoking When broiling in an electric oven the door should be opened to the broil stop position about 4 When broil ing with e gas oven the door should be closed If...

Reviews: