background image

Summary of Contents for MLE2000AYW

Page 1: ...CTIONS FACTORY STACKED VERSION The installation including a proper exhaust system is the responsibility of the owner LEAVE THESE INSTRUCTIONS WITH THE OWNER For further information call 1 888 4 MAYTAG 1 888 462 9824 Printed in U S A 6 2721750 ...

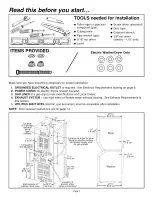
Page 2: ...ers except Canada 3 GAS LINES if a gas dryer must meet National and Local Codes 4 EXHAUST SYSTEM use rigid metal or flexible metal exhaust ducting See Exhaust Requirements in this section 5 UTILITIES SHUT OFFS electric gas and water must be accessible after installation NOTE Door reversal instructions are on page 14 Location of Canadian terminal block Connection Gas Manifold 711 2 81 6 cm 271 2 I_...

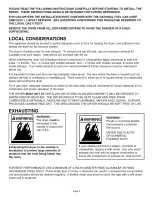
Page 3: ...ere must be a minimum of 36 square inches of unobstructed space surrounding the dryer For a gas dryer adequate clearance as noted on the data plate must be maintained to insure adequate air for combustion and proper operation of the dryer THE DRYER MUST NOT BE INSTALLED OR STORED IN AN AREA WHERE IT WILL BE EXPOSED TO WATER AND OR WEATHER THE DRYER AREA IS TO BE KEPT CLEAR AND FREE FROM COMBUSTIBL...

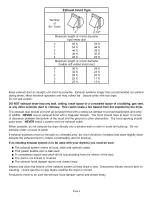
Page 4: ... least 12 inches of clearance between the bottom of the hood and the ground or other obstruction The hood opening should point down NEVER install a screen over the exhaust outlet When possible do not exhaust the dryer directly into a window well in order to avoid lint build up Do not exhaust under a house or porch If exhaust ductwork must run through an unheated area the duct should be insulated a...

Page 5: ...proper height The drain hose is attached at the factory Maximum flow rate is 12 gallons per minute FLOORING For best performance the washer must be installed on a solidly constructed floor Wood floors may need to be reinforced to minimize vibration and or unbalanced load situations Carpeting and soft tile surfaces are contributing factors in vibration and or tendency for a washer to move slightly ...

Page 6: ...ryer The dryer must be disconnected from the gas supply piping system during any pressure testing of the system DO NOT re use old flexible metal gas line Flexible gas line must be design certified by American Gas Association CGA in Canada NOTE Any pipe joint compound used must be resistant to the action of any liquefied petroleum gas NOTE As a courtesy most local gas utilities will inspect a gas a...

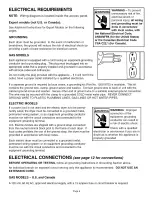
Page 7: ...l ground connection The wire may be secured with the clamp to a grounded COLD metal water pipe NEVER CONNECT GROUND WIRE TO PLASTIC PLUMBING LINES GAS LINES OR HOT WATER PIPES ELECTRIC MODELS If a power cord is not used and the electric dryer is to be perma nently wired the dryer must be connected to a grounded metal permanent wiring system or an equipment grounding conductor must be run with the ...

Page 8: ... It is not permissible to convert a dryer in Canada to 208 volts J Additional Instructions for Export Models not U S or Canada Contact the distributor that sold the appliance or Maytag International 8700 W Bryn Mawr Avenue Chicago Illinois USA 60631 773 714 0100 for information on product shipping damage replacement parts and accessories Maytag models manufactured for operation on 60 Hz AC are not...

Page 9: ...e 240 Edwards Street S E Cleveland Tennessee 37311 Phone 1 888 4 MAYTAG 1 888 462 9824 for information on the nearest authorized Maytag Parts Distribu tor EXPORT MODELS Contact the Commercial Distributor from whom you purchased your appliance or Maytag International 8700 W Bryn Mawr Avenue Chicago Illinois USA 60631 Phone 773 714 0100 for information on the nearest authorized Maytag Parts Distribu...

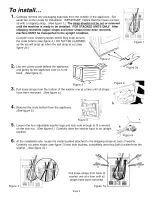
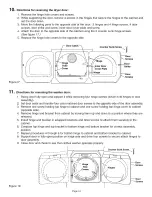
Page 10: ... i i i Lay two corner posts behind the appliance and gently tip the appliance over on to its back See figure 3 Pull loose straps from the bottom of the washer one at a time until all straps have been removed See figure 4 Figure 2 _ _ _ e 2a Figure 3 Figure 4 Remove the crate bottom from the appliance See figure 5 L Figure 5 Loosen the four adjustable washer legs and lock nuts enough to fit a wrenc...

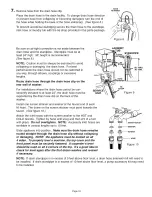
Page 11: ...ust be supported by the drain hose clip on the back of the washer SERVICI UNIT TIE STRAP Figure 9 Install one screen strainer and washer at the faucet end of each fill hose The dome on the screen strainer must point towards the faucet See figure 10 Attach the inlet hoses with the screen washer to the HOT and COLD faucets Tighten by hand until snug and then 2 3 of a turn with pliers Do not overtigh...

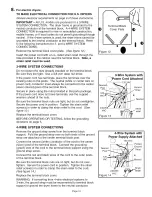
Page 12: ...excessive force in tightening threads as this may damage Figure 11 internal components Check all gas supply connections from service valve for leaks using a soap solution DO NOT use an open flame to check for gas leaks If bubbles occur tighten the connections and recheck NOTE As a courtesy many local gas utilities will inspect a gas appliance installation Check with your local utility to see if th...

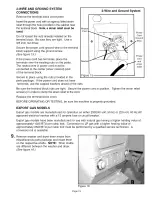
Page 13: ...oes not have terminals use the cupped washers ahead of the nuts Be sure the terminal block nuts are tight but do not overtighten Secure the power cord in position Tighten the strain relief screw s in order to clamp the strain relief to the cord See figure 13 Replace the terminal block cover BEFORE OPERATING OR TESTING follow the grounding directions on page 5 3 Wire System with _Power Cord Attache...

Page 14: ...and Ground S stem Power Cord Ground Wire Power cord strain relief Be sure the terminal block nuts are tight Secure the power cord in position Tighten the strain relief screw s in order to clamp the strain relief to the cord Replace the terminal block cover BEFORE OPERATING OR TESTING be sure the machine is properly grounded EXPORT GAS MODELS Export gas models are manufactured for operation on eith...

Page 15: ...ge screws which hold hinges to door assembly 2 Set door aside and transfer four color matched door screws to the opposite side of the door assembly 3 Remove one screw holding top hinge to cabinet and one screw holding top hinge cover to cabinet opposite side 4 Remove hinge and bracket from cabinet by moving them up and down to a position where they are released 5 Install hinge and bracket in swapp...

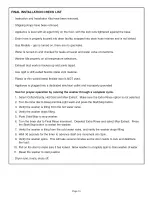
Page 16: ...oper operation by running the washer through a complete cycle 1 Select Cotton Sturdy Hot Cold and Max Extract Make sure the Extra Rinse option is not selected 2 Turn the timer dial to Heavy Normal Light wash and press the Start Stop button 3 Verify the washer is filling from the hot water valve 4 Verify the washer stops filling 5 Push Start Stop to stop washer 6 Turn the timer dial to Final Rinse ...

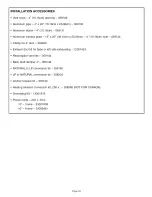
Page 17: ...ole 059134 Clamp for 4 duct 304630 Exhaust duct kit for base or left side exhausting 12001453 Rectangular vent kits 059144 Back draft damper 4 059146 NATURAL to LP conversion kit 306195 LP to NATURAL conversion kit 306204 Anchor bracket kit 303740 Heating element conversion kit 208 v 308590 NOT FOR CANADA Grounding Kit 12001875 Power cords 240 v 30 A 10 3 wire 33001838 10 4 wire 33002441 Page 16 ...

Reviews: