PAGE 20
FOR SERVICE TECHNICIAN’S USE ONLY
DO NOT REMOVE OR DESTROY
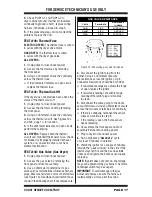
TEST #7: Door Switch
Activate the Service Diagnostic Mode and then
select the User Interface/Control System Test.
See procedures on page 4. Perform the steps
under “Diagnostic: Door Switch/Drum Light.”
Functionality is verified when opening the door
causes “
p:7e
” (electric) or “
p:79
” (gas) to be
displayed and turns on the drum light. Closing
the door should turn off the drum light.
If the preceding conditions are not met:
1.
Unplug dryer or disconnect power.
2.
Remove console to access the CCU
and User Interface (UI).
3.
Check that the wires between the door
switch and CCU are connected. (Refer to
wiring diagrams on pages 24–25.)
If the connections are good, replace the
wire and door switch assembly and retest.
If wire and door switch assembly have
been replaced and dryer still does not start,
replace the CCU.
4.
Reassemble all parts and panels.
5.
Plug in dryer or reconnect power.
6.
Perform the steps under “Diagnostic:
Door Switch/Drum Light” to verify repair.
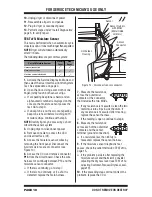
TEST #8: Drum Light
This test is performed if the drum light
does not turn on.
1.
Pressing the “
drum light
” button on the
console should toggle the button indicator on
and off (and the drum light on and off).
If the button indicator toggles on and off,
go to step 2.
If the button indicator does not turn on, go
to TEST #6 – “Some buttons do not light
indicators,” page 19.
2.
Unplug dryer or disconnect power.
3.
Remove the rear panel to access
the drum light.
4.
Check Drum Light—using an ohmmeter,
measure resistance across the drum light
terminals.
If an open circuit is detected, replace
the drum lamp and retest.
If the reading is around 100–150
Ω
,
continue to step 5.
5.
Remove console to access the CCU
and User Interface (UI).
6.
Check Drum Light Harness—using an
ohmmeter, measure the resistance between
“L1” on the terminal block (or AC plug) and
CCU P8-1 (brown wire).
If the reading is around 100–150
Ω
, the
drum light and harness are OK. Continue
to step 7.
If an open circuit is detected, check harness
connections between the terminal block,
the drum light, and the CCU. If connections
are OK, replace the main harness.
7.
Plug in dryer or reconnect power. Press
the “
drum light
” button to activate the drum
light. With voltmeter set to
AC
, connect leads
across the drum light terminals.
If 120V AC is present, and lamp does
not light, replace drum light and retest.
If 120V AC is not present, replace the CCU.
8.
Unplug dryer or disconnect power.
9.
Reassemble all parts and panels.
10.
Perform steps under “Install Diagnostics”,
page 5, to verify repair.
TEST #9: Water Valve (Steam Model)
Activate the Service Diagnostic Mode and
then select the User Interface/Control System
Test (see page 4). Perform the diagnostic test
“Console ID, Motor, Heater, and Water Valve.”
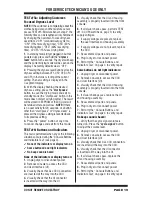
Verify that water is being sprayed into the drum.
See Figure 15, page 21.
NOTE:
The motor and heater are also activated
during this test.
NOTE:
Refer to Strip Circuit on page 22
to diagnose water valve.
If no water is sprayed in the drum:
1.
Verify that water is hooked up and turned on.
2.
Unplug dryer or disconnect power.
3.
Remove console to access the CCU
and User Interface (UI).
4.
Verify that the wires are connected to the
water valve relay on the CCU. Refer to CCU
diagram on page 9.
5.
Check Water Valve & Harness—using an
ohmmeter, measure the resistance between
the water valve relay COM connector (red wire)
and CCU P8-5 (black/white wire).


