background image

34 

9. PRODUCT SPECIFICATIONS

9.1 Specifications 

Stations 

10 stations 

Paper Feed 

Roller separator system 

Station Capacity 

1.1"  (approx. 350 sheets of 64g/m

2

 paper) 

Paper Transport 

Belt roller system 

Stacking Capacity 

2.6" (approx. 880 sheets of 64 g/m

2

 paper) 

Paper Stacking System 

Right and left index system (20° apart) or straight stacking  

Speed 

40-60 set/minute (8.5" x 11" size paper) selectable 

Max. paper Size 

12.9" x 18.5" 

Min. paper size 

3.8" x 5.9" 

Paper quality 

1st and 10th station: 35 to 210 g/m

2


2nd to 9th station: 35 to 160 g/m2 

Detection of Station in use 

Stations in use can be checked by trial feed programmed by CHECK key. 

Detection of Paper Quality 

Paper thickness on each station can be checked by trial feed programmed by CHECK key. 

Feed Error Detection 

Empty feed, no paper, paper jam, double feed (detection of paper thickness with 
photo-electric sensors) 

Other Detection 

Stacking table full, paper eject jam, back door open/close status, (Staple cartridge empty and 
paper jam detection when optional stapler-puncher is mounted).  

Additional Features 

-  Automatic elevation of paper feed table 
- Alternate collation (Neighboring two stations can be used together for the same 

sheet/page. 

-  Insertion of partitioning paper (according to the designated set) 
-  Programmed insertion of cover paper (loading covers on the top station and back covers 

on the bottom: Good for collation for system-notebook, chits, etc.) 

-  Three levels of paper feed pressure (four levels for Station 1 and 10, and three levels for 

Station 2 to 9) 

-  Three levels of separator pressure (Fourth level built-in while not displayed on the tablet: 

Used for special papers) 

- Four-digit display on the operation panel counter, addition/subtraction (preset) 

switch-enabled 

Power Supply Voltage 

AC120V  

 60Hz 

Power Consumption 

200W 

Dimensions 

21.5"W x 29.6"D x 41.6"H 

Weight 

167.5 lbs 

Specifications are subject to change without prior notice for the sake of improvement. 

9.2 Optional 

parts 

Part Name 

Qty 

Figure 

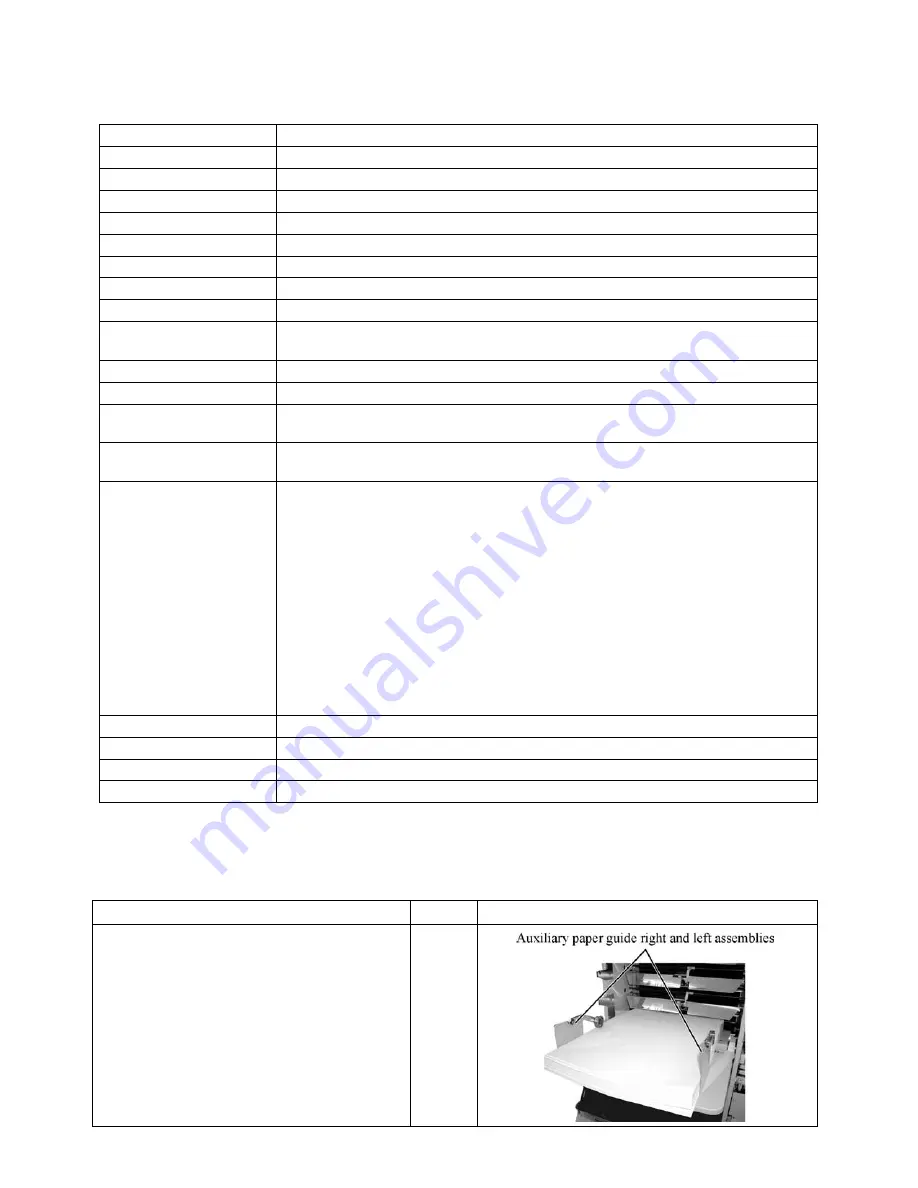
Auxiliary paper guide right assembly 
Auxiliary paper guide left assembly 

10 

each 

Summary of Contents for FC-10

Page 1: ...TOP COLLATOR FC 10 Read this Operation Manual carefully before use Keep it at specific place for handy reference REVISED May 31 2005 MyBinding com 5500 NE Moore Court Hillsboro OR 97124 Toll Free 1 800 944 4573 Local 503 640 5920 ...

Page 2: ...ng fire or injury Always disconnect the machine by gripping the plug Make sure that the paper feed table auxiliary table stacking table and the plate to prevent the machine from falling are properly set They may cause an injury if they come off Also take care not to cause the machine to fall when attaching or removing the stacking table and auxiliary table Be sure to remove the power plug from the...

Page 3: ... 3 3 Setting separator pressure 14 4 MATTERS TO NOTE 15 4 1 Definitions 15 4 2 Characteristics and purpose of use 15 4 3 When not in use 15 5 OPERATIONS 16 5 1 Procedure and method 16 5 1 1 Activating power 16 5 1 2 Setting of paper on feed tables 16 5 1 3 Setting of stacking guides poles etc 18 5 1 4 Collation 18 5 2 Counter 19 5 2 1 Using adding mode 19 5 2 2 Using subtracting mode 19 5 3 Settin...

Page 4: ...s are lit or flashing 29 7 2 Troubleshooting 31 7 3 In case of breakdown 32 8 RELOCATION OR DISPOSAL 33 8 1 Relocation 33 8 1 1 Removal of the machine from its present location 33 8 1 2 Transport 33 8 1 3 Installation 33 8 2 Disposal 33 9 PRODUCT SPECIFICATIONS 34 9 1 Specifications 34 9 2 Optional parts 34 MyBinding com 5500 NE Moore Court Hillsboro OR 97124 Toll Free 1 800 944 4573 Local 503 640...

Page 5: ...ed on the table or the like other than the dedicated table for the collator be sure to install the metal fitting A to prevent the machine from falling How to install metal fitting A to prevent the machine from falling For fixing metal fitting A to the wall select the sturdy and permanently stabilized place where the metal fitting A will not come off even in case 36 lbs power is continuously applie...

Page 6: ...xample owing to splashing water Near heat sources Places exposed to wind Narrow spots with poor ventilation or dark places Locations exposed to direct sunlight or other powerful light sources Direct sunlight or other strong light sources may cause the optical sensor to malfunction Install the machine in an appropriate place or shield the light with a heavy curtain or other material BE SURE TO FOLL...

Page 7: ...cking the collator check the attachments Should any part be missing contact your dealer immediately IMPORTANT NOTES FOR ASSMBLYING MACHINE REFER PAGE 11 3 PREPARATION FOR USE MyBinding com 5500 NE Moore Court Hillsboro OR 97124 Toll Free 1 800 944 4573 Local 503 640 5920 ...

Page 8: ...cuit breaker 7 Paper feed roller 8 Left cover 9 Back door 10 Stacking pole 11 Stacking table 12 Inlet 13 Outlet to connect optional stapler puncher and stacker 14 Right connector 15 Light connector Connect to left tower option 16 Right cover 17 Shift lever for paper direction 18 Auxiliary table 19 Paper detection wire MyBinding com 5500 NE Moore Court Hillsboro OR 97124 Toll Free 1 800 944 4573 Lo...

Page 9: ...tes an error in the left side collator when lighted red 5 COUNTER Displays the number of collated sheets Err is displayed in the event of an error 6 SHEET SET Press the key to change the number of collated sets and the number of batches in Insert and Programmed Insert modes 7 CHECK lamp Lights green to when trial feed is complete 8 PAPER JAM lamp Lights red should a paper jam occur 9 DOUBLE FEED l...

Page 10: ...ing will not occur Also used to display 1 on the counter 17 PUNCH 2 key This function does not apply for units in North America 18 SPEED 3 key When lighted green high speed collation occurs when not lit collation will be slow Also used to display 3 on the counter 19 ALTERNATE 4 key When lighted green Alternate mode is selected when not lit Normal mode is selected Also used to display 4 on the coun...

Page 11: ...in its receptacle on the back of the collator 2 Insert the plug into the wall outlet Caution It is strongly advised not to use an extension cord or overloaded one electrical outlet as it can cause erroneous operation 3 Stacking table assembly 1 Insert the 2 stacking side guides and the stacking end guide in the stacking table making sure not to set them in the wrong direction 2 Insert the 2 stacki...

Page 12: ... insertion hole in the collator 2 Pinch the bent part at the aligning wire tip with your fingers and draw it to the front Then fit it on the wire insertion hole in the stacking table 3 While pinching the wire as it is insert the bent part at the wire tip into the wire insertion hole in the stacking table Remarks a Make sure the stacking table and aligning wire are properly attached to the machine ...

Page 13: ...feed table will rise If the lever is higher than the table paper cannot be fed as the table cannot be raised 2 Insert the right side shaft of the paper feed table in the hole on the side opposite the collator operation side and mount the left shaft on the plate with the U shape slot 3 Fit the auxiliary table slots two places on both side shafts of the paper feed table MyBinding com 5500 NE Moore C...

Page 14: ...r regular jobs processing ordinary paper set the separator pressure shift lever at 2 Remove the paper feed table when changing separator pressure Three different degrees of pressure can be selected for all stations Select 1 weak when paper feed slip occurs Select 3 strong when double feed occurs While separator pressure is classified as 1 2 and 3 on the collator display for special cases 4 is buil...

Page 15: ...Automatic collation of printed or copied documents in page sequence Enables alternate collation Alternate collation allows using two stations as one making for easy collation of massive stacks of paper Electric paper feed table which raises and lowers automatically provides for fast setting 4 3 When not in use Remove the power plug from the outlet Cover the machine MyBinding com 5500 NE Moore Cour...

Page 16: ...t them until they lightly strike the forward guide Failure to properly align sheets may lead to double feed or no feed d Make sure any ink on the paper is dry Let ink dry before loading paper Wet ink soils the feed rollers and can lead to malfunction such as double feed or no feed e Copied sheets may cause wrong feed or stacking error owing to electrostatic charge Static electricity can be control...

Page 17: ...ts on the stacking table Note How to load a paper with a small number of pages using less than 10 stations In case the collator is used independently or a staple is connected with it Load the paper in order from the bottom 10th station This way prevents disorder in paper ejection and facilitates the processing speed In case optional machines are connected with the collator another collator namely ...

Page 18: ... Set the standard on the positioning gauge for the pole guide shown on the stacking table and move the pole guide to the left to narrow the gap between pole guide and collated paper Move the right and left side guides uniformly inward to narrow the gap between pole and paper based on the positioning gauge Adjust the positioning guides gradually rather than all the way at once while checking stacke...

Page 19: ...l stop after all collated sheets are delivered The counter displays the number of collated sets and it will automatically stop when its displayed figure becomes 9999 Press the START STOP key to continue collating and the counter will display 0 and resume counting in adding mode 5 2 2 Using subtracting mode Set the number of sets to be collated by pressing numerical keys If the number of sets is se...

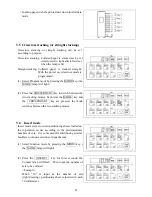
Page 20: ...de is convenient as it loads sheets with the same page number in two neighboring stations One machine can collate paper with up to five pages at once With the power switched on normal mode is automatically programmed 1 Select Program mode by pressing the MODE MODE lamp will light 2 Press the ALTERNATE 4 key for Alternate mode Each time the MODE and ALTERNATE 4 keys are pressed the mode switches be...

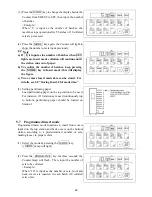
Page 21: ... 5 key to switch between the two stacking modes Each time the MODE key and the CRISSCROSS 5 key are pressed the mode switches between the two stacking modes 5 6 Insert mode Insert mode serves to insert partitioning sheets loaded on the top station in use according to the predetermined numbers of sets It is convenient for distributing similar booklets to various sections or departments 1 Select fun...

Page 22: ...sert mode data can be stored For details see 5 8 Storing Insert Chit mode data 5 Setting partitioning paper Load partitioning paper on the top station to be used For instance if 10 stations are used continuously top to bottom partitioning paper should be loaded on Station 1 5 7 Programmed insert mode Programmed insert mode functions to insert front covers loaded on the top station and back covers ...

Page 23: ... mode this will display the figure c Two or more Chit mode data can be stored For details see 5 8 Storing Insert Programmed Insert mode data 5 Setting front and back covers Load partitioning paper on the top station to be used For example when 10 stations to be used continuously top to bottom front covers should be loaded on Station 1 back covers on Station 10 If fewer than 10 stations are used lo...

Page 24: ...ode A to d responds to the following keys Memory code A Key 1 Memory code b Key 2 Memory code C Key 3 Memory code d Key 4 To cancel the storage in each memory code press the RESET key 5 9 Calling up the Insert Programmed Insert mode data 1 Select Program mode by pressing the MODE key MODE lamp will light 2 Press the PROGRAM key for three seconds memory code AbCd will be displayed A flashing letter...

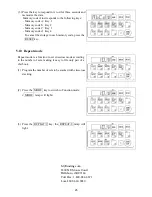
Page 25: ...press the RESET key 5 10 Repeat mode Repeat mode is a function to set crisscross mode according to the number of sets making it easy to file only part of a chit book 1 Program the number of sets to be stacked with crisscross stacking 2 Press the MODE key to switch to Function mode MODE lamp will light 3 Press the REPEAT 9 key the REPEAT 9 lamp will light MyBinding com 5500 NE Moore Court Hillsboro...

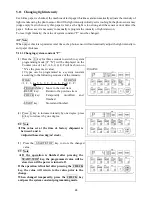
Page 26: ... be displayed on the Counter one of 1 to 9 A b C d E F will be shown on X as the present set value 19 types can be programmed as a system constant according to the following sequence of the intensity WEAK STRONG 1 2 3 4 5 6 7 8 9 A b C d E F PROGRAM key Move to the next item RESET key Return to the previous item CHECK key Temporarily modified and finished START key Stored and finished 2 Press 4 ke...

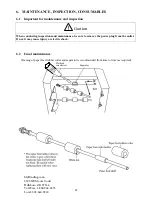
Page 27: ...e sure to remove the power plug from the outlet If not it may cause injury or electric shock 6 2 Usual maintenance Cleaning of paper feed rubber roller and separator is recommended from time to time as required Separator Flat head screwdriver MyBinding com 5500 NE Moore Court Hillsboro OR 97124 Toll Free 1 800 944 4573 Local 503 640 5920 ...

Page 28: ...erring to the previous page When the paper feed rubber rollers are replaced mount them on the paper feed rollers holders so that the white dot of the rubber rollers is on the right hand side In addition after mounting the paper feed rollers on their holders roll them on a flat surface such as a desktop to make sure they are mounted horizontally If mounted askew problems like paper feed failure or ...

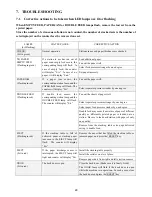
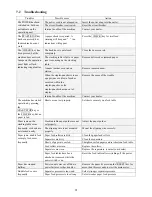
Page 29: ...sheets of paper well Select separator pressure stronger by one degree Select paper feed pressure weaker by one degree Double feed may occur if a mixture of paper of different quality or differently printed paper is loaded onto a station Be sure to load each station with paper of only one quality DOUBLE FEED Flashing in red If double feed occurs the corresponding station lamp and the DOUBLE FEED la...

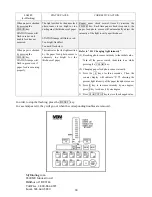
Page 30: ...ing properly This indicates that the light emitted by the paper feed photo sensor is extremely too bright for the thickness of paper Refer to 5 11 Changing light intensity 1 Resetting photo sensor intensity to the initial value Turn off the power switch them turn it on while pressing the CLEAR key 2 Changing paper feed photo sensor intensity 1 Press the 0 keys for three seconds Then the counter di...

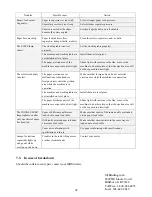
Page 31: ...of the machine Contact your dealer The machine has started operation by pressing the START STOP key or the CHECK key but no paper is fed Sheets are not set properly Set sheets securely on a feed table Stacking table paper guides are not set properly Adjust the paper guides Paper jams on the stacking table occur frequently or sheets are not stacked neatly The aligning wire is not mounted properly M...

Page 32: ...not enter the ejection area while the machine is in operation The machine and stacking table are not installed on level place Install them at a level place The collator suddenly runs fast The paper discharge parts of the machine are exposed to direct light Shade light with curtains or the like or move the machine to a darker place so that the ejection area will not be exposed to direct light Paper...

Page 33: ...on Manual together with the machine 2 Take care not to expose the collator to strong vibration or shock 8 1 3 Installation When installing the collator at its new location observe the same procedure as when first installing it 8 2 Disposal When disposing of the collator ask a contractor specialized in industrial waste disposal to handle it in accordance to the local regulations MyBinding com 5500 ...

Page 34: ...ck door open close status Staple cartridge empty and paper jam detection when optional stapler puncher is mounted Additional Features Automatic elevation of paper feed table Alternate collation Neighboring two stations can be used together for the same sheet page Insertion of partitioning paper according to the designated set Programmed insertion of cover paper loading covers on the top station an...

Page 35: ...35 MyBinding com 5500 NE Moore Court Hillsboro OR 97124 Toll Free 1 800 944 4573 Local 503 640 5920 ...

Reviews: