7
4. Steps for Operation (Process Flow from Preparation to Finish)
1) Preparation
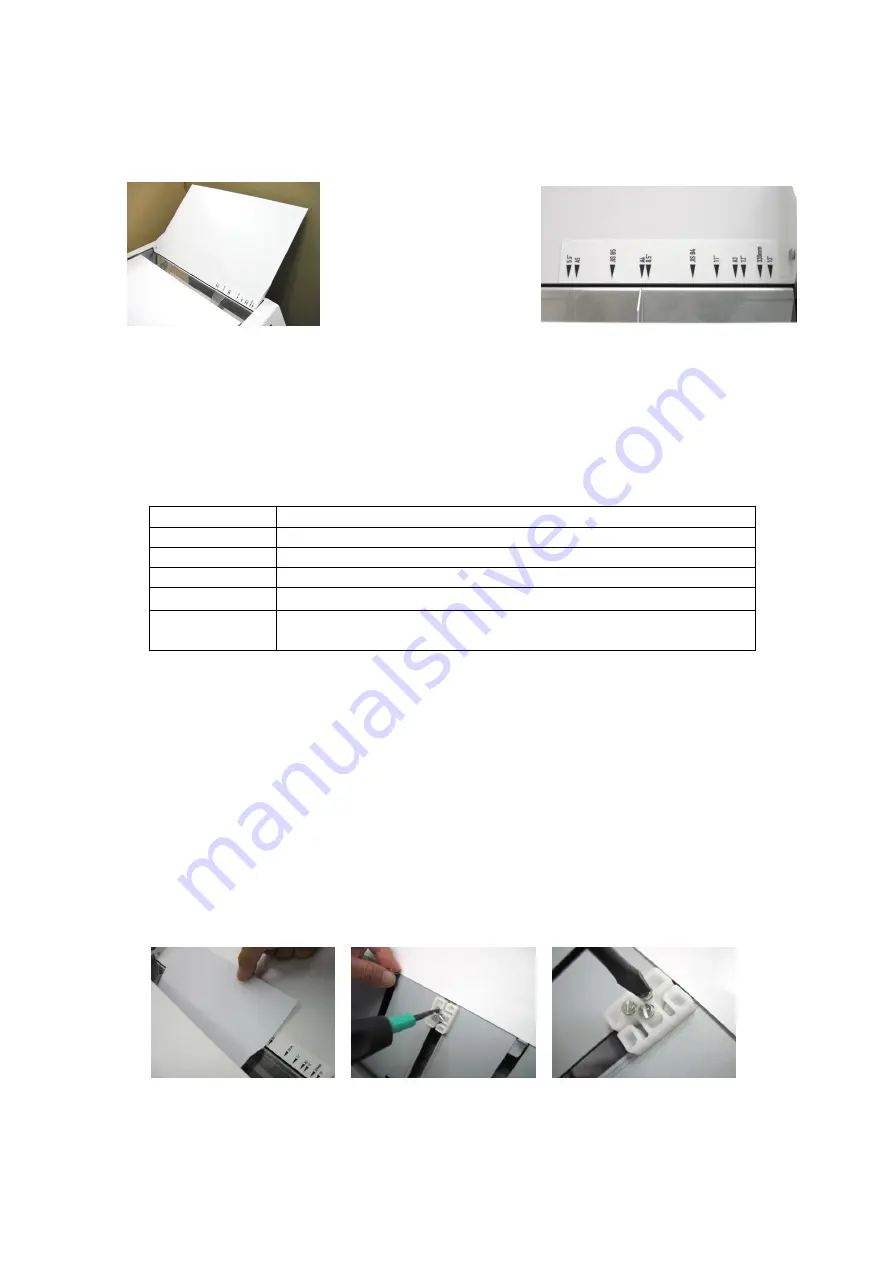
(i) Open the top cover. This cover serves as a table for setting paper.
Paper width guide
(ii) Connect the accompanying power supply cord to the AC inlet to supply the
designated power for the machine.
(iii) Press the power switch of this product.
(iv) The indicator on the operation panel will start flashing, and after a while will remain
lit. This indicates that the product is ready for operation.
* If the lower cover comes open, if there are not enough staples left, or if paper remains
fed, the product issues an error. The indicator displays E01, E02, or E03.
(v) Configure the settings.
Item
Descriptions
Paper Feed
Select between
Auto
Mode
and
Manual Mode
.
Clincher
Select between
Flat
and
Loop
.
Staple and Fold Select
Saddle Stapling
,
Side/Corner
Stapling,
or
Fold only
.
Paper Size
Select from six paper size options.
Count Mode
Select between
Count Up
or
Count Down
. In
Count Down
mode,
specify a value in advance.
2) Bookbinding
(i) Set the paper width guide to the size of paper to be bound. Put the paper on the table,
and then release your finger to let it fall naturally. In manual mode, press the Start
switch. In auto mode, the product will start operating automatically when the optical
sensor detects the end of the paper that falls down.
(ii) Press the Start switch. Bookbinding will begin.
(iii) After binding is finished, the number of copies bound is displayed in three digits.
(iv) If the paper is not cut at the right angle, make an oblique adjustment:
Power off the product. => Open the lower cover. => Adjust the guide to the paper width,
and then load the paper.
=> Slightly loosen the three screws at the center of the paper stopper to set the stopper
at the end of the paper. => Refasten the three screws. => Remove the paper, and then
close the lower cover.
3) Finish
(i) Turn off the power switch. The lit indicator where numbers show will go out.
(ii) Close the upper cover.


