MBW 473 Manual English V5.0
7
3.3 Starting your 473
The 473 needs a source of AC power. It will work over a wide power range and will most likely operate
at your local voltage and frequency. Look at the back panel label for the power requirements of your
specific instrument.
1. Connect the AC power cord to the external power supply input and the external power supply
output to the back of the instrument.
2. Connect the measuring head and PRT
3. Turn the power switch to ON.
The display should become visible within a few seconds. If nothing happens, check the power source.
3.4 Dew Point Measurement
After connecting the measuring head or temperature probe, switch on the 473 and you will get an ex-
ternal temperature reading. If your instrument is equipped with a pressure sensor, the pressure read-
ing will be displayed. To measure humidity (dew point, frost point, %RH, etc.), the
Dew/Frost Control
mode must be enabled and gas must be flowing across the mirror. If %RH readings are required, an
external temperature probe must be connected. To connect the external temperature probe, see sec-
tion
‘External Temperature Probe’ on page 16. Alternatively, a fixed external temperature value may
be entered via the touch screen. Please follow the instructions in section 6.2
‘External Temperature’.
You can test the 473 dew point measurement by measuring the dew point tem-
perature of the room.
First, make sure the measuring head is connected to the back panel of the 473.
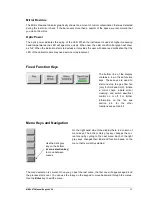
Next, start the measurement by pressing the
Dew/Frost Control
key. This button
enables the system to cool the mirror to the dew or frost point temperature, moni-
tor the thickness of the condensation layer on the mirror, and precisely adjust the
mirror temperature to maintain a stable condensation layer. When Dew/Frost Con-
trol is enabled, the indicator on the key will turn green and the dew or frost point
temperature display will begin to show the mirror temperature as it cools to the
condensation point.
See section 5.2
‘Selection of indicated Parameters‘ for information on selecting
the parameters you wish to have displayed.
Fan
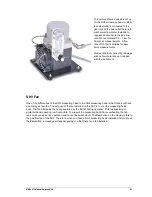
The SH2 and the SHX measuring head are equipped with a fan to pull a gas
sample through the measuring head. If you are using the SH2 or the SHX
measuring head, press the
Fan
key on the touch screen to turn the fan on/off. For
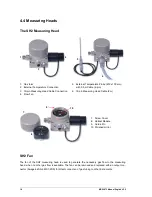
further information on the fan refer to section 4.4
’Measuring Heads’.
Summary of Contents for 473-RP2
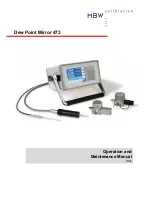
Page 1: ...Operation and Maintenance Manual V5 0 Dew Point Mirror 473...
Page 2: ......
Page 4: ...ii MBW 473 Manual English V5 0...
Page 8: ...2 MBW 473 Manual English V5 0...
Page 10: ...4 MBW 473 Manual English V5 0...
Page 14: ...8 MBW 473 Manual English V5 0 SH2 SHX Fan Fan...
Page 30: ...24 MBW 473 Manual English V5 0...
Page 68: ...62 MBW 473 Manual English V5 0...
Page 69: ...MBW 473 Manual English V5 0 63 11 Drawings 11 1 Display Unit Side View...
Page 70: ...64 MBW 473 Manual English V5 0 Front View Back View...
Page 71: ...MBW 473 Manual English V5 0 65 11 2 Measuring Heads RP2 SH2...
Page 72: ...66 MBW 473 Manual English V5 0 SHX SH3...
Page 73: ...MBW 473 Manual English V5 0 67...
Page 74: ...68 MBW 473 Manual English V5 0...

