32
7. Setup
When selecting the installation site, avoid direct sunlight, vibration, dust, hot and cold tempe-
ratures and dampness. Ensure sufficient ventilation when setting up the device with other
equipment. Keep a sufficient distance from heat sources. Do not point any strong spotlights or
light sources towards the device. This may cause overheating (danger of fire!).
Heat dissipation from the device must not be obstructed. Never place the device on any soft
surfaces such as a carpet or a bed. Do not cover the ventilation openings of the device. Air cir-
culation must not be obstructed by objects such as magazines, tablecloths, curtains or similar.
This prevents heat dissipation from the device and may lead to overheating (danger of fire!).
Only operate the CD player on a stable, horizontal surface not sensitive to heat.
Do not drill or screw any additional screws into the casing to mount the device. This may expose
dangerous voltage to touch.
Make sure that the connection cables are not squeezed or damaged by sharp edges. Always
place cables so that no one can trip over them or be caught in them. Danger of injury!
The cables must be of sufficient length. Do not put any mechanic strain on them. This may
damage the cables or device. There is a risk of dangerous electric shock.
Due to the diversity of furniture paints and polishes used, it is possible that the device's feet will leave
visible residue on furniture due to chemical reaction. The device therefore should not be placed on
valuable furniture surfaces without any suitable protection.
•
The CD player is set up on a level, horizontal surface. Otherwise, CDs cannot be read or played back pro-
perly.
8. Connection to the Audio System
The CD player has AUDIO OUT (35) cinch sockets for connection to your audio system (e.g. mixer).
Only connect audio outputs with suitable shielded connection cables. Use of any other cables
may cause interferences.
To avoid distortions or mismatches that could damage the device, only connect devices with
the same connection type.
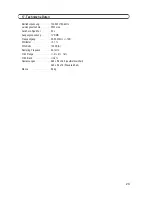
For this, observe also the connection information in the section "Technical Data".
•
Connect the AUDIO OUT connections (35) to the CD inputs of your mixer or pre-amplifier.
•
Always connect the white socket to the left input and the red socket to the right input.
•
Connect the REMOTE CONTROL socket UNIT1 (37) of the drive unit to the REMOTE CONTROL socket
UNIT1 (37) of the operating unit.
•
Connect the REMOTE CONTROL socket UNIT2 (37) of the drive unit to the REMOTE CONTROL socket
UNIT2 (37) of the operating unit.
Summary of Contents for CMP-960USB
Page 87: ...87...


