Page 12
S Series – S1400/800 Operating Instructions
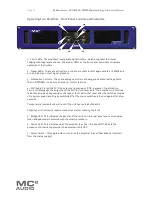
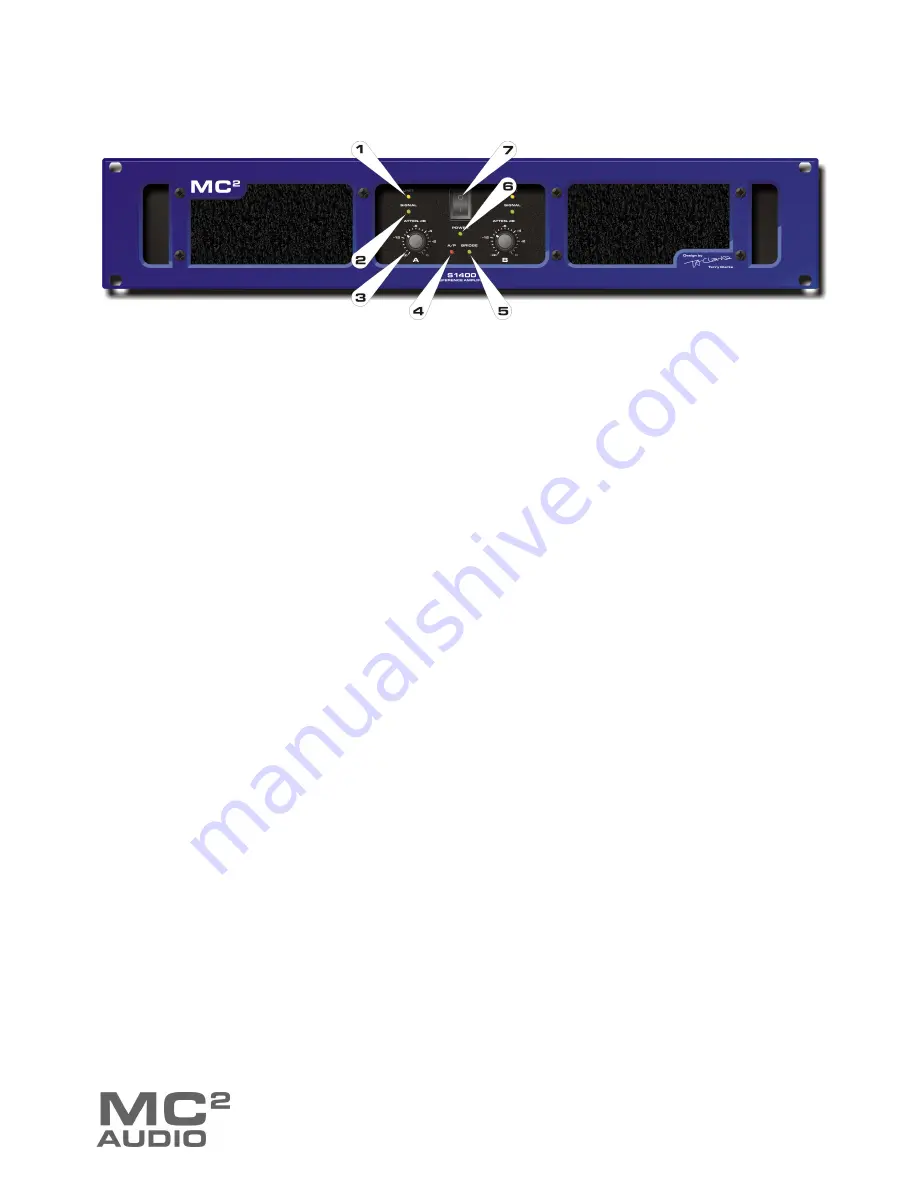
Operating Your Amplifier: Front Panel Controls and Indicators
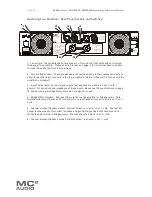
1: Limit LEDs: The amplifiers incorporate signal limiters, which are preset to prevent
clipping with high levels of drive. The amber LEDs on the front panel illuminate to indicate
operation of the limiters.
2: Signal LEDs: These are active from a minimum output level of approximately 10 Watts and
are an indication only of signal presence.
3: Attenuation Controls: These are analogue controls allowing precise level settings. Note
that in ‘BRIDGED’ mode only ‘channel A’ control is active.
4: A/P (Audio Protect) LED: If the outputs are shorted or if DC is present, the protection
circuit will disengage the outputs and the A/P LED will illuminate. The amplifier will continue
to be monitored and depending on the type of fault, will either reset after the fault has cleared
or require manual resetting by switching off at the mains switch and then on again after a few
seconds.
Temperature related faults will reset if the unit has cooled sufficiently.
Output short circuits will require manual reset after clearing the fault.
5: Bridge LED: This indicates the position of the switch on the rear panel and is illuminated
when bridged mode is selected with the switch pressed in.
6: Power LED: This indicates when the amplifier is active — this does NOT indicate the
presence of a mains supply when the power switch is OFF.
7: Power Switch: This single pole switch turns the amplifier fully off (but does not isolate it
from the mains supply).

