c
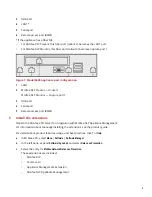
Connect the appliance to the network:
1)
McAfee DLP Prevent and McAfee DLP Monitor — Connect the LAN1 interface of the appliance to
your network.
2)
McAfee DLP Monitor — Connect the Capture port 1 interface to your network tap or SPAN port.
d
(Optional) Connect the OOB interface to another network.
This is required for McAfee DLP Monitor if you are not using LAN1 for your management traffic.
8
Install the appliance
Install the software and run the Setup Wizard.
a
Prepare the appliance for installation.
•
6600 appliances — Turn on the appliance.
•
4400 and 5500 appliances
1
Using the installation ISO file, create or set up the external imaging media. You can perform the
initial installation using these methods:
•
USB drive
Use image writing software, such as Launchpad Image Writer, to write the image
to the USB drive. For more information, see
•
USB CD drive
•
(4400 appliances only) Integrated CD drive
•
Virtual CD drive using the remote management module (RMM)
2
Insert or connect the media to the appliance.
3
Turn on the appliance.
4
Before the operating system starts, press F6 for the boot menu and select the external media.
R3c0n3x is the BIOS password for 4400 appliances.
b
Follow the on-screen prompts.
When the installation completes, the appliance restarts.
c
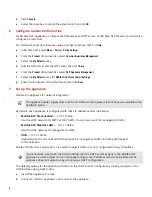
Complete the Setup Wizard using the information in the on-screen Help.
d
If the installation fails:
1
Verify the network connection is working and any configured static routes are correct.
2
Ping the default gateway and McAfee ePO from the appliance console.
3
If the problem persists, contact technical support for assistance. Do not perform the installation
again.
When you contact technical support, make sure you know the appliance primary serial number. You
can find the serial number on the product name sticker on the delivery packaging, the sticker on the
bottom-left of the top panel, or the sticker on the pull-out tray on the front panel.
5
Summary of Contents for Data Loss Prevention Prevent
Page 7: ...7 ...


