8
9
1.
EXTENSION CORD.
Always keep extension cord
away from blades. Never drape it over a hedge being
trimmed. If you cut or damage the cord, unplug it at
the electrical outlet immediately, before inspecting or
repairing cord.
2.
WORKING POSITION.
Maintain proper footing and
balance and do not overreach. Wear safety goggles,
non-skid footwear and rubber gloves when trimming.
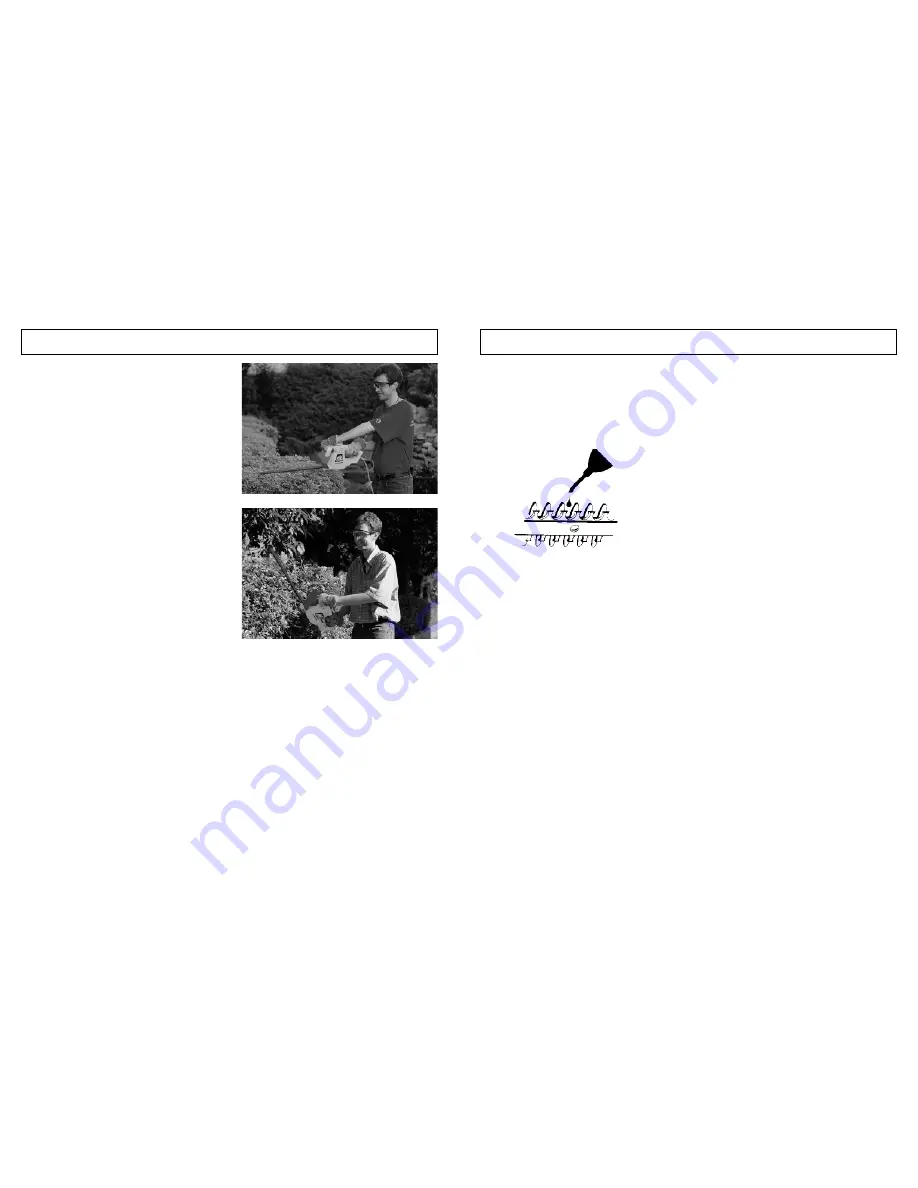
Hold the tool firmly in both hands and turn the tool
ON. Always hold the trimmer, as shown in the illustra-
tions, with one hand on the rear handle and one hand
on the front handle. Never hold the tool by the blade
guard.
3.
TRIMMING NEW GROWTH.
A wide, sweeping
motion, feeding the blade teeth through the twigs is
most effective. A slight downward tilt of the blade, in
the direction of motion gives the best cutting. (Fig. 5-
1A)
CAUTION
Do not use the trimmer for cutting stems greater than 1/2”.
Use the trimmer only for cutting normal shrubbery found
around houses and buildings.
4.
LEVEL HEDGES.
To obtain exceptionally level
hedges, a piece of string can be stretched along the
length of the hedge as a guide.
5.
SIDE-TRIMMING HEDGES.
Hold the trimmer as
shown and begin at the bottom and sweep up. (Fig. 5-
1B)
5 - TRIMMING INSTRUCTIONS
6-1. BLADE LUBRICATION
WARNING
Before lubricating, be sure your hedge trimmer is discon-
nected from the power supply. Failure to do so can result in
accidental starting, causing serious personal injury.
For easier operation and longer blade life, lubricate the
garden trimmer blade before and after each use. Apply
light machine oil along the edge of the top strap. (Fig. 6-1)
Your trimmer should be stopped, disconnected and oiled
occasionally during use.
1.
The cutting blades are made from high quality, hard-
ened steel and with normal usage, they will not
require resharpening. However, if you accidentally hit
a wire fence, stones, glass or other hard objects, you
may put a nick in the blade. There is no need to
remove this nick as long as it does not interfere with
the movement of the blade. If it does interfere, unplug
unit and use a fine toothed file or sharpening stone to
remove the nick.
2.
If you drop the trimmer, carefully inspect it for damage.
If the blade is bent, housing cracked, or handles bro-
ken or if you see any other condition that may affect
the trimmer’s operation contact a professional service
center for repairs before putting it back into use.
3.
Fertilizers and other garden chemicals contain agents
which greatly accelerate the corrosion of metals. Do
not store the tool on or adjacent to fertilizers or chem-
icals.
4.
With the unit unplugged, use only mild soap and a
damp cloth to clean the tool. Never let any liquid get
inside the tool; never immerse any part of the tool into
a liquid.
IMPORTANT
To assure product SAFETY and RELIABILITY, repairs,
maintenance and adjustments should be performed by an
professional service center using identical replacement
parts.
6 - MAINTENANCE INSTRUCTIONS
5-1A
5-1B
6-1


