4
5
2 - SAFETY PRECAUTIONS
2-1. KICKBACK SAFETY PRECAUTIONS
WARNING
Kickback may occur when the nose or tip of the guide bar
touches an object, or when the wood closes in and pinch-
es the saw chain in the cut. If bar tip makes contact with
something it may cause a lightning-fast reverse reaction,
kicking the guide bar up and back towards the operator.
Pinching the saw chain along the top of the guide bar may
push the guide bar rapidly back towards the operator. Either
of these reactions may cause you to lose control of the saw,
which could result in serious personal injury. Do not rely
exclusively upon the safety devices built into your saw. As
a chain saw user, you should take several steps to keep
your cutting jobs free from accident or injury.
1.
With a basic understanding of kickback, you can
reduce or eliminate the element of surprise. Sudden
surprise contributes to accidents.
2.
Keep a good firm grip on the saw with both hands, the
right hand on the rear handle, and the left hand on the
front handle, when the engine is running. Use a firm
grip with thumbs and fingers encircling the chain saw
handles. A firm grip will help you reduce kickback and
maintain control of the saw. Don’t let go.
3.
Make sure that the area in which you are cutting is
free from obstructions. Do not let the nose of the guide
bar contact a log, branch, or any other obstruction
which could be hit while you are operating the saw.
4.
Cut at high engine speeds.
5.
Do not overreach or cut above shoulder height.
6.
Follow manufacturer’s sharpening and maintenance
instructions for the saw chain.
7.
Only use replacement bars and chains specified by
the manufacturer or the equivalent.
NOTE:
Low-kickback saw chain is chain that has met the
kickback performance requirements of ANSI B175.1-2000
(American National Standard for Power Tools Gasoline-
Powered Chain Saws Safety Requirements) when tested
on the representative sample of chain saws below 3.8 c.i.d.
specified in ANSI B175.1-2000.
2-2. OTHER SAFETY PRECAUTIONS
1.
DO NOT operate a chain saw with one hand! Serious
injury to the operator, helpers, bystanders, or any
combination of these persons may result from one-
handed operation. A chain saw is intended for two-
handed use.
2.
DO NOT operate a chain saw when you are fatigued.
3.
Use safety footwear, snug-fitting clothing, protective
gloves, and eye, hearing and head protection devices.
4.
Use caution when handling fuel. Move the chain saw
at least 9.1m (30 feet) from the fueling point before
starting the engine.
5.
DO NOT allow other persons to be near when starting
or cutting with the chain saw. Keep bystanders and
animals out of the work area.
6.
DO NOT start cutting until you have a clear work area,
secure footing, and a planned retreat path from the
falling tree.
7.
Keep all parts of your body away from the saw chain
when the engine is running.
8.
Before you start the engine, make sure that the saw
chain is not contacting anything.
9.
Carry the chain saw with the engine stopped, the
guide bar and saw chain to the rear, and the muffler
away from your body.
10. DO NOT operate a chain saw that is damaged,
improperly adjusted, or not completely and securely
assembled. Be sure that the saw chain stops moving
when the throttle control trigger is released.
11. Shut off the engine before setting the chain saw down.
12. Use extreme caution when cutting small size brush
and saplings because slender material may catch the
saw chain and be whipped toward you or pull you off
balance.
13. When cutting a limb that is under tension, be alert for
springback so that you will not be struck when the ten-
sion in the wood fibers is released.
14. Keep the handles dry, clean, and free of oil or fuel mix-
ture.
15. Operate the chain saw only in well-ventilated areas.
16. DO NOT operate a chain saw in a tree unless you
have been specifically trained to do so.
17. All chain saw service, other than the items listed in the
user manual safety and maintenance instructions,
should be performed by competent chain saw service
personnel.
18. When transporting your chain saw, use the appropri-
ate guide bar scabbard.
19. DO NOT operate your chain saw near or around flam-
mable liquids or gases whether in or out of doors. An
explosion and/or fire may result.
20. USE THE RIGHT TOOL: Cut wood only. Do not use
the chain saw for purposes for which it was not intend-
ed. For example, do not use the chain saw for cutting
plastic, masonry, or non-building materials.
21. Do not attempt to add fuel or lubricating oil to saw
while engine is running.
SAFETY PRECAUTIONS FOR CHAIN SAW USERS
(ANSI B175.1-2000, Annex C. CAN/CSA-Z62.1-03)
NOTE:
These safety precautions are intended primarily for
the consumer or occasional user. When using a chain saw
for logging purposes, refer to the Code of Federal
Regulations, Section 1910.226(5); 2.5.1., of American
National Standard Safety Requirements for Pulpwood
Logging, ANSI 03.1-1978; and relevant state safety codes.
These models are classified according to CAN/ CSA-
Z62.1-03 as a Class 1C saw. They are intended for infre-
quent use by homeowners, cottagers, and campers, and for
such general applications as clearing, pruning, cutting fire-
wood, etc. They are not intended for prolonged use. If the
intended use involves prolonged periods of operation, this
may cause circulatory problems in the user’s hands due to
vibration. All models covered in this manual employ an anti-
vibration feature for increased comfort and safety.
2-3. GENERAL SAFETY PRECAUTIONS
FOR CHAIN SAW USERS
1.
Fatigue causes carelessness. Be more cautious
before rest periods and towards the end of your shift.
2.
Personal protective clothing required by your safety
organizations, government regulations, or your
employer should be used. At all times when using a
chain saw, snug-fitting clothing, protective eye wear,
safety footwear, and hand, leg, and hearing protection
should be worn.
3.
Before refueling, servicing, or transporting your chain
saw, switch off the engine. To help prevent fire, restart
your chain saw at least 9.1m (30ft) from the fuelling
area.
4.
When a chain saw is being used, a fire extinguisher
should be available.
5.
When felling, keep at least 2 tree lengths away from
your fellow workers.
6.
Plan your work, ensuring an obstacle-free work area
and, in the case of felling, at least one escape path
from the falling tree.
7.
Follow the instructions in your operator’s manual for
starting the chain saw and control the chain saw with
a firm grip on both handles when it is in operation.
Keep handles dry, clean, and free of oil.
8.
When transporting your chain saw, use the appropri-
ate transportation covers, which should be available
for the guide bar and saw chain.
9.
Never operate a chain saw that is damaged or improp-
erly adjusted or that is not completely and securely
assembled. Be sure that the saw chain stops moving
when the power control system trigger is released.
Never adjust the guide bar or saw chain when the
engine is operating.
10. Beware of carbon monoxide poisoning. Operate the
chain saw in well-ventilated areas only.
11. Do not attempt a pruning or limbing operation in a
standing tree unless specifically trained to do so.
12. Guard against kickback. Kickback is the upward
motion of the guide bar that occurs when the saw
chain, at the nose of the guide bar, contacts an object.
Kickback can lead to dangerous loss of control of the
chain saw.
13. A chain saw is intended for two-handed use. Serious
injury to the operator, helpers, and/or bystanders can
result from one-handed operation.
14. See section 2-5, 2-6 for symbol definitions, page 5.
15. When carrying a chain saw with the engine running,
engage the chain brake.
16. Allow your chain saw to cool before refueling, and do
not smoke.
17. Keep other persons or animals a safe distance away
from a running chain saw or the area where a tree is
being felled.
18. Use extreme caution when cutting small brush and
saplings because slender material can catch the saw
chain and be whipped toward you.
19. When cutting a limb that is under tension or compres-
sion, be alert for springback.
20. This gas-powered saw is classified according to CAN/
CSA-Z62.1-03 as a Class 1C saw. It is intended for
infrequent use by homeowners, cottagers, and
campers, and for such general applications as clear-
ing, pruning, cutting firewood, etc. It is not intended for
prolonged use.
Prolonged periods of operation can cause circulatory
problems in the user’s hands due to vibration. For
such use, it may be appropriate to use a saw having
an anti-vibration feature.
2-4. MORE ABOUT KICKBACK
WARNING
DANGER! BEWARE OF KICKBACK!
Kickback can lead to dangerous loss of control of the chain
saw and result in serious or fatal injury to the saw operator
or to anyone standing close by. Always be alert. Rotational
kickback and pinch-kickback are major chain saw opera-
tional dangers and the leading cause of most accidents.
BEWARE OF:
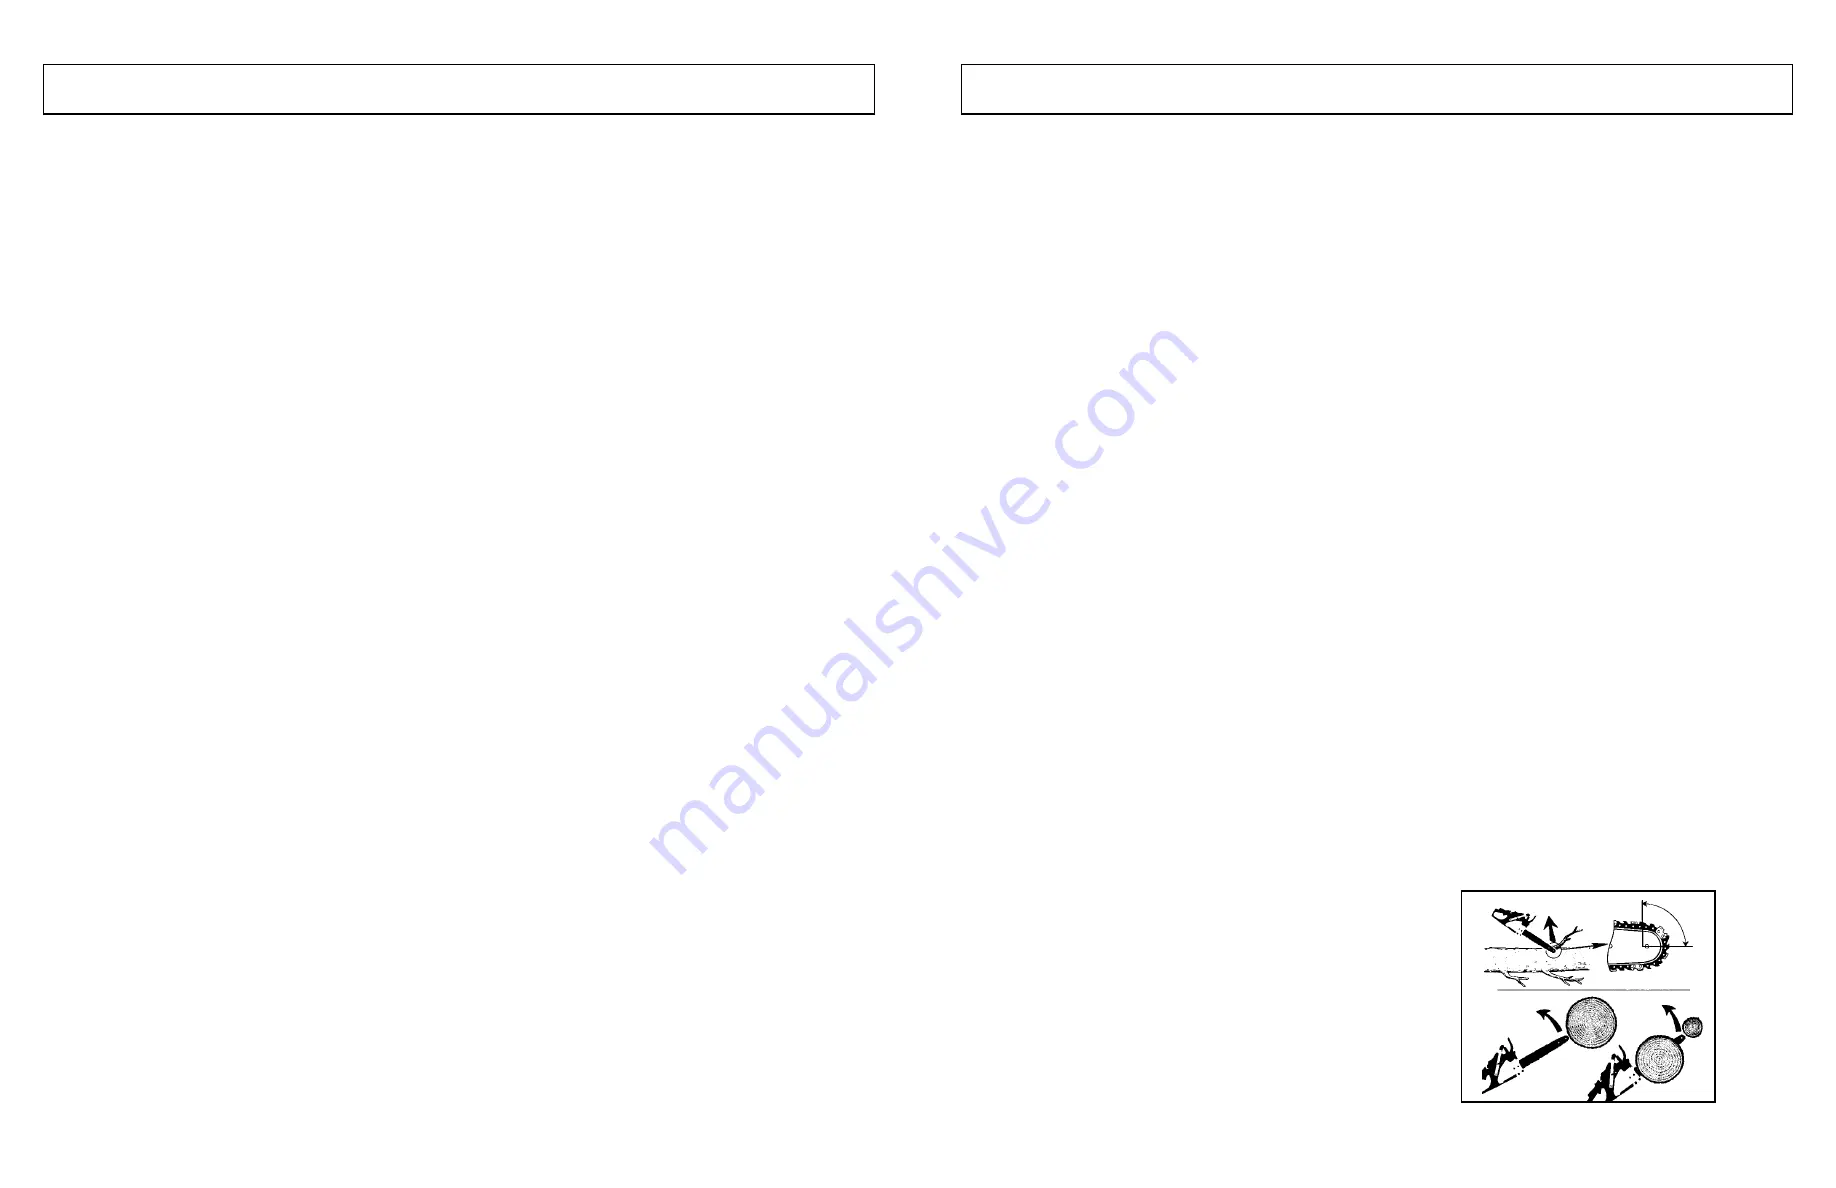
ROTATIONAL KICKBACK
(Figure 2-4A)
A = Kickback path
B = Kickback reaction zone
2 - SAFETY PRECAUTIONS
2-4A
B
A
A
A


