background image

English---18

115432326 Rev. 4 2/17/12

WORKING TECHNIQUES

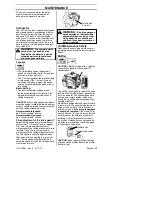
Clearing

S

The clearing technique removes all un-

wanted vegetation. Keep the trimmer

head just above the ground and tilt it. Let

the end of the trimmer line strike the

ground around trees, posts, statues and

the like.

IMPORTANT!

This technique

increases the wear on the trimmer line.

S

The trimmer line wears quicker and must

be fed forward more often when working

against stones, brick, concrete, metal

fences, etc., than when coming into con-

tact with trees and wooden fences.

Grass trimming with a trimmer head

Trimming

S

Hold the trimmer head just above the ground

at an angle. It is the end of the trimmer line

that does the work. Let the trimmer line work

at its own pace. Never press the trimmer

line into the area to be cut.

S

The trimmer line can easily remove grass

and weeds up against walls, fences, trees

and borders, however it can also damage

sensitive bark on trees and bushes, and

damage fence posts.

S

Reduce the risk of damaging plants by

shortening the trimmer line to 10--12 cm and

reducing the engine speed.

S

When trimming you should use less than

full throttle so that the trimmer line lasts

longer and to reduce the wear on the

trimmer head.

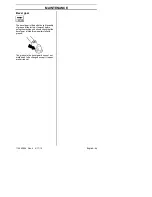
Grass clearing using a grass blade

S

Grass blades and grass cutters must not be

used on woody stems.

S

A grass blade is used for all types of tall or

coarse grass.

S

The grass is cut down with a sideways,

swinging movement, where the movement

from right--to--left is the clearing stroke and

the movement from left--to--right is the return

stroke. Let the left--hand side of the blade

(between 8 and 12 o’clock) do the cutting.

S

If the blade is angled to the left when clear-

ing grass, the grass will collect in a line,

which makes it easier to collect, e.g. by

raking.

S

Try to work rhythmically. Stand firmly with

your feet apart. Move forward after the re-

turn stroke and stand firmly again.

S

Reduce the risk of material wrapping

around the blade by following these in-

structions:

S

Always work at full throttle.

S

Avoid the previously cut material during

the return stroke.

S

Stop the engine, unclip the harness and

place the machine on the ground before

you start to collect the cut

material.

Summary of Contents for B28 PS

Page 1: ...ment et bien assimiler le manual d utilisation avant d utiliser la machine Lea detenidament el manual de instrucciones y asegúrese de entender su contenido antes Operator s manual B28 PS GB 2 27 FR 28 53 ES 54 79 Manuel d utilisation Manual de instrucciones before using the machine de utilizar la máquina ...

Page 2: ...tection must always be used Choke Primer bulb Symbols WARNING Careless or incorrect use of clearing saws brushcutters and trimmers can result in serious or fatal injury to the operator or others Please read the operator s manual carefully and make sure you understand the instructions before using the machine Always wear S A protective helmet where there is a risk of falling objects S Hearing prote...

Page 3: ...Maintenance schedule 23 TECHNICAL DATA Technical data 24 EC declaration of conformity Applies to Europe only 25 Note the following before starting Please read the operator s manual carefully McCulloch has a policy of continuous product development and therefore reserves the right to modify the design and appearance of products without prior notice WARNING A clearing saw brushcutter or trimmer can ...

Page 4: ...nut 5 Upper shaft 20 Cupped washer 6 Lower shaft 21 Retaining washer 7 Loop handle 22 Dust cup 8 Throttle control 23 Trimmer head 9 Stop switch 24 Transport guard 10 Throttle lock out 25 Hex wrench 11 Harness clamp 26 Wrench 12 Cylinder cover 27 Harness 13 Starter handle 28 J handle 14 Fuel tank 29 Shaft coupling 15 Choke control 30 Operator s manual What is what 6 2 10 11 8 17 22 1 3 9 12 16 14 1...

Page 5: ...tions such as severe cold very hot and or humid climates Wear personal protective equipment See in structions under the heading Personal protec tive equipment Never use a machine that has been modified in any way from its original specification Never use a machine that is faulty Carry out the checks maintenance and service instruc tions described in this manual Some mainte nance and service measur...

Page 6: ...ction describes the machine s safe ty equipment its purpose and how checks and maintenance should be carried out to ensure that it operates correctly See the What is what section to locate where this equipment is positioned on your machine The life span of the machine can be re duced and the risk of accidents can in crease if machine maintenance is not car ried out correctly and if service and or ...

Page 7: ...s of strength changes in skin color or condition These symptoms normally appear in the fingers hands or wrists The risk increases at low temperatures Muffler The muffler is designed to reduce the noise level and to direct the exhaust gases away from the operator CAUTION Muffler is fitted with a catalytic converter designed to reduce exhaust gas emissions In countries that have a warm and dry clima...

Page 8: ...on Technical data Refer to the instructions for the cutting attach ment to check the correct way to load the trimmer line and the correct line diameter Maintain the correct blade setting Follow our instructions and recommendations WARNING Always stop the en gine before doing any work on the cutting attachment This continues to rotate even after the throttle has been released Ensure that the cuttin...

Page 9: ...rum other wise the machine will generate harmful vibration S Smaller machines generally require small trimmer heads and vice versa This is be cause when clearing using trimmer line the engine must throw out the trimmer line radially from the trimmer head and overcome the resistance of the grass being cleared S The length of the trimmer line is also im portant A longer trimmer line requires greater...

Page 10: ...a comfortable working position Tighten the wing nut WARNING To avoid serious injury only use grass blades grass cutters or trimmer heads with plastic blades when the J handle is fitted Never use saw blades Assembling and dismantling the two piece shaft Assembly S Loosen the coupling by turning the knob S Position locking release button A of attachment into guide recess B of coupling B A S Push the...

Page 11: ...n the harness to the harness clamp on the shaft and lift the unit to the operat ing position S Put on the harness Now make a final adjustment so that the unit is in a com fortable working position when it hangs from the harness NOTE It may be necessary to relocate the harness clamp on the shaft for proper balancing of unit WARNING When using a brushcutter it must always be hooked securely to the h...

Page 12: ...the gearbox S Insert a small screwdriver C in the hole to lock the shaft S Place the blade D and retaining washer E onto the shaft of the gearbox NOTE Make sure the raised part of the retaining washer is facing the gearbox and the raised area fits into the hole in the centre of the blade Fitting the trimmer guard and trimmer head S Hook the trimmer guard combination guard A onto the fitting on the...

Page 13: ...oap and water 3 If the machine is leaking fuel Check regu larly for leaks from the fuel cap and fuel lines Transport and storage S Store and transport the machine and fuel so that there is no risk of any leakage or fumes coming into contact with sparks or naked flames for example from electri cal machinery electric motors electrical relays switches or boilers S When storing and transporting fuel a...

Page 14: ...d especially when working near flammable substances and or vapors Fueling WARNING Taking the following precautions will lessen the risk of fire Do not smoke or place hot objects near fuel Always shut off the engine before refueling Always stop the engine and let it cool for a few minutes before refueling When refueling open the fuel cap slowly so that any excess pressure is released gently Tighten...

Page 15: ...Move the blue engine choke lever over to the FULL CHOKE closed position Starting Hold the body of the machine on the ground using your left hand CAUTION Not with your foot Firmly grip the starter rope handle with your right hand DO NOT squeeze throttle trigger Slowly pull out the cord until you feel some resistance the starter pawls grip then quickly and powerfully pull the cord until engine attem...

Page 16: ...choke lever to the OFF CHOKE opened position CAUTION Do not put any part of your body in marked area Contact can result in burns to the skin or electrical shock if the spark plug cap has been damaged Always use gloves Do not use a machine with dam aged spark plug cap CAUTION Do not pull the starter cord all the way out and do not let go of the starter handle when the cord is fully extended This ca...

Page 17: ...rying or transporting the equipment any distance 5 Never put the machine down with the engine running or while the cutting attachment is rotating WARNING Sometimes branches or grass get caught between the guard and cutting attachment or wrapped around the shaft Neither the operator of the machine nor anyone else may at tempt to remove the cut material while the engine is running or the cutting equ...

Page 18: ...ts by shortening the trimmer line to 10 12 cm and reducing the engine speed S When trimming you should use less than full throttle so that the trimmer line lasts longer and to reduce the wear on the trimmer head Grass clearing using a grass blade S Grass blades and grass cutters must not be used on woody stems S A grass blade is used for all types of tall or coarse grass S The grass is cut down wi...

Page 19: ...e can cause damage and wear to the trimmer head WARNING Watch out for thrown objects Always wear eye protection Never lean over the cutting attach ment guard Stones rubbish etc can be thrown up into the eyes causing blindness or serious injury Keep unauthorized persons at a dis tance Children animals onlookers and helpers should be kept outside the safety zone of 15 m Stop the machine immediately ...

Page 20: ...unction S The carburetor governs the engine s speed via the throttle control Air and fuel are mixed in the carburetor S The T screw regulates the throttle setting at idle speed If the T screw is turned clockwise this gives a higher idle speed turning it counterclockwise gives a lower idle speed Basic setting S The basic carburetor settings are ad justed during testing at the factory Fine adjustmen...

Page 21: ...the engine are hot and may contain sparks which can start a fire Never start the machine in doors or near combustible material Spark plug The spark plug condition is influenced by S Incorrect carburetor adjustment S An incorrect fuel mixture too much or in correct type of oil S A dirty air filter These factors cause deposits on the spark plug electrodes which may result in operat ing problems and ...

Page 22: ...r is filled with the right quantity of grease at the factory However before using the machine you should check that the bevel gear is filled three quarters full with grease The grease in the bevel gear does not nor mally need to be changed except if repairs are carried out ...

Page 23: ...heck that the trimmer head is undamaged and not cracked Replace the trimmer head if necessary Check that the blade nut of the cutting equipment is tightened correctly Check that nuts and screws are tight Check that there are no fuel leaks from the engine tank or fuel lines Check the starter and starter cord Clean the outside of the spark plug Re move it and check the electrode gap Adjust the gap t...

Page 24: ...ped with trimmer head original 100 Vibration levels see Note 3 Equivalent vibration levels ahv eq at handles measured according to EN ISO 11806 and ISO 22867 m s2 Equipped with grass blade original left right 4 2 6 0 Equipped with trimmer head original left right 4 3 4 5 Note 1 Noise emissions in the environment measured as sound power LWA in conformi ty with EC directive 2000 14 EC Reported sound...

Page 25: ...0 as authorised representative in the Community declare that the brushcuttermodel McCulloch B28 PS with serial numbers dating from 2011 and onwards the year is clearly stated on the rating plate followed by the serial number comply with the requirements of the COUNCIL S DIRECTIVES of 17 May 2006 relating to machinery 2006 42 EC of 15 December 2004 relating to electromagnetic compatibility 2004 108...

Page 26: ...English 26 115432326 Rev 4 2 17 12 Trimmer Head Line Loading Instructions 20i 10i 3 m 6 m 1 2 3 4 5 6 7 8 9 ...

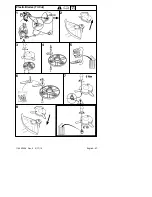
Page 27: ...English 27 115432326 Rev 4 2 17 12 Plastic Blades Tri Cut 1 2 3 4 5 6 7 8 ...

Reviews: