background image


Installation and Power On 

Open the battery compartment and insert 2pcs Mignon (AA) batteries. 

Make sure that the 

polarity is okay! 


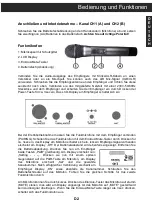
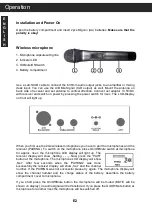
Wireless microphone 

1. Microphone capsule with grille 

2. Indicator LED 

3. On/Mute/Off-Switch 

4. Battery compartment     


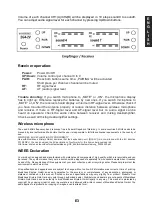
Use a Latch/XLR cable to connect the 6.35mm audio output jacks  to an amplifier or mixing 
desk  input.  You  can  use  the  A/B  Mix-Signal  (XLR  output)  as  well.  Mount  the  antenna  on 
back  side  of  receiver  and  set  antenna  to  vertical  direction.  Connect  net  adaptor  13.5V/DC 
with receiver and switch on power by pressing the power switch for 3sec. The LCD-Display 
on front will light up.  


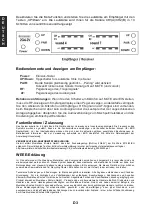
When you first use the 2G4 wireless microphones you have to pair the microphones and the 
receiver (PAIRING). To switch on the microphone press On/Off/Mute switch at microphone 
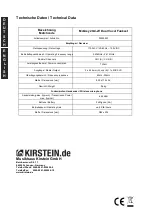
for  approx.  3sec,  the  microphone  LCD  display  will  light  up.  The 
receiver  display  will  show  „Setting  -  -  -„.  Now  press  the  “PAIR” 
button at the microphone. The microphone LCD display will show 
„Set“.  After  few  seconds  when  the  “PAIRING”  was  done 
successfully  the  receiver  display will  show 

„Set“ and the channel 

number.  If  the  PAIRING  was  not  successful  please  try  again.  The  microphone  display  will 
show  the  channel  number  and  the  charge  status  of  the  battery.  Assemble  the  battery 
compartment cover to microphone.


If  you  short  press  the  On/Off/Mute  button  the  microphone  will  be  muted  (MUTE  will  be 
shown on display), no audio signal will be transferred. If you press the On/Off/Mute button at 
microphone for another 3sec the microphone will be switched off.


E2 

   Operation 

E
N

G

I

S

Summary of Contents for 2G4-2V

Page 1: ...00039500 Version 01 2019 2G4 2V Dual Vocal Funkset Bedienungsanleitung User manual...

Page 2: ...chen Sie nicht das Ger t zu ffnen oder Teile im Innern zu zerlegen oder sie auf irgendeine Weise zu ver ndern Das Ger t enth lt keine Teile die vom Benutzer gewartet werden k nnten Wenn das Ger t nich...

Page 3: ...verbinden PAIRING Schalten Sie das Funkmikrofon mit dem Ein Aus Mute Taster durch Dr cken f r ca 3sec ein das Display am Mikrofon schaltet sich ein Ist kein Empf ngersignal vorhanden erscheint am Dis...

Page 4: ...rt Musikhaus Kirstein GmbH dass der Funkanlagentyp McGrey 2G4 2V der Richtlinie 2014 53 EU entspricht Der vollst ndige Text der EU Konformit tserkl rung ist unter der folgenden Internetadresse verf g...

Page 5: ...ations or extreme cold or heat such as in direct sunlight near a heater or in a car during the day to prevent the possibility of panel disfiguration or damage to the internal components Do not place t...

Page 6: ...pair the microphones and the receiver PAIRING To switch on the microphone press On Off Mute switch at microphone for approx 3sec the microphone LCD display will light up The receiver display will sho...

Page 7: ...Kirstein GmbH declares that the device radio unit 2G4 2V is in compliance with the EU directive 2014 53 EU You can download the EC declaration of conformity for this item under download link http www...

Page 8: ...Master Output 2 x 6 35mm A und B 1 x MIX XLR bertragungsbereich Frequency response 40Hz 20kHz Ma e Dimensions mm 200 x 175 x 36 Gewicht Weight 0 6 kg Funkmikrofon Handsender Wireless microphone Sendel...

Reviews: