- 14 -
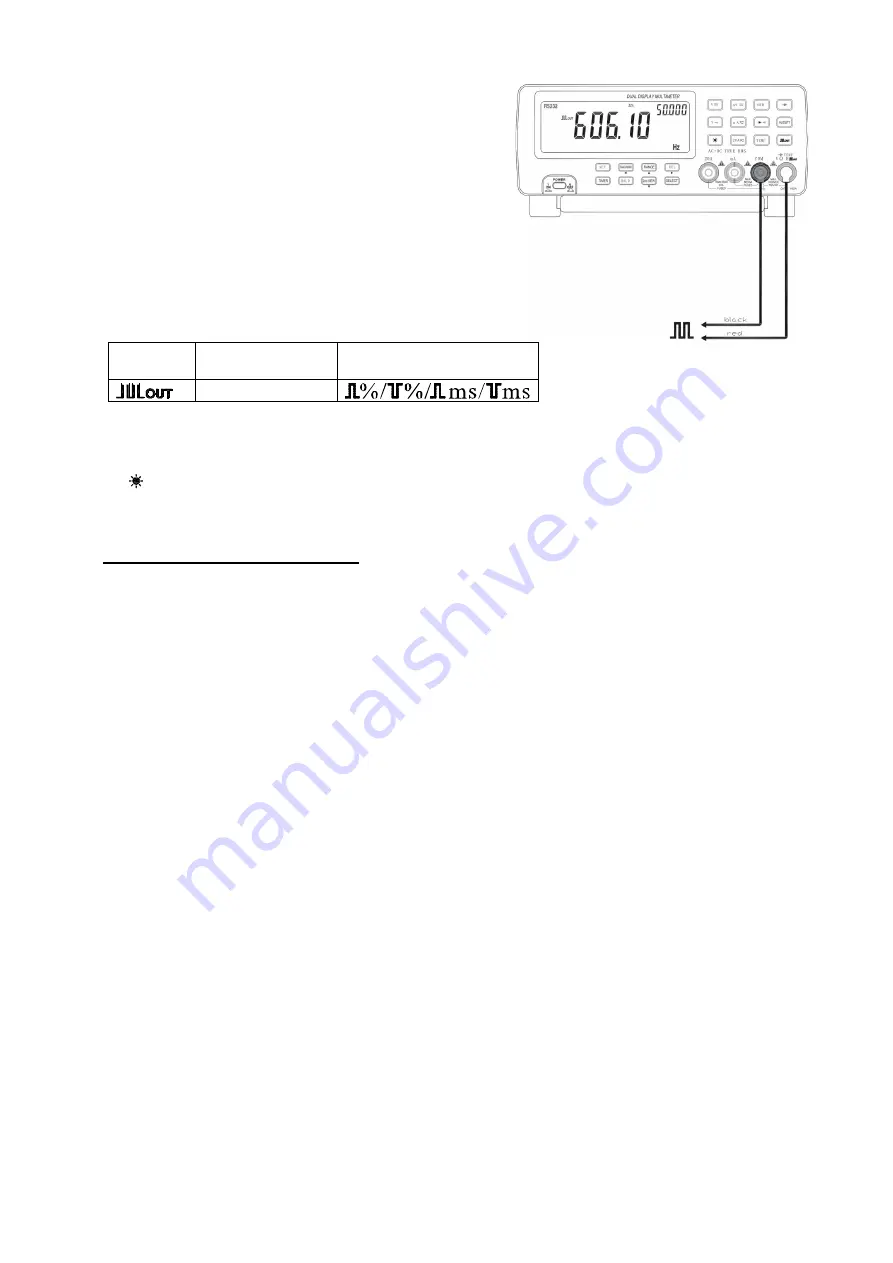
Connect the black test lead to “COM” terminal and the red test
lead to “VΩ Hz” terminal.
Press 2nd VIEW button to select the frequency from the
following ranges:
0.5000Hz/1.0000Hz/2.0000Hz/10.000Hz/50.000Hz/60.240Hz/74.
63Hz/100.00Hz/151.50Hz/200.00Hz/303.00Hz/606.10Hz/1.2500
kHz/1.6660kHz/2.5000kHz/5.0000kHz
Press SELECT button to select the duty cycle from 1% to 99%
Press 2nd VIEW button for at least 2 seconds to return to default
square wave output.
Function
Primary display
Press 2nd VIEW
Secondary display
Press SELECT
Hz
4.12 Backlight Display
Press “ ’ button to turn on backlight. Press it again to turn it off.
5. PROGRAMMABLE CONTROL
The unit is equipped with RS232 interface and relevant software, which allows easy connections to PC for PC
control.
Software operating environment: Windos9x/NT/2000/XP
Software version: V1.0
5.1 Installation
Plug the CD disk into the CD drive. Start up the setup.exe file to install the software. Select a desired installation
path.
5.2 RS232 Port Set
RS232 port is used for the data transfer between the multimeter and PC. There are two ports to be chosen from:
COM1 and COM2.
5.3 Connect
Click “Connect” to activate the communication between the multimeter and PC. To disconnect the communication,
click “Disconnect”.
5.4 Recording Size
User can store up to 8192 files to the multimeter memory.
5.5 Sampling Interval
The sampling interval can be set at any value between 0.1~99 seconds.
5.6 Alarm Setup
This function sets the upper and lower limits for alarm. If the testing results exceed the preset upper or lower
limits, the PC will send out alarm with sound.


