975-049
P2007 Jens Broecking © Firma WJG, Braunschweig. Nachdruck oder Vervielfältigung nur mit ausdrücklicher Genehmigung
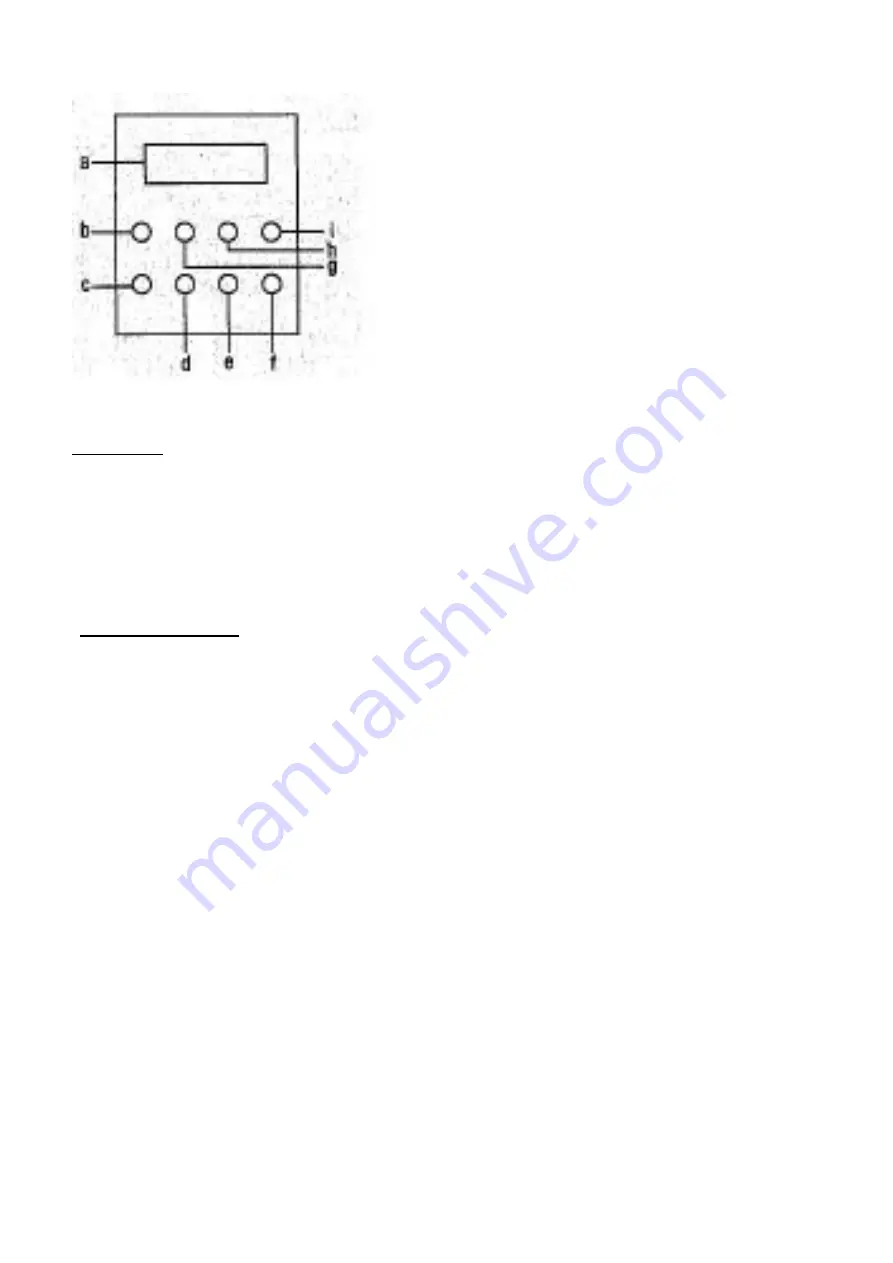
a. LC-Display.
b. WEEK = Weekday set up button.
c. Adjuster for the current time.
d. PROG = Program set up button.
e. ON/AUTO/OFF = Operating mode switch auto or manual.
f. Reset button = Reset to factory defaults.
g. HOUR = Hour set up button.
h. MIN = Minute set up button.
i. R = Deletes the current entry.
Connection:
•
Install the time switch on the control panel of a domestic power distribution system.
•
The contact is made by screw terminals.
•
To the terminals IN and OUT connect the neutral wire (blue) to N and the live wire (brown) to L.
Please leave the installation work to a professional!
Operating the Device
•
First you have to set up the current time and date.
•
Press the buttons CLOCK and HOUR at the same time to set the hour.
•
Press the buttons CLOCK and MIN at the same time to set the minutes.
•
Press the buttons CLOCK and WEEK at the same time to set the day of the week.
•
Now you can program the timer switch up to your needs. Press the button PROG to enter the
configuration modus. (The LCD shows 1ON).
•
Press the button WEEK to set the weekday. You can choose individual weekdays (Mo, Tu, We, Th, Fr.
Sa und Su) or a combination of weekdays as follows:
Combination 1 (whole week) Mo-Tu-We-Th-Fr-Sa-Su
Combination 2 (without weekends) Mo-Tu-We-Th-Fr
Combination 3 (only weekend) Sa-Su
Combination 5 Mo, We, Fr
Combination 6 Tu, Th, Sa
Combination 7 Mo-Tu-We
Combination 8 Th-Fr-Su
•
Press the buttons HOUR and MIN to set the hour and the minutes.
•
Press the button PROG again to set the off time for the timer. (The LCD shows 1OFF)
•
With the button R you can delete programmed data and the previous setting is valid again.


